|
May 2009 Vol. 9 No. 3
Concrete Color Recipes 2009by Kelly O'BrienLike any craftspeople, concrete contractors are always looking for new ideas and new inspirations for their next project. While we hope that all the work we showcase in Concrete Decor serves that purpose, once a year we like to provide some striking effects with step-by-step instructions in this, our annual Color Recipes feature.
- Allow the surface to completely dry if a wet surface preparation method was used. - Add 4 tablespoons of the desired color of Reflector Enhancer to a gallon of ready-to-use CSS Emulsion. In this case, Orange Gold Reflector Enhancer was used as the primary initial color coat.
![]() Stained & Resurfaced Floor Treatment H&C Concrete, Cleveland, Ohio www.hcconcrete.com Perfect for a one-of-a-kind finish, this floor treatment gives you lots of room to get creative with your colors. Ingredients - H&C Resurfacer Heavy Traffic texture system H&C Color Packs (Base coat: Sandstone; topcoat: Birch Bark) - H&C Semi-Transparent Decorative Stains (Meadow Green, Obsidian, Pumpkin Spice) - H&C Concrete Sealer, Solvent-based (Clear) or a water-based sealer (such as H&C Concrete Sealer Wet Look) Instructions - Blend the Sandstone Color Pack into the water to be mixed with the Resurfacer. - Mix Resurfacer into colored water. Pour mixture onto the concrete and trowel or squeegee down smoothly. Typically a darker color is used for the base coat, as it will eventually only be visible as the "grout" lines. - After the Resurfacer has set, apply the tape in the pattern desired over the base coat, being sure to leave extra tape hanging off the edges to provide a starting point when it's time to remove. - Mix the second Color Pack (Birch Bark) into the water for a second batch of Resurfacer. c Mix and pour this onto the concrete in small amounts and trowel down using a random fanning motion. Lift and drop the trowel as you work to create peaks and valleys (or use the trowel to create another desired pattern). - Allow to dry overnight. - Remove the tape to expose the pattern. - Using the Semi-Transparent Decorative Stains (blended with water at a 2-to-1 dilution rate), spray the stain with a pump-up sprayer, blending and diluting colors to achieve a unique look. Apply as liberally or lightly as desired, and feel free to remove any stain to lighten the color, should too much be applied. - Allow to dry 4 to 6 hours. - Apply a water-based or solvent-based sealer. Keep in mind that a solvent-based sealer will darken the final appearance.
Stampable Overlay Design Specialty Concrete Products - Columbia, S.C. www.scpusa.com This top-to-bottom (well, really bottom-to-top) overlay recipe is great for putting down a distinctive design, such as this swordfish. Ingredients - SCP Veneer-Crete Stamp Overlay System (Pewter, with Charcoal Powder Release Agent) - Stampmaster Vegas Seamless Stone texture mats - SCP Chrome Etch acid stains (Cool Blue, Citrus Green, Storm Green, Rust Brown) - SCP Stone Shade dyes (Neon Blue, Pine Green) - SCP Stencil-Crete grout (White) SCP Chrome-Seal 30% sealer (Clear) Ammonia or baking soda Instructions - Prep existing concrete surface for overlayment (clean surface thoroughly and repair cracks and spalling if needed, honoring existing control joints). - Apply thin polymer-modified SCP bond coat material. -
Apply precolored Pewter SCP Veneer-Crete Stamp Overlayment at 1/4-inch depth. -
Apply layer of SCP Charcoal Powder Release Agent (may be broadcast or brushed).
-
Place Stampmaster Vegas Seamless Stone texture skins on surface and tamp texture into surface of Veneer-Crete. -
Allow materials to cure out overnight.
Wash surface. A pressure washer can be used to wash excess SCP Charcoal Powder Release Agent off surface. Then, wash down to desired amount of Charcoal highlight. -
Apply SCP precolored Stencil Crete Grout into the scored lines and allow to cure. Clean off excess grout residue.
Glossy Floor Finish Kemiko Concrete Products - Whittier, Calif. www.kemiko.com This elegant color combination is the way to go for a simple design that calls for a two-toned color scheme. Ingredients Kemiko Neutra Clean Kemiko Black Stain, in two batches: Lighter color – 1 part Black Stain to 18 parts water Darker color – 1 part Black Stain to 4 parts water Kemiko Stone Tone Wax II (Buff On) Instructions - Wash the concrete surface thoroughly with Kemiko Neutra-Clean, using either a slow-speed floor machine with a scrub brush attachment or a long-handled, medium-stiff bristle brush. Then wet-vacuum (preferred) or mop (many moppings may be necessary) to remove all dirt. Allow the floor to dry completely. - After mixing the stain batches, apply them to the floor with a foam brush, working wet on wet. Apply the lighter color three times (be sure to let each coat dry completely) and the darker color twice. - After the floor has completely dried, scrub off the residue using a slow-speed floor machine with a scrub brush attachment, Neutra-Clean and water only, or a long-handled, medium-stiff bristle brush, and remove the water-and-residue mixture from the floor with a wet vacuum (preferred) or a mop and squeegee. (Note: If color comes up on a white towel after wiping the floor, clean again.) c Allow the floor to dry completely. - Apply Kemiko Stone Tone Wax II (Buff On) with a heavy floor-polishing machine (slow speed, 175 rpm) and three attachments, to be used one after the other: a Bassine brush when applying (this stiff natural-bristle brush is the most critical of the three steps when achieving the effect), a medium-bristle brush (Palmyra, Union Mix, or Tampico) when buffing, and a polishing pad (if needed). - When putting the wax onto the floor, spread a smooth light coating of wax out from the walls (2 to 3 inches) and in the corners out to the radius of the floor machine attachment. Put no more than 1/8 cup of wax on the floor in the center of the first 3-foot to 4-foot square. It will appear wet and dull. Immediately work the wax by spreading and burning it in with the natural stiff-bristle attachment (this may take one to two minutes). Move to the next area, maintaining no larger than a 3-to-4-foot quadrant, and repeat the step only after the wax in the preceding area is giving off a slight glare and the wax ridges have disappeared. Mineral spirits will soften any ridges or excess wax, allowing it to be spread and worked in. - When you have completed the application phase, change to the medium-bristle brush attachment and buff the entire floor, including your original hand-waxed areas. After buffing, if greater protection is desired, repeat the first phase, applying a thin second coat. Then rebuff. If a slightly higher sheen is desired, buff with the soft polishing pad. Mottled Metallics Miracote – Rancho Dominguez, Calif. www.miracote.com 
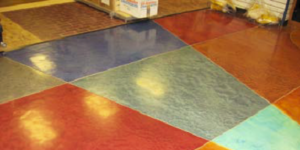
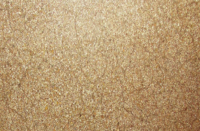
This technique uses manufactured silicon dioxide platelets coated with titanium dioxide to create a multilayered, variegated, hammer-toned seamless floor coating over concrete or an overlayment. Ingredients - CQ Clear Epoxy mixed with Midnight Black ColorPax-E - Chameleon Dispersing Agent mixed with Radiant Sunrise Chameleon "Flip-Flop" Special Effects Pigment - Chameleon Dispersing Agent mixed with Star Silver Chameleon Special Effects Pearlescent additive Instructions - Apply the Midnight Black epoxy base coat to a clean surface. This allows for the highest amount of color stimulation. - Prepare two spray bottles with each color blended with the dispersing agent. - Spritz the lighter silicon dioxide (Star Silver Pearl) across the surface. - Repeat with the darker color (Radiant Sunrise). - Apply a final clear urethane coat to seal. ![]() |

Exposed Aggregate Faux Paver Effect
Tile Finish for Resurfaced Floors
Colored Sealer with a Shine
Mottled Metallics 
