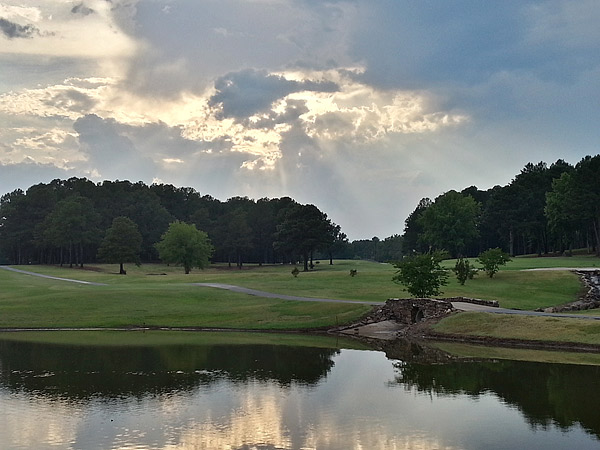
Iphoneography — or “i4neography” — is a term that has been around for a few years, and as you may have guessed, it pertains to photography via iPhones. As a professor of digital photography, I get annoyed when students ask if they can use their smartphones instead of a real camera. Still, I wonder if I should be teaching a course specifically for camera phones.
From film to digital to camera phones: In some ways, nothing has changed. If you understand how a camera works and you are observant of light, you can make almost any camera work for you. It’s more important that the one behind the camera strives to capture what they believe is important so they can share that experience accurately with others. It’s a balance between what you perceive and being proficient with the tools that record it.
Today, some phone designers have catered to the general public and dumbed down photography to the point where the only options you have are in the editing process. With other phones, if you don’t know the mechanics of photography, you will never be able to take advantage of all the incredible control features available.
What does the rise of the camera phone mean for the readers of Concrete Decor? Have we reached a point where we no longer need cameras? The most difficult aspects of taking photos on a construction site are the brutal environment and how stopping to take photos distracts us from our work. Good cameras hate dust, water and extreme temperatures. They are expensive and using them well takes training and practice. Yet, you can say the same thing about cellphones and most of us still risk having them near us at all times.

Can smartphone cameras take photos that match the quality of digital SLR cameras with exchangeable lenses? No, not even close, but they are quickly improving. The new ones capture images that range from 8 to 13 megapixels (MP) in size, and they have virtually replaced the point-and-shoot camera. In any case, every photographer knows that your best camera is the one you have available.
In my opinion, the effort that goes into quality documentation of your finished work is just as important as the quality of the materials, tools and craftsmanship used to create it. The photos that you take away from a job will continue to promote future projects for several years to come.
What’s more, we typically think of documenting only finished work, but even before you begin, a visual record of the entire site, the landscape and the nearby existing structures can be crucial to documenting the process of designing site-specific themes. On some jobs, I have digitally superimposed suggested designs onto location photos so clients can better visualize the concept and how finished space will function. This is especially necessary for public art proposals that are reviewed by committees without your presence.
Regardless of what camera or smartphone you are using, here are some tips that you may find helpful in the documentation of your work.
Lighting
While you are working on a job, try to notice what time of the day yields the most even lighting. In a 10-hour day, you may only have a 30-minute window to photograph. Avoid the worst-case scenario — hard or direct light and cast shadows intersecting the work. Soft lighting is generally the best.
If you want to accentuate the texture, photograph while the light source is low and from the side. Indoors, open the windows and doors to increase the ambient light. This will help reduce digital noise (the grainy effect) and blur from camera movement.

Flash
Turn off your “on-camera” flash. Although the flash may travel 10-15 feet, the subject nearest you will be washed out in brightness and the background will “fall off” into shadows. If you are using a real camera with a “hot shoe,” you can attach an external flash that will enable you to direct the light into the ceiling or walls and bounce it evenly onto the floor.
Depth of field
With regular cameras that have manual controls, you would want to decrease the size of the aperture to create the greatest depth of field in order to put as much in focus as you can. If your phone doesn’t give you this option, a landscape setting (if available) can achieve the same effect.
Reducing blur
Blur is caused by shutter speed that is too slow or by camera movement. The ISO setting is a light sensitivity rating — the lower the setting, the better the image quality —and a higher ISO will give you a faster shutter speed but may create digital noise. The antishake mode is also a very helpful feature that will help reduce blur in low-light shooting.
File size
Set the resolution of your images as high as possible, at superfine quality. The large file is not necessary if you only want to post your images to Facebook, website, or email, but if these are images that you need to print or send off for possible publication in a magazine such as Concrete Decor, the larger the better.
White balance
When possible, avoid multiple light sources. Each source of light has its own color. Shooting in shade or on a cloudy day will give you even, diffused light, but unless the WB is adjusted, the image will have a bluish tint.
Two great shooting modes
For the most part, just single-shot/auto mode with some adjustments to the exposure is all you need. But there are two other modes that are very useful. The first is HDR, or “High Dynamic Range.” The simple explanation is that when you take a photo of a subject that has a wide range of lights and darks, you usually have to choose which part is most important and adjust your exposure accordingly. With HDR, multiple shots are created simultaneously, then merged into one perfect image where every part of the subject and its background are correctly exposed. This technology is consistent with the way our eyes really see, and it used to be a manual process that required expensive photoediting software. It is so easy with smartphones.
Another shooting mode, which I find very helpful in better understanding a job site and its surroundings, is “Panoramic.” This mode has been around for a long time, but new software assists you with alignment grids as you accurately reposition each subsequent photo. On the Samsung Galaxy phone, once the image is perfectly lined up to the previous photo, the camera automatically takes the next picture. On the iPhone, the mode is similar to taking a slow continuous video. This used to require multiple photos, painstaking alignment on a leveled tripod, and considerable photoediting to “stitch” everything together.
Choosing a brand
What are the better camera phones on the market? If you are already competent with a digital SLR camera, you will appreciate all the options and manual adjustments of the Samsung Galaxy S4 and S3. If you would rather take the shot and edit it later using a variety of apps, you may prefer others. In fact, some don’t even have settings — you must simply keep your hand steady and make sure there is enough light.
The HTC One, due to its large aperture and BSI (also known as back-illuminated) sensor, can handle low-light situations with very little digital noise. It also has “extended depth of field,” which means everything in the photo will be in sharp focus. The iPhone 5, on the other hand, has one of the best HDR modes on the market.
Attachments
Until recently, camera phones could only offer “digital zoom.” Without getting technical, “optical zoom” is what really counts. The way this is accomplished is through attachments. Here are a few options: the Olloclip 3-in-1 attachment for the iPhone enables wide-angle, fish-eye (180 degrees of imagery), and 10x macro. Others include the Photojojo Phone Lens Series and the Schneider Optics iPro Lens System for iPhone 5.
Apps
Honestly, there are too many apps to mention, but I recommend that you look for an app that is the highest-rated one for the brand and model of your specific phone. The same app varies greatly from brand to brand. Personally, because accurate documentation is my goal, I stay away from all the gimmick filters and special effects. Simple adjustments to color correction, light and dark, and crop are all I need. When editing is necessary, I forward the files from my phone to my email and open them up in Photoshop.
Transferring your images
With regards to transferring photos from the cellphone to the computer, if you only need images for digital display, sending it to your computer as an email is fine. But if you need a full-size file (typically 8-13 megapixels), you will need to connect the smartphone via USB cable directly to the computer. The problem with emailing it to yourself is that most emailing apps will compress the file (throwing away pixels) to send it faster. The reason you would want to plug it in is to preserve full-size files suitable for quality prints or publication.
Some of you may want to upload photos that you have taken with a quality camera to your smartphone or tablet so you can easily share your portfolio with clients. That can be done by connecting your computer to your phone and syncing it with iTunes. Select the photo, then sync. Even easier, just store them in a remote online storage service such as Dropbox or Flickr so you can access them anywhere on any device.


