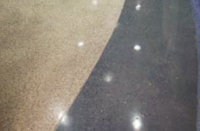
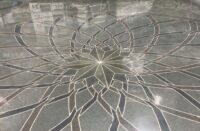
Decorative concrete is especially helpful for company branding purposes or to make a bright and impactful statement in an indoor or outdoor space.
In this light, it’s easy to see why glass adds a unique dimension. It’s different and it catches the eye, which is something appealing for businesses.
Another reason for the trend towards glass is the recycled element and the desire for LEED points, says Dustin Thornley, sales manager at American Specialty Glass. Much New York City-funded construction is now required to meet LEED Silver certification standards, for example, and using recycled glass can meet this requirement while also providing a way to add color and design.
Finally, glass in concrete overlay is cost-effective. While terrazzo boasts many benefits, glass-infused overlay is more affordable, and it still accomplishes a finished look. It mimics the design and overall effect of terrazzo at a lower cost.
Incorporating glass into a concrete overlay is one of the main ways to achieve a colorful and dynamic polished look. There are two recommended methods with which to accomplish this — either by mixing integrally or by broadcasting. (We suggest using CTS Rapid Set’s TRU Self Leveling overlay, and the techniques in this article were developed with that product in mind.)
Mixing integrally
When adding integral glass, it is recommended you mix the overlay first. If you are using AmeriPolish’s integral color, mix the water and dye, then add the overlay material. Next, screen the product with a 1/8-inch classifier to remove any unmixed material or clumps. Lastly, mix the glass into the overlay. This technique is ideal for a 50 percent load using size 0 or size 1 glass. You want to use smaller glass because it has a better chance of staying close to the surface when placing the mix on the floor.
In terms of the finishing technique, you can generally gauge the rake depth at 3/8 inch depending on the load. Be sure to not use a spike roller — it would only succeed in pushing the glass around. Rather, for mixing integrally, the preferred finishing method is with a smoother.
Broadcasting glass
Broadcasting is a much more delicate process than mixing integrally. This option really depends on the set time of the overlay. If you throw the glass too early, it will all sink to the bottom, meaning it isn’t visible. Conversely, if you wait too long, the glass will sit on the surface, not penetrating, and could be pulled out of the overlay during the initial grind.
The size of the glass influences when you broadcast, since the weight of the glass is relational to the size. In previous tests we’ve used up to a size 2, but generally we use size 1. If the glass is larger, thus heavier, you should wait longer. If the glass is smaller and lighter, broadcast sooner. Again, keep in mind that this is a delicate process, so time it as accurately as possible.
When you do the initial grind, be sure to grind the surface enough to where there is not a void between the glass and the overlay — you want the two to bond or else the polish will be diminished. Also, be aware that when you broadcast, it is difficult not to have pullouts. We use a grout coat to fill pits left behind when the glass is removed.
For the broadcast finishing process, here are the steps:
- Place the product
- Gauge rake to set depth
- Purge any air pockets with a spike roller
- Soon after the spike roller is used, broadcast the glass
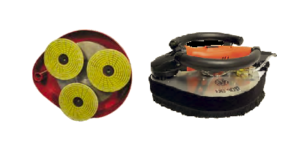
When you get to the third step, consider using a new porcupine roller. The spikes are stainless steel and are 1 1/4 inches in length. The advantage of this new roller is that it doesn’t leave spike marks like plastic spike rollers do. This new metal roller has pinlike spikes, meaning they aren’t as thick.
Once the four-step process is complete and the initial set of the overlay occurs, do not use a trowel or any other tool to press down glass that did not fully penetrate the overlay. Doing so will leave an impression that could be difficult to get out.
The hybrid approach
While not common, it is possible to combine the above two techniques into a hybrid approach. Meaning, you would first mix the glass integrally, and then you would broadcast after the product is placed.
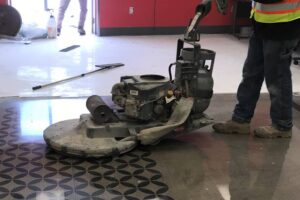
The final step: grinding and polishing
After the overlay is set, the final step to ensure a finished look and preservation of the floor is to grind and polish. These processes are documented and readily available to you. However, note that since each manufacturer carries different products, the steps will vary due to product-specific characteristics.