What is a myth-perception? Can it be only one person’s perception, is it a truth, or is it purely a means to saddle the competition with a hurdle or diversion — intentional or not?
The one universal truth about the polished concrete industry is that, sadly enough, there is no universal truth. We don’t agree about what defines polished concrete, what steps are important, or what is the best way to steer the industry. In fact, we have quite a bunker mentality. From my perspective I’d like to identify, to bring out in one forum, some of the basic building blocks of polishing, and to examine them in terms of myths or accurate perceptions. I will try to address each subject in sequential order.
(Note: Whenever I refer to polished concrete, I am referring to a concrete floor that has been ground, polished and chemically densified.)
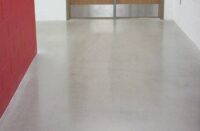
Flatness: It’s simple — how much the flatness of a concrete slab will affect your final floor is dependent on end use and visual expectations. Floor flatness creates a starting point for your work. It’s your canvas. Is flatness required for proper and safe operation of equipment, such as a high-cube warehousing operation? Is it simply a demand of the architect and/or end user for visual appearance? What control do you wield in all of this? With an existing floor, your starting point is out of your control, it’s a crapshoot, but with a new pour and with prior knowledge of the floor’s end use, your degree of control is dependent on your willingness and ability to insert yourself into the planning stages.
Curing method: The effect of a cure will be dependent on the methodology, along with the subsequent steps you will be taking. Fifty percent of the water in a portland cement concrete mix will come out of the mix through the hydration process that occurs during curing. Controlled curing/hydration will create more level, consistent concrete in performance and appearance. Curing can be controlled through additives, coatings, or simply water. This control is a dominant factor in the elimination of edge curl, cracks that occurs when hydration is not equalized throughout the slab, or crazing, when the slab isn’t protected from air movement across the surface. However, each method will have a different effect on your ability to perform. Wet cures — Wet cures create a very dense, consistent floor surface. While they eliminate the need to remove a coating, they can make opening up the cap very difficult, along with interfering with dye or stain penetration. Are you aware that you will never receive a denser, more tightly consolidated floor than one that has been water-cured?
UV-dissipative cures — A simple statement: Dissipative cures do not receive enough UV exposure to break down on a project that is totally roofed in.
Solvent-based cures — Do you have a VOC issue? Will you be able to remove it all so it doesn’t cause a barrier to penetration of densifiers and dyes?
Wax-based cures — Make sure you have warm water handy, as sanding may remove the surface wax but not the wax that has penetrated the pores.
Plastic sheeting — A positive choice for holding in the moisture. However, any contact between the plastic and hydrating slab will leave permanent darkening at point(s) of contact, and if wood or metal is laid out to keep the plastic in place, expect permanent shading of those areas, or even worse, rust or tannin stains if they are placed underneath the plastic.
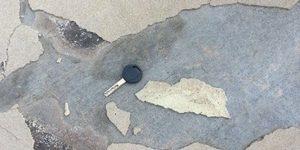
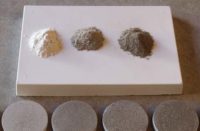
Aggregate exposure: Remember, it’s just freaking concrete. You cannot simply set your machine down on a surface, grind through two or three metal steps, and voila, you have a beautiful terrazzo-looking floor. During the troweling phase of concrete finishing you are actively pushing the aggregate down into the mix, while at the same time pulling up and consolidating the fines at the surface. If your customer wants an exposed aggregate finish, or poor man’s terrazzo, you either have to make allowances to your mix design and finishing process or seed the surface. Either way, if your perception and that of the owner or architect aren’t similar, you may learn an expensive lesson.
Densifiers: Plain and simple: You can polish without densifying, but you don’t receive the increased hardness, repellency and elimination of natural dusting that occurs with concrete unless you chemically densify. Plain and simple.
Equipment and diamond pairing: A + B = C ? The number of variations possible when pairing grinding equipment and diamonds is exponential. Each piece of equipment differs, not only as to whether it is a planetary or nonplanetary grinder, but also in weight and configuration, or whether it’s run wet or dry. Pretest your pairings prior to starting a project because a diamond that works on Manufacturer A’s 30-inch machine may not work as well on Manufacturer B’s 30-inch machine. If you are using multiple equipment manufacturers on a project make sure that Grinder C can remove the scratch pattern created by Grinder A.
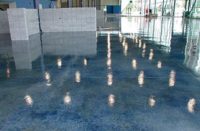
Clarity and shine: Clarity and shine are both present on every floor that you polish, or are they? You can achieve surface shine without having achieved floor clarity, and you can achieve clarity without having a high shine. Are they independent in the grinding and polishing process? Clarity is achieved in your initial low-end grinding stages when you are removing the laitance and irregularities that are natural in concrete. You are creating a clean, consistent surface on which you can then craft your shine, your polish. But buyer beware. Is that shine completely mechanical, or is part of that shimmer created by melted resins, and if so, will it wear and dull with traffic? Trowel marks and stun marks — why can I see them, but not feel them? There are similarities in these markings, but they occur at different stages. Trowel marks are created by excess and uneven pressure on the blades of the trowel during the final finishing steps of a concrete pour, while stun marks are created by excess pressure on the diamonds by the grinder during initial cutting stages, particularly with metals.
Trowel marks are generally easier to understand because you can see the action that creates the marks, but stun marks are not as easy to visualize. An analogy for stun marks might be the effect of a woman’s high-heel shoe on a marble floor. The extreme pressure caused by all the weight bearing on a stiletto heel (1,600 psi for a 100-pound women on a quarter-inchsquare heel) will cause stun marks on the marble. These marks can be seen, but when you run your hand on the floor they don’t present a physical profile to feel. What has happened here is similar to what happens when excess weight and pressure bear down on a metal diamond in the early grinding stage — it cause subsurface crystal damage that can be seen, but not felt. This is apt to happen more often on uneven floors where you’re having to run your head speed at a lower rate, thus allowing more torque on the individual heads. Does each successive diamond step tightens the floor? No. There is simply no myth that is so greatly perpetuated, yet so wrong. In understanding the pore structure of concrete, it is imperative you know that the pores are neither uniform in shape nor in placement throughout the slab. In Grinding 101 we learned about scratch patterns and how each successive diamond lowers the scratch profile of the previous diamond. This action DOES NOT TIGHTEN THE FLOOR. It merely eliminates some pores, while at the same time opening or exposing new pores. It is true that as you grind and polish, you are minimizing exposed surface area, but your diamond steps do not tighten the floor.