

Isn’t it funny how the little things get overlooked on so many decorative concrete projects? Everyone realizes choices need to be made regarding stain colors and design, but it amazes me how puzzled decision-makers look when asked about filling joints or saw cuts.
Not long ago my wife and I were having dinner at a well-known chain restaurant when we noticed that hundreds of feet of saw cuts had been left unfilled. I’m guessing this had to be a health issue. If nothing else, it made the floor look unfinished, to say the least.
Our company has helped with the design and installation of two large projects over the last few years, and neither architecture firm involved addressed what to do with the saw cuts. More than 600 pages of plans, and nothing was specified on what to do with the contracting joints or saw cuts.
If you are turning normal gray concrete floors into decorative works of art, it’s only a matter of time until you will be asked what the best choice is for filling the cuts in the floor. Let’s take a look at what choice is the best under which scenario.
Let me first say that unless you placed the slab you know little about the concrete, reinforcement, vapor membrane or sub-base. Because of this it is very important to do everything possible to make sure that the process you choose will last and not turn into a yearly warranty program. I won’t turn the rest of this article into a yawner by talking water-to-cement ratios but things like this play into your finished look. The fact is that if your slab is contracting at the cuts or joints filled than you will have a big problem if they are not filled correctly. On the other hand, if your slab was placed correctly and with rebar than you have a better chance of a sanded grout lasting. We will talk sanded versus nonsanded grout in a minute so hang tight.
Now I’m a realist, and I completely understand that blasting through a project by using grout is the easiest way to finish and then get paid, but is it the right choice?
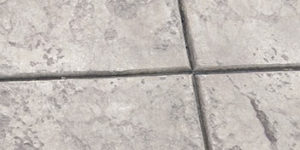
Grouting joints
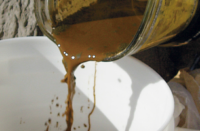
Grouting is the fastest, most attractive and most economical way of filling joints. Grouting also gets the most callbacks if not done properly. My bet is 90 percent of all residential decorative floors are grouted and half shouldn’t be. If you are leaning this way I have a few suggestions before you get started. Start by checking your slab for movement at saw cuts or joints. If the joints are moving with the contraction of the concrete, they are considered “working” or moving joints. If the cuts or joints are working, using a grout is not recommended. If they are not working then grouting may work out fine. I say “may” because there is always the chance the saw cut could turn into a working crack in the future, which is probably not what you wanted to hear. Check with your grout manufacturer on recommended depth, but 1/4 inch is common. I have achieved the best results by using a liquid acrylic grout additive (found in most home improvement stores) in lieu of water to mix with the sanded grout. The acrylic seems to dry with less grout shrinkage. A good time to grout is after the floor is sealed and the sealer has hardened, but just before a finish wax coat is applied.
As promised, here are my two cents on sanded versus nonsanded grout. I like the sanded grout and have had better luck with it depending on the width of the saw cut. If your job is on the fast track and you must grout right behind the sealer, using a nonsanded grout may be your best option for not scratching the sealer. Try not to get yourself backed into a corner if possible, because you are never in so much of a hurry that you can’t do it right.
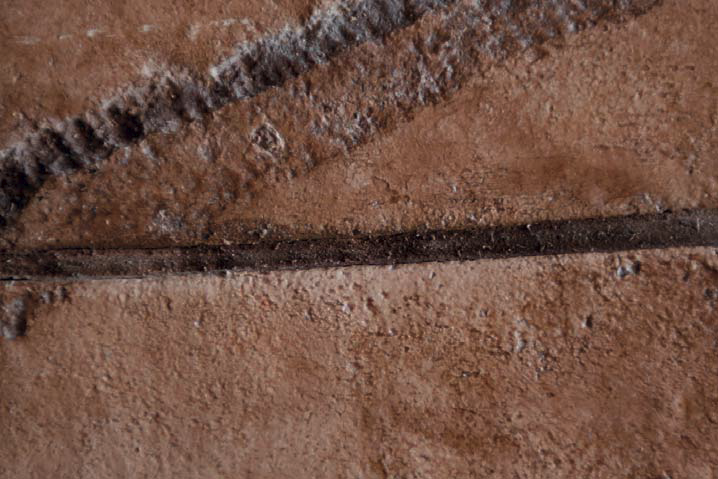
Joint fillers
If semirigid joint fillers – and knowing when to use them – confuse the heck out of you then you are in good company. But if you have a floor that has working or contraction cuts than you must respect the movement within the floor. Simply grouting the cut will only land you unpaid work in the future. Determining the right joint filler for your project may require a phone call to Metzger/McGuire or a similar manufacturer. My goal is to get you thinking about which is the best application for your job. It very well may be a blend of cuts filled with grout and cuts with semirigid filler. I have both in my floor at home and will be the first to tell you that the grout looks more old-world, but I also have several contracting joints that are filled with colored joint filler.
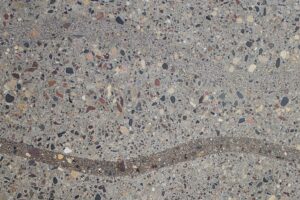
If you are like me and look down at every exposed concrete floor, you have noticed the movement toward industrial-style polished and stained floors. These large slabs are using polyurea-style joint filler that is usually flush with the concrete. The idea here is to fill the joint and eliminate concrete spalling at cut edges. This type of joint filler will dry in about an hour and be ready for grinding. Another type of filler, more of an epoxy filler, has a longer no-track time (the amount of cure time needed before material can’t be tracked). Use caution here because many jobs have been damaged by other trades coming in the next day and tracking joint filler across the floor.
Most of these fillers are available in many colors and some companies will color-match to your taste. I highly encourage you to take a few minutes to contact folks like Scott Metzger, owner of Metzger/McGuire, who specialize in supplying the right joint filler for the situation. These guys make it their business to know the correct steps from prep to installation and will be more than willing to walk you through your next project.