
Recipe submitted by: Percy Concrete & Design Inc., Wrentham, Mass.
www.concretedesignsolutions.com
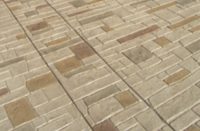
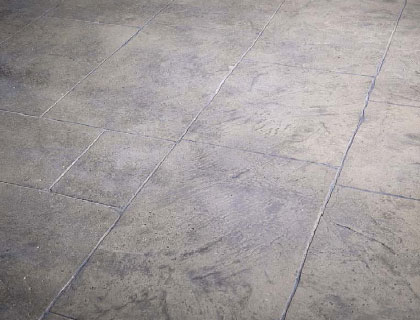
This gorgeous interior finish echoes the classic look of Belgium stonework by combining a handful of texture skins with a variety of innovative touches that add to the floor’s natural look.
Ingredients:
- Butterfield Color Uni-Mix Integral Color: Lanon Stone
- Butterfield Color Texture Skins: Italian Slate, Heavy Stone, Brick Touch-Up Skin
- Butterfield Color Clear Liquid Release
- Butterfield Color Perma-Cast Powdered Release: Storm Gray
- Mineral spirits
- Butterfield Color Clear Guard 2.92 VOC Cure & Seal
- Butterfield Color Flattening Paste
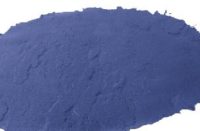
- Butterfield Color Perma-Cast Shake-on Color Hardener: Cape Cod Gray
- Butterfield Micro-Cem Polymer
- Standard tile grout
- Special equipment required: Heavy gauge chain, a 4-inch hand-held angle grinder with a 3/8-inch diamond blade, grout gun, flat brick jointers (various sizes), HVLP sprayer
Directions:
- For an interior installation like this, it’s important to make sure the floor has been carefully engineered to support the weight of the concrete. Once your support structure is built, mix your concrete with half the recommended dosage of the Lanon Stone integral color and place. This particular floor was done with a 4,000-psi pea gravel mix placed over radiant heating at a 4-inch slump.
- Once the concrete is in place, stamp the entire floor with the seamless Italian Slate skins using the liquid release. Then go back over the surface with the Heavy Stone and Brick Touch-Up skins at random to increase the variety of the textures.
- Let the concrete cure overnight.
- The next day, take lengths of heavy gauge chain and throw them up in the air, letting them fall onto the surface, which will add some random distressing to the floor.
- The next step is to cut the grout lines. Rather than stamping a tile pattern, the contractor and homeowners came up with a custom pattern of 2-foot-wide tiles with varying lengths. By designing their own pattern and hand-cutting authentic grout lines, they added significantly to the floor’s natural stone look.
- To cut the grout lines, mark your tile pattern on the surface. Using hand-held angle grinders fitted with 3/8-inch diamond blades, go over the floor and cut the joints to a depth of at least 3/8 inch to allow for proper grout depth. Twisting the grinder slightly to the left and right as you cut the grout lines will serve to distress the edges of each tile. You should also take the grinders to the corners of your intersections to further add to the floor’s look of natural wear.
- Once your grinding is done, clean the surface thoroughly to remove all dust and foreign materials, and let dry completely.
- Mix 12 ounces of Storm Gray powder release with 1 gallon mineral spirits in a 5-gallon pail, then strain and pour into your sprayer. Apply this mixture randomly to the surface, which will give the finished floor an antique look.
- Let dry for four hours or until surface moisture is no longer present.
- Mix the quart of flattening paste into 5 gallons of Clear Guard sealer, and apply a coat over the entire floor. Let set overnight.
- The next day, it’s grout time. Mix 3 parts Cape Cod Gray color hardener with 1 part polymer and add tile grout until you have a pudding-like consistency. Using a grout gun, one person should fill the grout lines, while several others follow behind with flat brick jointers to profile the grout. You want a small reveal so you can see the carefully distressed edges of your tiles. Let grout cure overnight.
- The next day, clean the surface thoroughly, and apply a second coat of sealer to the entire floor.