
Shorty’s Bar, located in the basement of the Kutztown Tavern in Kutztown, Pa., is a classic college bar: Concrete floors, block walls, basically indestructible. Patrons line up five deep at the two bars on weekend nights. It’s the kind of place where it can take five minutes to move 40 feet. The next day the floor and walls are hosed down into floor drains to clean it up for the night’s crowd. My kind of place … 30 years ago.
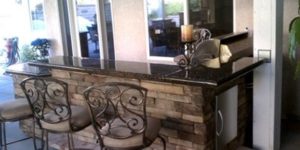
The owner, an old concrete contractor, wanted to replace the two bars with concrete. The goal was to add ambience and character to the bar with a material that could be hosed down along with the floors. The owner also wanted seamless tops, making this a good candidate for pouring in place.
The question was: Could we approach the quality of our precast countertops on a poured-in-place project? I believed we could.
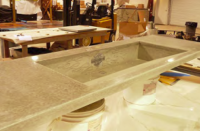
The forms
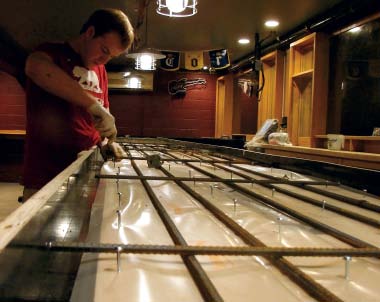
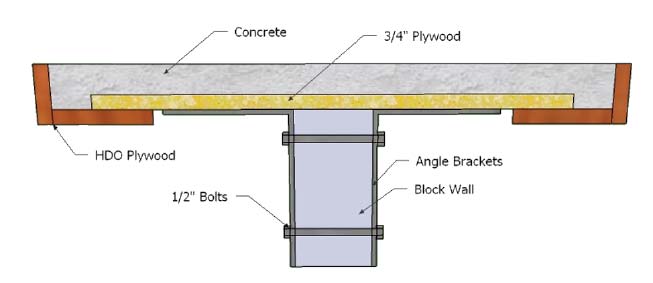
The bar tops sit on a 4-inch-thick solid block wall. We used 3/4-inch exterior grade plywood quick-bolted to the block as the stay-in-place part of the form, and we used HDO (high-density overlay) plywood to form the drop and edge. Angle braces bolted through the block wall held everything in place.
No. 3 rebar at 8 inches on center both ways controlled plastic shrinkage and took care of the cantilever and spans.
The concrete
The concrete had to be strong — I wanted a minimum of 7,000 psi.
It had to be finishable. We could not simply load up on high-range water reducer and hope for the best.
It could not shrink noticeably. We did not want any joints or plastic shrinkage cracks.
It had to be delivered by a ready-mix truck. There was no way I wanted to mix 1.5 cubic yards on-site.
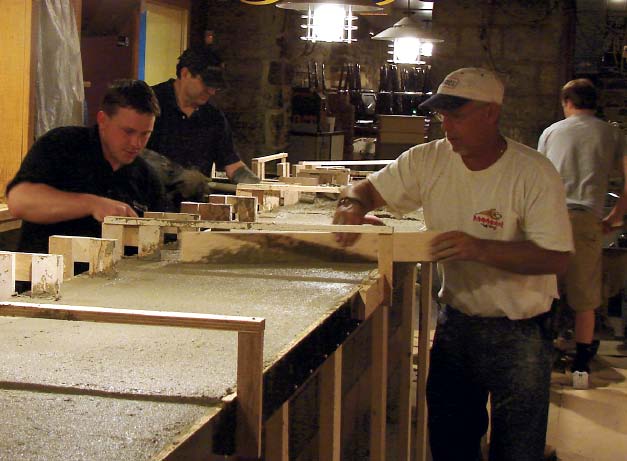
Working with Jim Casilio of Casilio Concrete (based in Bethlehem, Pa.) we came up with a mix that worked just about perfectly. We used a 70-30 portland-slag mix, a midrange water reducer (dosed as high as we dared) and a shrinkage reducer, and we cast at a maximum 4-inch slump.
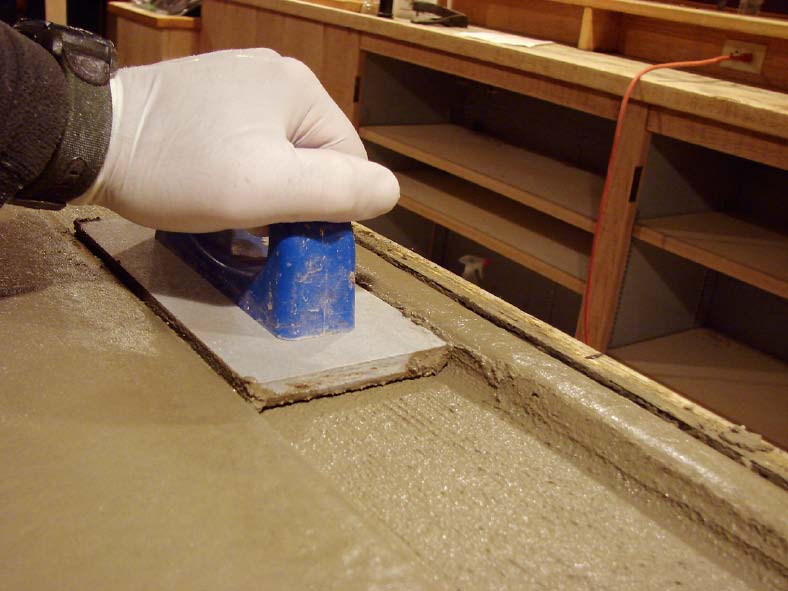
The end result was a mix that was tolerable to cast (with vibration), did not set too quickly, finished very well, did not shrink noticeably and gained strength quickly. We had the finishing process wrapped up about four hours after the start of the pour in ambient temperatures of 70 degrees.
Sealing mistakes and missteps
Up to the point of sealing, things had progressed very well. The sealer plan was to use one coat of a thin-build water-based epoxy as the primary base coat.
The problem with the plan was the 100 percent relative humidity we had had in my area for the prior three months — remember, we were working in a basement. When it says “Don’t apply this product above 60 percent relative humidity,” you may get away with 80 percent, but as I learned, 100 percent is too high. The sealer turned white due to an improper cure. A six-hour detour to strip it and we were back to square one.
Bob Chatterton from Surface 519 and I came up with a backup plan involving two Surface 519 products: We would use a solvent-borne sealer (519 SB3400, a silane acrylic) that would not white out in high humidity as a base coat, and we’d top it with an abrasion-resistant topcoat (Rock Renew) that could be easily reapplied as needed. I’ve had excellent results with Rock Renew in the past. It’s used on the floor of Penn Station with yearly maintenance.
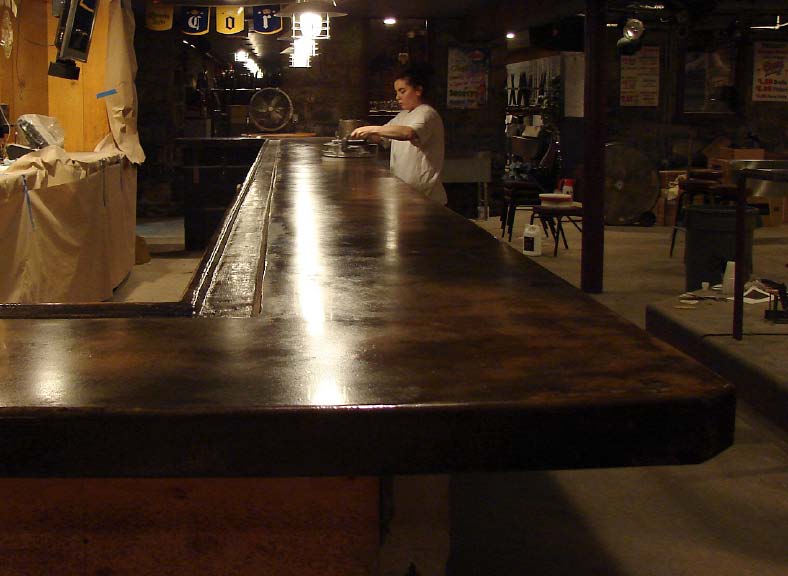
The end result
There are a few adjustments I’ll make on the next pour-in-place project, but overall the project was a success for us and for the owner. I’m looking forward to the challenge of the next PIP project.