During a training workshop that we recently conducted, our students got into a discussion as to what is better, integral color or color hardener. I feel contractors’ creative abilities can really flow once they have mastered the use of both products and how they are different. Knowing both integral color and color hardeners allow them to produce some really unique, realistic-looking recreations of stone, brick or tile.
There is absolutely nothing wrong with selecting either or both of the products for decorative concrete work. But they are completely different in nature and usage. They provide different looks to the concrete, the finished product performs differently, and both require a completely different installation process. The cost differences are also huge.
Color hardener is the more cost-effective and also the more labor-intensive to install. It would be fair to say there are pros and cons to each method.
Also, the two are sometimes combined to obtain the look needed or to gain additional strength or wear resistance in high-abrasion areas. Integral pigments will provide color only, while color hardeners will provide additional wear resistance for a surface that is expected to receive a high degree of abrasion from foot or vehicle traffic.
Integral color
There are several different forms that integral iron oxide pigments come in. The material is manufactured in basically three different types or formats. They are standard dry powder pigment, liquid pigment and granulated pigment.
The strength of the iron oxide pigments will vary from manufacturer to manufacturer, and you can easily tell if someone is diluting your product with fillers. Just take a sample of your iron oxide pigment and add some muriatic acid. If it fizzes and foams up all over the place, you have filler mixed in with the product you are using. If you add the muriatic acid and it does nothing, you’re dealing with pure iron oxide pigment.
It is always best to have a custom blending facility blend and package your iron oxide so it is ready to go on the job site. All colors are derived from blends of yellow, black, orange-toned red, blue-toned red, white, green and blue. The first four mentioned are the most commonly used and most cost-effective, while the white, green and blue pigments all have a premium cost associated with them.
The use of integral pigments is simple. Just add it to your ready-mix truck upon arrival. Have the driver blend it into the mix and pour as usual.
One thing to keep in mind — know the color your customer wants prior to bidding a job with integral color. You have factors to deal with, such as knowing what dosage rate of pigment makes a particular color. This affects your cost of installation drastically. Also, the ready-mix producer will most likely charge you a mixer clean-out fee for each truckload of concrete pigmented, which adds up on large jobs.
 Color hardener
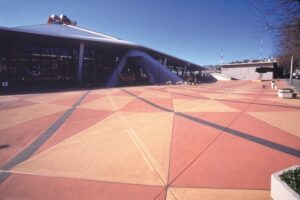
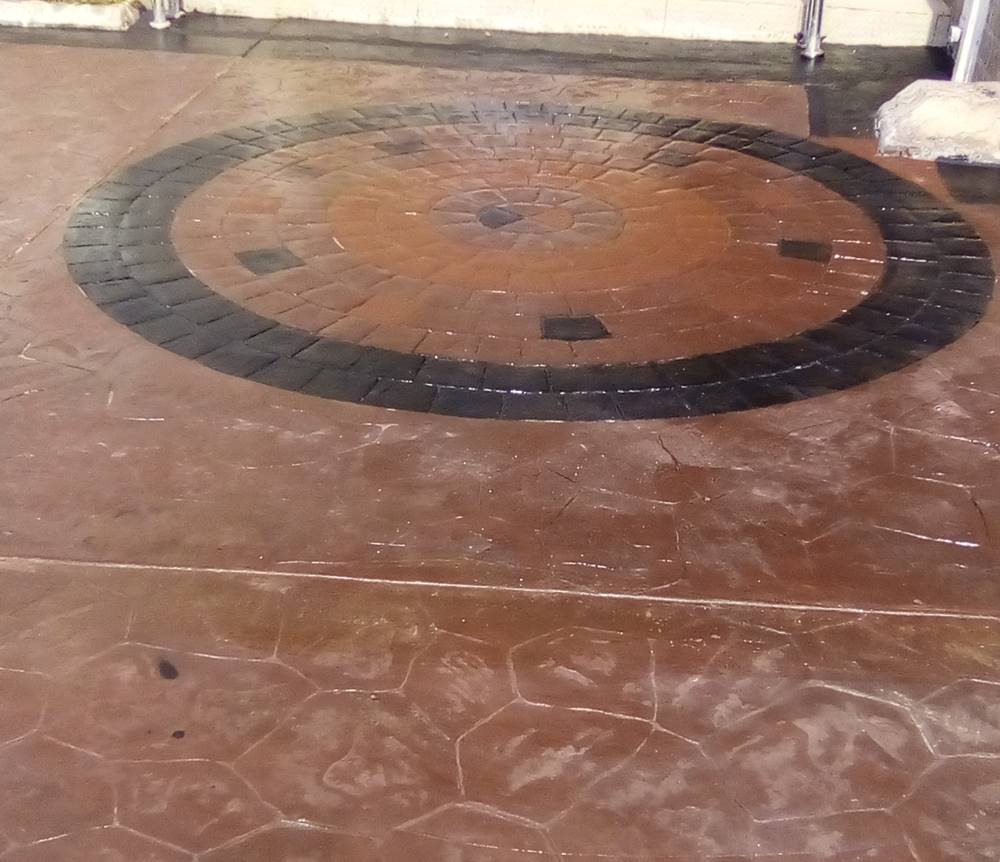
Color hardener is a completely different product, and cost, usage and installation techniques are completely different as well. It can produce a much wider palette range of color than what could normally be produced with using integral color. Color hardener jobs end up having a bright, intense, crisp-looking color. The surface looks kind of like the shell of an M&M candy.
The color hardener creates a much more durable, vibrant and wear-resistant surface than standard concrete. Hardener actually provide our surfaces with better abrasion resistance, color vibrancy and performance.
The color-hardened surface will also provide you with a surface that will decrease “permeation,” or water intrusion. In freeze-thaw regions, this actually helps the concrete reduce or eliminate the problems associated with the freeze-thaw actions of the environment, producing much more durable concrete surfaces in the long run.
The color of the slab you are working on can be changed instantly from one color to another simply by changing the color of the hardener being applied. This is especially helpful when doing borders or creating bands of color to provide life or unique artistic flair to the work. Another huge benefit of color hardener is that the cost is consistent throughout the color spectrum except for shades of blue.
You can also make samples for the next job you are doing if you have the proper colors with you and a little leftover concrete from your pour.
Dry-powder antique release
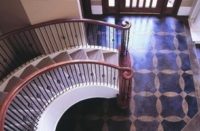
I also feel the way dry-powder antique release agents take to a color-hardened surface is different from the look of standard concrete with integral pigments. This allows you to produce some very realistic-looking stone, brick or tile effects in concrete.
Repairing a damaged color-hardened surface is much easier than trying to match integral pigments. Ask any well-seasoned professional who has been in the trade a long time. Those who use color hardener also won’t have to pay any mixer washout fees to have the ready-mix producer wash out their mixer truck, unlike with integral pigments.
The uniform cost associated with all the colors available except blue will be a big advantage over the integral pigment method. Color hardener also allows the installer to obtain shades of color not obtainable using integral pigments alone.
Applying the color hardener
Mastering the installation of color hardener is not magical. It is all in the timing of your work and the approach you take while doing the job.
First of all, you should work with a concrete mix design that allows you to have a workable slump but does not have so much water added that it promotes bleed water. When we lay down our mud properly, it really does not bleed that much.
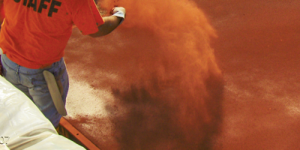
Prior to the pour, arrange your pails of color hardener around the job site to make access to the material easy. Remove the lids from the product and pre-fluff the material in the pails to loosen up any compacted material in the bottom of the pails. This will save you time when you need it the most, during the pour. It is advisable to split the volume of color hardener into another pail so it is easy to move the bucket and handle during the application procedure.
When your concrete arrives
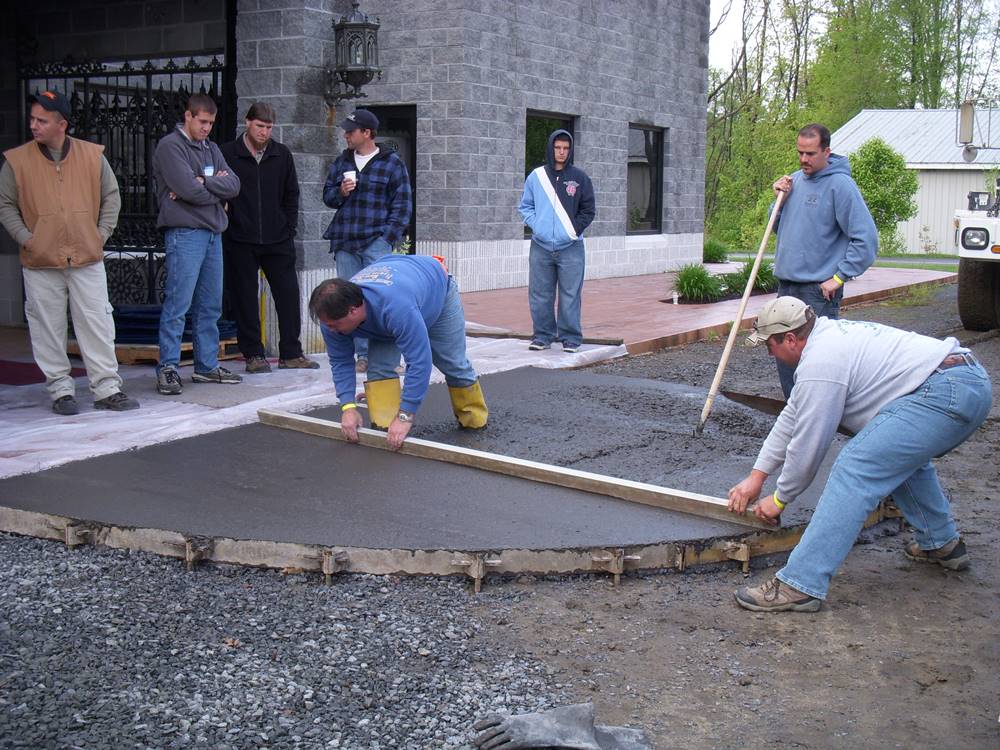
Upon arrival of your concrete truck you should be ready to go. Sometimes weather conditions such as heat or wind really push your limits, and the more prepared you are beforehand, the more working time you will have to actually do the work. I always tell everyone, “Failing to prepare is preparing to fail.”
When the ready-mix arrives, place, screed, bull-float and edge your concrete in an efficient manner. While placing the concrete, keep in mind that the flatter you place and screed the concrete, the easier it will be for you apply and work in the color hardener with bull floats. If you have any skinning over or see a slight color change of the concrete prior to application of the hardener, run your float over the slab to wake it up. You may have moisture in the slab, but it’s very possible that with the “slight skinning over” of the surface you are a membrane away from the moisture you need to activate the hardener. Running your float over the slab wakes up the concrete and also helps remove any edger marks or float lines from the first bull-float pass.
On to the next
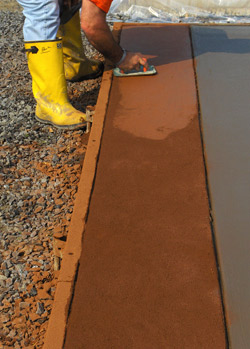
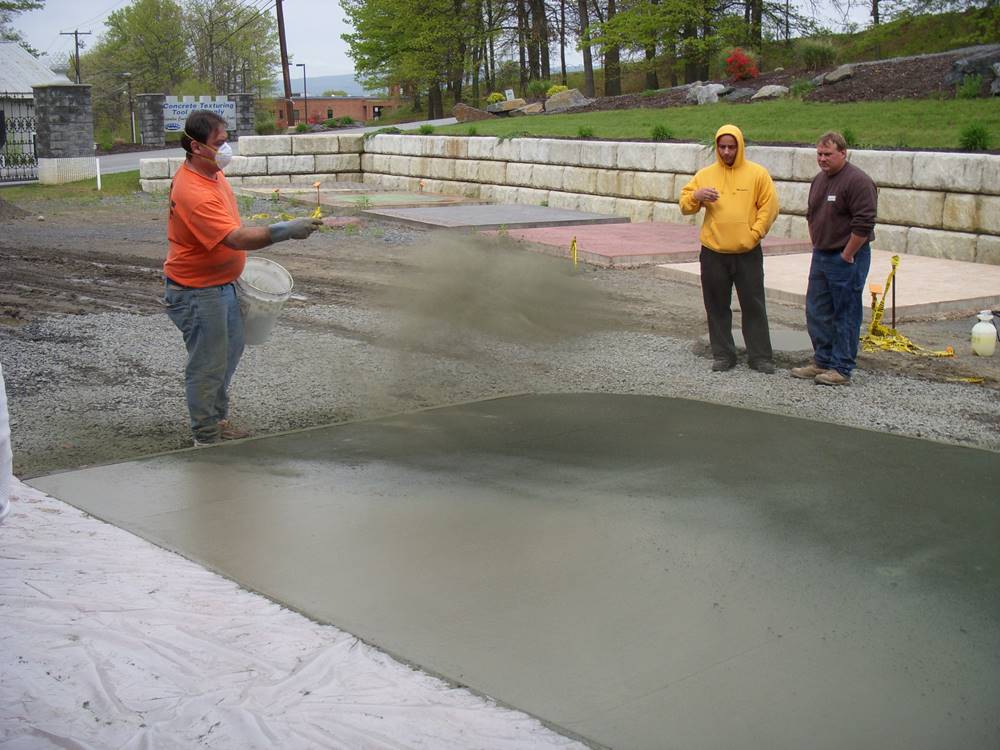
Once you complete this step, broadcast the pre-fluffed hardener across the slab surface. You want to apply the material in a uniform layer, evenly across the slab, applying at different angles. Beware of applying large piles of color hardener, because they will fight you when you are working the material into the surface.
Once the slab is covered with the color hardener, the material will look like a dry powder on the surface. Let it sit undisturbed for about two minutes. It will go from a dry powder to a moist-looking powder as it soaks and wets out on the surface.
Now, without delay, work the color hardener into the surface with your hand float and bull floats, edge the slab and remove your edger marks.
Timing, timing, timing
If your timing is correct, the color hardener should work into the surface of the concrete with no problem. If you apply too little material in the first application and the product seems to work into the surface and dissipate upon application, you did not apply enough material in the first application. Apply a second application of hardener without delay and repeat the above steps.
Keep in mind that you will experience the hardening effect as well as the color with this process. With integral pigment you have no hardening effect added, only color.
The main variable you will be working with is weather conditions. The rate of evaporation will either speed up or delay your installation process. This rate changes daily with the weather.
Windy days can be a handful, sucking moisture from the slab.
Variables such as the concrete mix design you’re working with and the slump you normally pour at will also dictate your day’s timing.
Integral Color Application Tips
- Always use high-quality pigments. Never use carbon black pigment in outdoor applications.
- Make a test pour utilizing the concrete and technique that will be used on the job site. Doing so, you will be able to determine the exact color you will get. Proportion differences between raw materials will modify your color shade.
- Maintain a consistent slump from truck to truck when adding pigments. Varying water content could cause color consistency issues.
- Always ask your ready-mix supplier to start from a clean truck. The half yard remaining in the belly of the mixer from a previous delivery could cause you color-shade problems.
- Never sprinkle or apply water to the surface of colored concrete during finishing. This will cause discoloration.
- Avoid late finishing or burnishing of the surface to avoid discoloration.
- Do not add calcium chloride to your colored concrete.
- Always follow manufacturer recommendations for curing colored concrete.
- Do not cover colored concrete with plastic or burlap before curing. This may cause permanent discoloration.
- Be consistent with your placement, finishing and curing techniques for best results. Do not change methods or ready-mix sources in the middle of a job.
Color Hardener Application Tips
- Monitor your weather conditions on the job for future reference regarding how they affected your pour. Keep notes.
- Pre-fluff your color hardener before the pour and split the volume of material into multiple pails for ease of application.
- Pour at a slump that’s workable but does not promote bleed water.
- Remove float lines and edger marks. They will show through in your finished work.
- Apply your first and second application of hardener as soon as possible. This ensurse you have adequate moisture available in the concrete to activate the color hardener.
- Do not apply water to activate the hardener. All moisture to activate the hardener should be from the concrete itself.
- Evaporation reducers or retarders are OK to use, but they should be restricted to proper usage. Use after screeding and before the first floating. Do not cheat and use the evaporation retarder to activate your color hardener on the surface of the concrete.
- Pour a piece of manageable size for your crew to do comfortably. Remember quality, not quantity, is your main goal and objective.
- Avoid covering a fresh pour with plastic. This may cause discoloration.
Questions from Readers
Question
What is the effect of not washing out the powdered release well before sealing the concrete?
Answer from Concrete Decor
Removing excess powder release from a concrete texturing application is very important. Keep in mind, powder releases are hydrophobic. They keep texturing/stamping tools from sticking to the concrete. They also impart an accent color to areas of the concrete that experience the greatest amount of pressure (depressions and crevasses) during the texturing process.
Washing the surface a day or two after the texturing process is important to remove the excess release powder from surfaces it didn’t bond with. If the cleaning process isn’t performed properly, a residual amount of release agent will sit on the surface. This can actually prevent a concrete sealer from properly bonding with the concrete. The problem can be further exacerbated if the sealer is not back-rolled or is applied in hot weather that prevents the sealer from wetting out the surface it’s designed to protect.