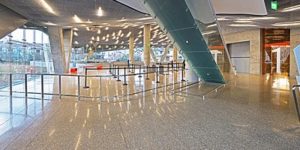
The moment you step through the doors of the Children’s Discovery Museum in central Las Vegas, you know you are in for a treat. The museum promises in its mission a “vibrant and engaging experience” for children from all walks of life.
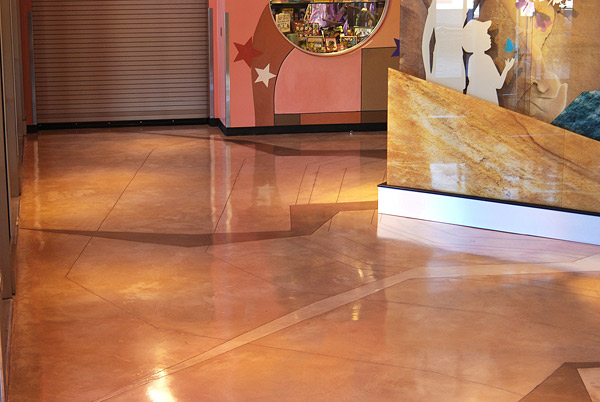
It’s what’s under your feet that first grabs your attention. At first glance, you may think you are standing on a pane of glass suspended miles above a Nevada desert, complete with volcanic “lava flows” that radiate from a three-story playground in the center of the floor.
“I’m pretty sure the architect intentionally designed it to look just like a topographical map,” says Kenny Sorensen, co-owner of Las Vegas-based Westdeck Concrete Coating LLC, the crew responsible for this job. “At least that’s what it looks like to me.”
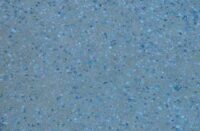
Although the floor’s design looks simple enough, creating it was a carefully orchestrated project. Three different custom colors were used, selected from dozens of options. Final color was achieved by hand-blending integral-colored bag mixes, samples of which had to be approved prior to the application. To create jagged lines across the surface of the entire floor, numerous saw cuts were made before a trowel-down material — a Mapei integral-colored microtopping — was applied to achieve a unique texture.
 The concrete floor at the Discovery Children’s Museum was already in place. All that was needed was the decorative finish. Thankfully, Sorensen says, the old concrete was in very good condition. “We prepped it, primed, saw-cut it, troweled it, waxed it — the whole nine yards,” Sorensen says.
Don Hammond of Vegas-based Border Construction Specialties, Sorensen’s product supplier, explains that the Mapei microtopping is actually a combination of unsanded and sanded grout products with added dry colorant. Hammond says the fact that each bag mix is available in a wide variety of colors makes this particular product quite appealing to applicators. Most overlay bag mixes come in the standard white or gray, and adding color can be tedious.
Sorensen says he really likes the way the material goes down. “The Mapei microtopping is a very smooth product we are able to install without getting a lot of chatter that you sometimes see from other microtoppings.”
 He says that because installers do not have to add pigment as they are troweling the floor, human error is removed from the equation. “This is really nice when doing a large project, because this helps the color stay consistent throughout the floor.”
That said, the textured surface turned out to be a bit of a challenge. “We had to play with it a little bit to try to achieve different textures,” Sorensen says, “but it all worked out well.” The entire surface of the floor was hand-troweled, a job that took several weeks to finish.
Making the lightning
After diamond-grinding the old concrete surface to start the project, Westdeck primed the floor using Mapei Primer L, a solvent-free acrylic primer that is intended to improve the bond between a concrete substrate and an underlayment or topping.
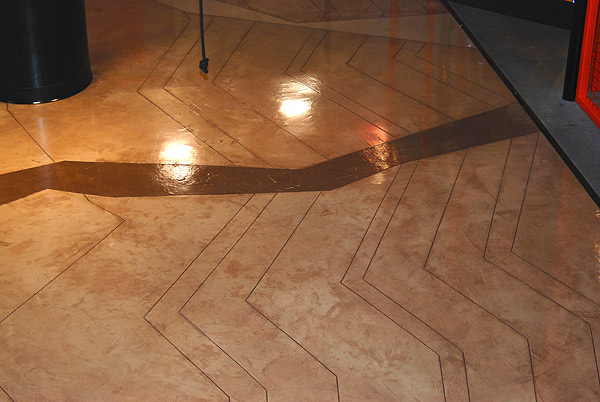
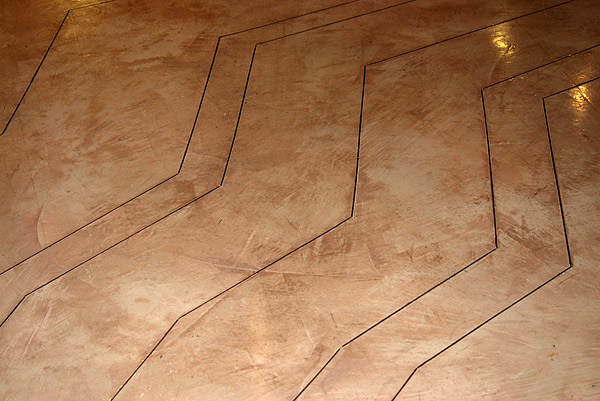
Once the floor was primed and dried, a chalk line was used to mark it with jagged lines. A second set of chalk lines roughly mirrored the first to create bands of varying thicknesses. The visual elements suggest volcanic ruptures, but Sorensen provides another keen comparison too.
“They almost look like lightning bolts,” he says.
 Sorensen’s crew had only drawings provided by the project architect from which to work. It was a tedious process. As they progressed, some lines had to be moved and chalked again until just the precise look was agreed upon.
Then it was time to break out the saws. Using circular saws with concrete blades and peanut grinders fitted with ball tips, each side of the “lightning bolts” had to be cut. Sorensen estimates that nearly a mile of saw cuts was done.
The end result was 10 main (thicker) bolts that spread outward from the square play area. Each of these branch out across the floor like the roots of a tree into narrower bolts that terminate in pointy tips.
The next step was to apply the rough coat for the topographical texture. This was achieved using the Mapei Ultracolor Plus system (a sanded-grout bag mix) mixed with Mapei’s Planicrete UA, a liquid latex admixture that encourages a fast-setting, polymer-modified, color-consistent, nonshrinking microtop finish.
The Westdeck crew troweled down several coats of this product, making sure to carefully mix the products to achieve precise colors. “We had to be very careful with color,” Sorensen says, noting that making color samples for prior approval is part of the overall process. Once they had the color dialed in, he says, it was a fairly simple procedure.
Overall, Sorensen says the microtopping install went very well. “You’re not having to add color to each mix to make everything match. It’s consistent throughout.”
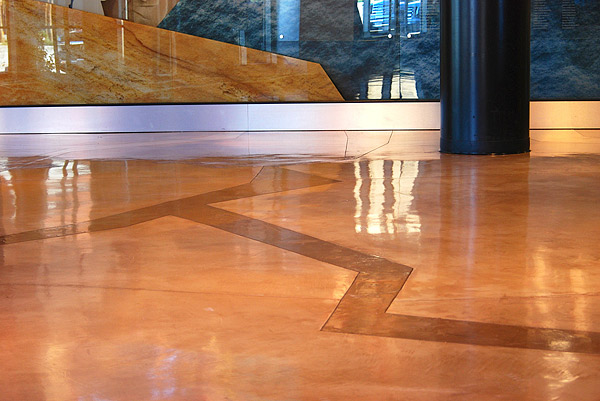
Coats of Keracolor U, an unsanded grout, mixed with Planicrete UA were then troweled down to get the final finish. “You use a kind of wet-on-wet procedure to achieve the texture,” Sorensen explains. Once the floor dried, the saw cuts were gone over one final time to clean them out.
The floor was sealed using two coats of Calico solvent-free acrylic sealer. It was then waxed and buffed several times.
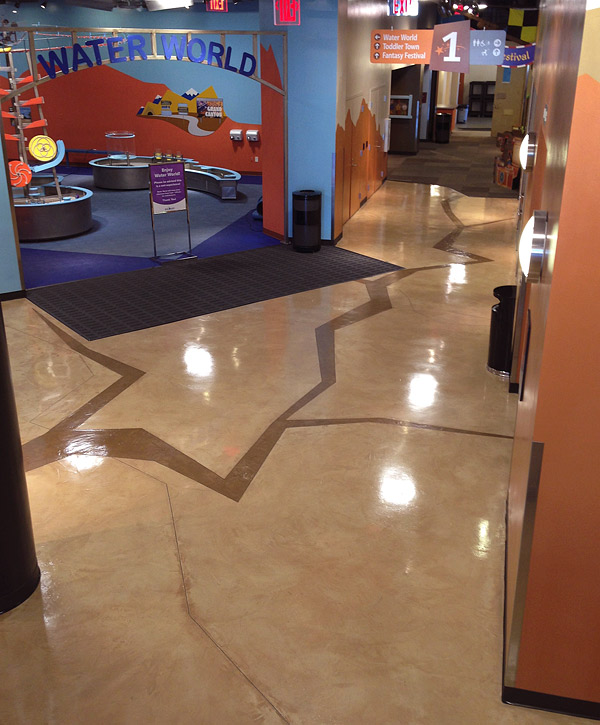
Sorensen says the biggest challenge with this floor was dialing in the right colors, but he was quick to point out that this is not something he is averse to doing. “It’s just part of the job,” he says. The net result is a 4,700-square-foot surface that makes for a stunning entryway to the museum.
Project at a Glance
Client: Discovery Children’s Museum, Las Vegas, Nev.
Decorative concrete contractor: Westdeck Concrete Coating LLC, Las Vegas (Kenny Sorensen and Craig Davis) | www.westdeckcoatings.com
General contractor: The Korte Co., Las Vegas | www.korteco.com
Architect: Lucchesi, Galati Architects Inc., Las Vegas
www.lgainc.com
Scope of project: Installation of Mapei microtopping and saw-cut sections at the main lobby of museum
Project duration: Three weeks
Materials supplier: Border Construction Specialties, Las Vegas | www.teamborder.com
Mapei products used: Primer L, Ultracolor Plus system, Keracolor U system, Planicrete UA
Sealer: Calico solvent-free acrylic