In part 1 of this three-part series, The Subgrade, I walked you through proven methods of addressing the unique challenges of installing concrete decks around pools and how you can overcome them.
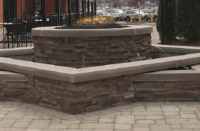
In part 2 we discuss pool coping, which is the cap, or cover, for the wall and provides aesthetics and safety along the pool’s edge. Visually, the coping frames the pool. Coping can be made of many different types of material, including cast-in-place concrete, brick, flagstone, precast concrete, travertine, aluminum or tile. The pool coping separates the pool structure from the pool deck, which means the deck can shift without adversely affecting the pool. For the purpose of this article we will primarily discuss the use of cantilevered Styrofoam forms for decorative cast-in-place concrete coping.
Pools are constructed with three basic types of materials — concrete (gunite), vinyl liners and fiberglass. Cantilevered Styrofoam forms are used in the construction of all three.
Tips for forming and finishing concrete coping
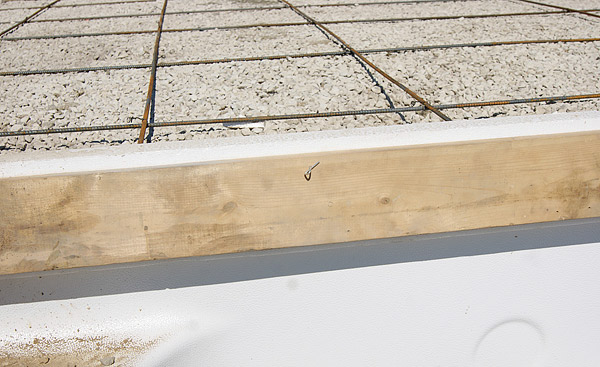
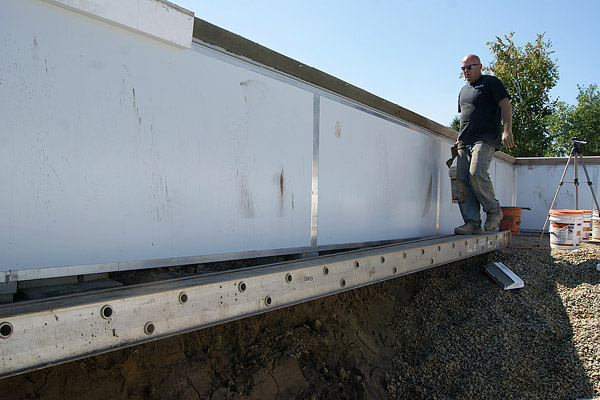
When forming straight-wall pools with cantilevered Styrofoam forms, we’ve found that backing the forms with 1-by-6-foot lumber is easier than using tie wires every foot to keep the forms straight. With the lumber you only need one tie wire every 5 feet or so to brace the form. This way is a lot quicker and helps produce straighter walls.
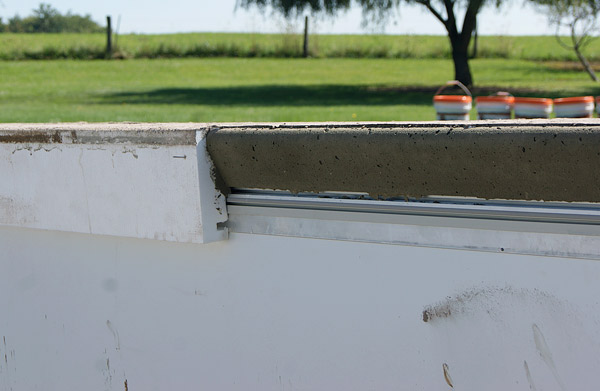
You use the tie wire the same way — you drill small holes through the 1-by-6. Be sure to keep the top of the 1-by-6 approximately 1-inch below the top of the Styrofoam form. This detail will make more sense later when we discuss coping borders.
For curved-wall pools there is no need for the 1-by-6 lumber as the radius actually adds strength. Plus, if it pushes out a little, it is not as noticeable as a straight wall.
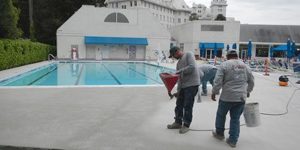
When pouring the concrete coping with pools constructed of gunite or vinyl liner, you generally have two choices: water in or water out. With fiberglass pools you have one choice, water in. I think you’ll find most pool builders want to get water in the pool as soon as the walls are done, because the water provides even pressure on all sides of the walls.
Water in the pool might be great for that, but it is a horrible situation for the poor guys pouring the mud, especially if it’s stamped. It’s even more of a pain if the pool has a concrete coping. From a concrete installer’s perspective, your ability to install the coping with the least degree of difficulty and cost will be to do so without water in the pool. However, the pool builder may not give you that choice.
Water in the pool
If the pool already contains water, which is most likely with fiberglass pools, you’ll face two major obstacles. How do you keep the mess out of the water, and how do you access the vertical face of the coping for finishing operations?
Built-in aluminum coping eliminates having to access the vertical face during the finishing operations. However, you still are faced with the challenge of keeping construction debris—such as broadcast color hardener, powdered release, concrete and other contaminants—from getting into the pool water.
What I have found to be most effective is to tape bubble wrap to the face of the coping. Normal plastic sinks, but the air-filled bubble wrap floats on top of the water. Use the widest bubble wrap you can find, as this allows you to collect the largest amount of contaminants. When the work is done, simply fold the bubble wrap up onto the deck and collect the contaminants for disposal.
Now that we know how to keep the mess out of the water, what can we do to make finishing the vertical face of the coping easier?
I’ve found that pouring the coping separately makes it easier. Obviously this is going to cost more, but this method allows you to more easily lean over the edge to fix any issues as the Styrofoam forms are pulled. It also has design advantages. Pouring the coping separately allows you to make it a different color than the main part of the pool deck. Having a different color coping is not only visually appealing, but it enhances safety by making the water’s edge more obvious.
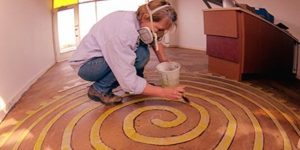
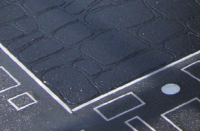
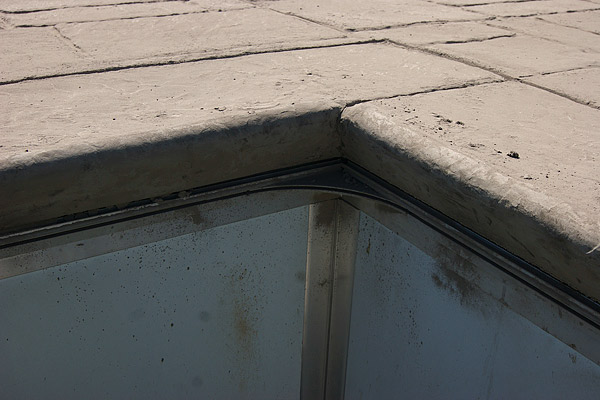
Whether I am using a different color for the coping or the same, I also suggest using a seamless texture on the coping border. With a seamless texture, you can put joints in wherever you want and the border stops the field pattern. Carry this texture over onto the face of the coping and install joints every 4 to 5 feet to simulate stone. This method allows you to avoid the less-than-realistic look of a jointed pattern, such as with some stones like ashlar slate or random stone that have joints in tight patterns. If you took that joint pattern all the way to the pool’s edge, all those lines should carry down the face of the coping.
If you can’t pour the coping separately and you are using integral color, you have one choice — get in and get wet! This is not so bad in the pool’s shallow end, but a lot trickier in the deep end where you’ll need some type of floating device for you and your tools. This is cumbersome at best. You won’t be able to avoid getting construction debris in the water because there is no way you can use the bubble wrap trick.
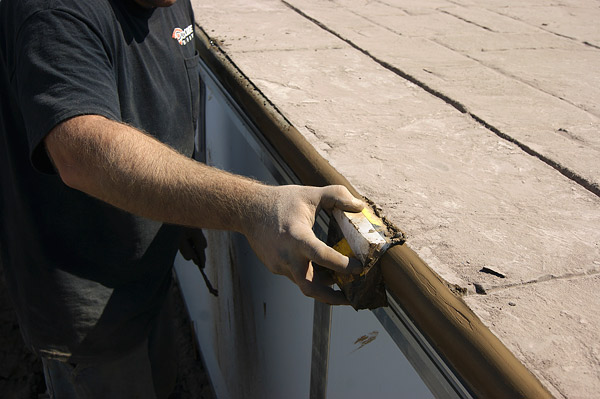
The process of texturing the coping face is simple. Cut a roughly 4-inch piece of the Styrofoam form you’re using and wrap it with vinyl tape. If you’re using integral color it’s extremely important to work quickly. As soon as you’re done stamping the pool deck, remove the Styrofoam form from the face of the coping and slide the tool back and forth on the face of the exposed concrete coping to work up enough cream to fill in all the holes.
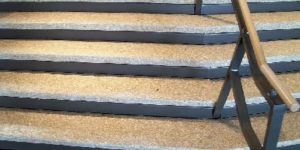
You can do a few different things to finish the coping face. You can leave it smooth, put a light broom finish on it or, preferably, stamp it if all the conditions are right. Next, use a chisel to carry all the joints down the face.
There is a way to avoid the dip in the pool. For those of you who have read my articles before, you know I’m a huge fan of color hardener and this is a perfect example of just one of its many advantages. If you use the hardener on the border, then all you have to do is mix up a slurry of sifted hardener. To do this, use a bucket strainer made for paint. Dump a scoop of hardener in and shake. The fine particles go in the bucket below and you throw away the bigger sand in the strainer. Mix the powder with water and you’ve got a matching slurry.
Whenever I do this or talk about this method, I have people ask, “You mean to tell me that’s going to stick on there and not come off?” The answer is yes. I have done hundreds of feet of coping in this manner and I have never had one peel off. In Ohio we have as many freeze-thaw cycles as anywhere in the country and the work holds.
You still want to get going on the coping faces as soon as possible after you’re done stamping the pool deck. If more than two to four hours go by before you slurry, brush a bonding agent on first to get the best bond. If you are using the color hardener slurry, you can finish the work the next day.
This approach works equally well even if there is no water in the pool.
No water in pool
With concrete (gunite) and vinyl liner pools, you are more likely to be able to work on a pool with no water. In order to backfill walls so you can pour concrete, the inside may need to be braced depending on the walls’ material. For concrete pools this isn’t a factor, but if you backfill the edges around the pool with stone or dirt and the walls are not braced, they will shift and start to cave in. The bracing is pretty simple and doesn’t take very long, and it also makes a great scaffolding to stand on.
The key here is to have a good relationship with the pool builders so they know exactly what you need. You have a lot more options in the pool with no water. By using color hardener you can pour the coping with a different color border at the same time you are pouring the pool deck. This is next to impossible if there is water in the pool, not to mention much more economical than forming and pouring the border separately.
To achieve this we use a groover edger to get the desired border width. We position a 1-by-6 piece of lumber an inch from the top of the foam so we can run the edger on the outside of the foam. This groove gives us the space we need to separate the main field color from the color hardener border. You also can just leave the border the same color as the field, which is probably a good method for beginners. The process for texturing the coping face is the same as we discussed earlier.