

For me, one of the most influential theories of math is called the Cartesian coordinates. The adjective Cartesian refers to the French mathematician and philosopher René Descartes who published this idea in 1637. Cartesian coordinates are the foundation of analytic geometry, and provide enlightening geometric interpretations for many other branches of mathematics, such as linear algebra, complex analysis, differential geometry, multivariate calculus and group theory.
A familiar example is the concept of the graph of a function. Cartesian coordinates are also essential tools for most applied disciplines that deal with geometry, including astronomy, physics and engineering. They are the most common coordinate system used in computer graphics, computer-aided geometric design and other geometry-related data processing.
The Cartesian coordinate system in two dimensions (also called a rectangular coordinate system) is defined by an ordered pair of perpendicular lines (axes), a single unit of length for both axes and an orientation for each axis. (Early systems allowed “oblique” axes, that is, axes that didn’t meet at right angles.)
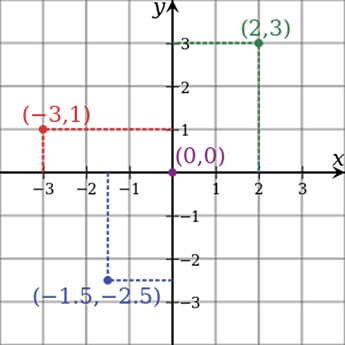
The lines are commonly referred to as the x- and y-axes where the x-axis is horizontal and the y-axis is vertical. The point where the axes meet is taken as the origin for both, thus turning each axis into a number line.
For a given point P, a line is drawn through P perpendicular to the x-axis to meet it at X and a second line is drawn through P perpendicular to the y-axis to meet it at Y. The coordinates of P are then X and Y interpreted as numbers x and y on the corresponding number lines. The coordinates are written as an ordered pair (x, y).
With that said, until this point all my articles have been about the basics of basic math. I have taken layout one step at a time, building up to this moment. This is where my secrets start to appear. It’s not just about layout anymore — it’s more about plotting points.
Practice makes perfect
Although it might take a while for this idea to sink in, I can promise you I do this on a regular basis and there’s no limit to what you can draw once you understand this theory. In truth, I don’t completely adhere to all this theory’s rules. I have simplified it and created a great way to layout large medallions in perfect symmetry.
|
|
|
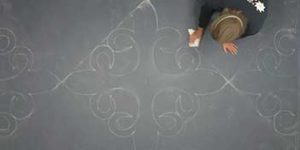
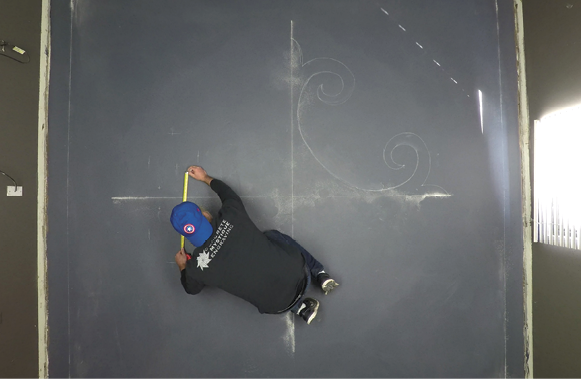
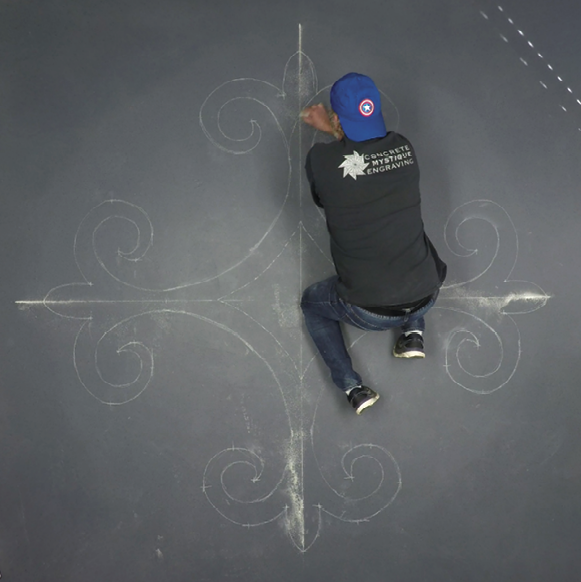
Let’s dig into how we can use this theory. I hinted at some of this with my last article on fleurs-de-lis. Like the last two articles, start by making a big “X” in the middle of the floor. Now the space is separated into four quadrants. You’ll begin by drawing your design correctly in one quadrant twice and then mapping the other three. In the end, you will have drawn the partial fleur-de-lis that comprises the design eight times, twice in each quadrant.
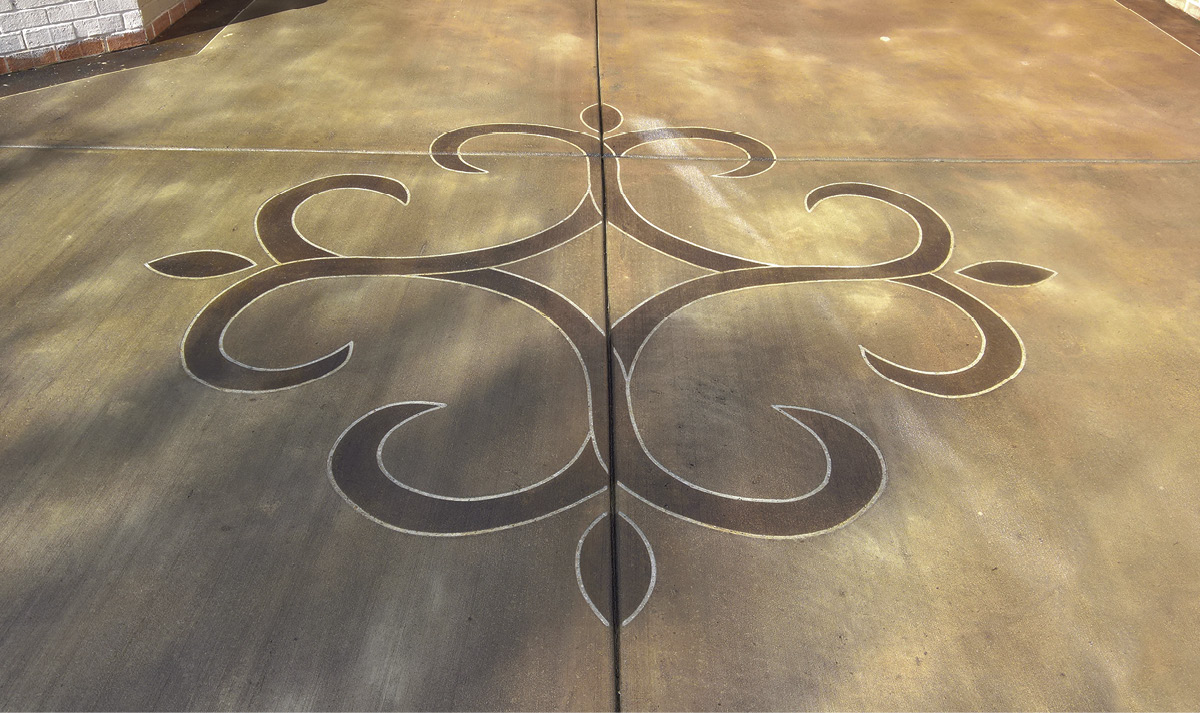
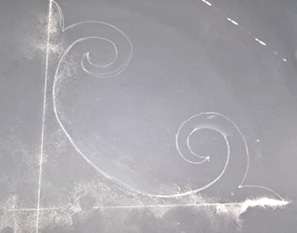
For this article, I used a recent design I did where I took the theory of a fleur-de-lis and added a twist to it. I started by deciding how large I wanted my medallion. In this case, it ended up being 8 feet long through the diagonal. I measured 4 feet out from the center of my X. Then I picked my first line to start drawing and drew the beginning of a fleur-de-lis. I can’t teach you how to draw a perfect curve. It takes lots of practice, erasing and redrawing until you get it right.
The plot thickens
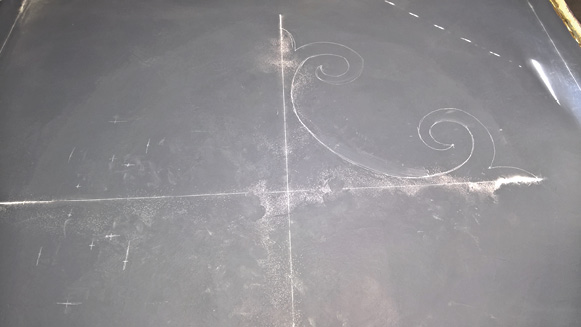
Once you create one side of the image, you can plot important points from it. The more points you plot, the easier it is to draw the other quadrants. Typically, I plot out points based on the outside edges of the image.
Just like a computer, the actual Cartesian coordinates require points. But I don’t need as many points plotted as a computer. I just need enough to be able to duplicate the original image. For this design, I plotted eight points (but I suggest you plot more like 10-15 to make it easier). Those same eight points are plotted on each quadrant twice.
Imagine the points in inches. The first one is for how far away the point is from the horizontal line and the second measurement is for the vertical point. For this design, all the plot points using x, y axes as coordinates are:
0,48 – 3,38 – 10,41 – 18,34.5 – 12,31 – 9,33 – 1.5,24 – 12,12
To the point
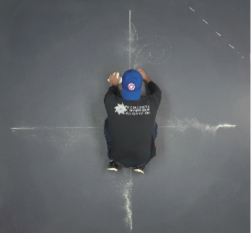
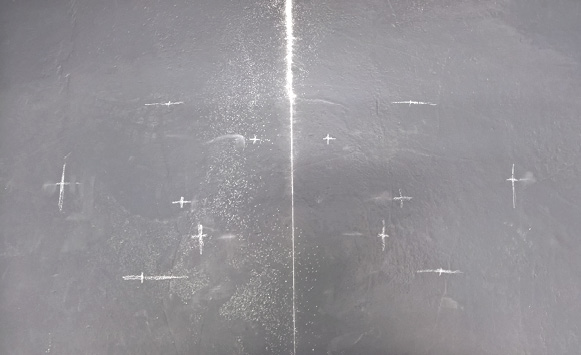
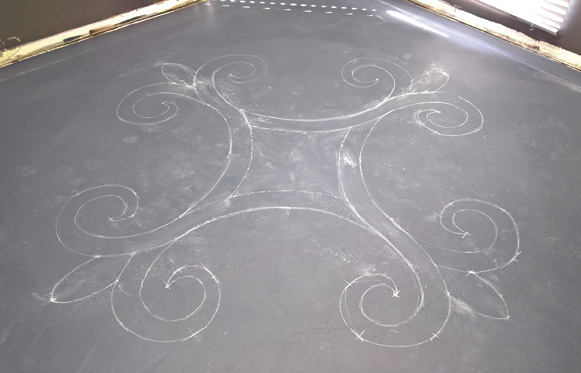
Did I lose you? Let me explain those numbers. In the second photo down on the right, you see a bunch of little marks. Each mark is a plot point of the original image. The first one — 0,48 — means that I started on the vertical line 48 inches from center. The second one is 3,38. I measured 3 inches from the horizontal center and then 38 inches up the vertical line. With 10,41, I measured 10 inches to the horizontal line and then 41 inches up the vertical. And so on.
So you don’t get confused, plot the same measurement in each quadrant as you proceed. For example, for the second mark, plot 3,38 seven times before moving on to the 10,41 mark. This will not only make the plotting procedure simpler, it will speed up the process.
In my imagery, you only see six distinct marks instead of the eight I mentioned. One of the marks that’s hard to see is on the vertical line at the tip of the design. The other is close to the center of the design where the opposite sides of the quadrant meet.
Finishing touches
To finish this design, I had to draw the curve that combines each fleur-de-lis section. After I finished drawing the design’s main areas, I went back in to add a border in the center of it. I did this by measuring the width I wanted and plotted a bunch of little points that I followed so I could accurately draw a curved line. This isn’t something you have to do but I like everything to have a consistent width. Just to add more flair, I finished off some of the curves to create a twist to my design, pun intended.
In the video for this article, I didn’t go in a perfect order around the quadrants like I should have. I did this on purpose to show you it doesn’t matter. If the points are identical, the design will come together when you are done.