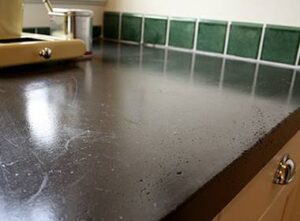


This topic came out of a recent post I made on my Facebook page, Sullivan’s Corner – Troubleshooting Decorative Concrete at www.facebook.com/sullivanscorner, regarding pinholes in a microtopping. I had posted some pictures of a microtopping project with severe pinholing across the surface and stressed that “the proper mixer, blade or paddle, along with the mixing process, can make a big impact in pinhole development in the overlay.”
I got some good questions from the post, with one in particular catching my attention: What type of mixer should be used when working with these types of decorative overlays?
It got me thinking about how much of what is taught and printed regarding these products focuses on surface preparation and installation. Obviously, those steps are important, but the ancillary issues — like mixers and mixing — are often glossed over or ignored completely.
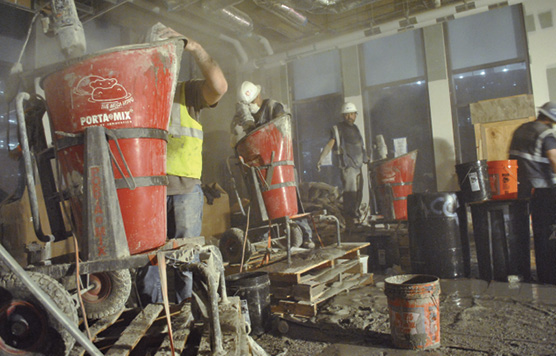
Too often mixing decorative overlays becomes an afterthought or path of least resistance process. This is the drill and paddle I have used for years, so it must be OK. Worse yet, and I am guilty of this, those of us on the training and manufacturing side default to whatever mixer is provided when we show up for a product demonstration. If the demo or training is close to home, then bringing the right mixer is less of an issue, but I don’t know many who travel with a stand mixer as checked baggage. After all, if it spins and the material gets mixed, what is the difference?
Well, I’m here to tell you there are many differences, and in some cases they can make a significant impact on the long-term performance of the material being mixed. Do you know the rpm or torque of the mixer you use? Do you know if the mixer and blade you use are designed for liquids, thin mortars or thick patch materials? Lastly, do you know if your blade mixes from the top down or bottom up?
Keys to success when mixing
“The two keys to successfully mixing overlays are consistency and efficiency,” says Jason Ryan, business development manager for Cement Colors in Fort Worth, Texas. Ryan, a technical expert on decorative overlays, has been training installers on proper overlay mixing and installing technique for years.
“A lapse in either of these [mixing consistency and efficiency] will almost always yield a sub-par result,” he says. The speed and efficiency of mixing become more important as the cement content and complexity of the mix increases, meaning a mixer that is sufficient for a knock-down spray texture may be inadequate for a self-leveling overlay.
What to look for in a mixer
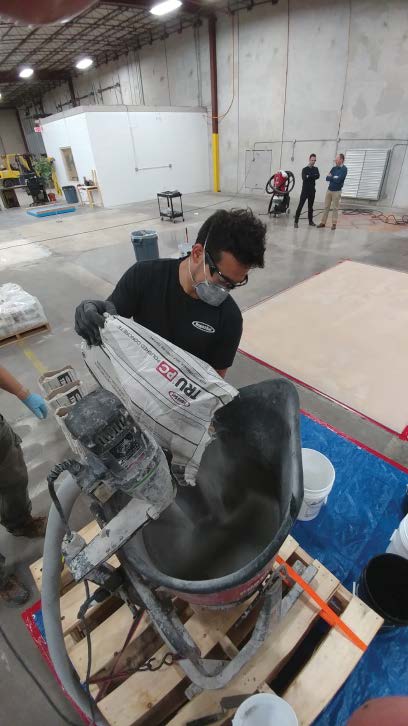
Edward Kientz, managing director of BN Products USA, is another expert when it comes to mixers for the decorative industry. Based in Wickenburg, Arizona, BN has been manufacturing mixers for the concrete industry for years. “Most people just grab their drill and insert a paddle,” says Kientz. “Drill motors are not designed for operating at long cycles and under heavy torque. This is where a mixer can make all the difference.”
He adds that key elements to look for include a soft start, to avoid getting material all over you and the surrounding area, as well as a high-torque motor that provides enough power.
According to Ryan, the ultimate determining factors when selecting a mixer is the scope and size of the job in conjunction with the type of overlay being installed. He recommends mixers with high shear and high torque that spin at no less than 400 rpm. “Low-speed mortar mixers and hand drills are usually not up to task,” he says.
Cement-based materials exotherm — give off heat — once water or liquid activator is mixed in. The heat reaction increases exponentially with the mass of product being mixed. “An increase in mix time due to slow and inefficient mixers will not only eat up the time available to finish the material, but will also work as an accelerator,” he says.
It’s important to note that more viscous, noncomplex systems, like microtoppings or spray deck coatings, don’t have the tight window like self-leveling or stampable overlays do, but the same principles apply regarding fast and efficient mixing. A couple of other things to consider are variable-speed mixers which make adding material less messy as the mix container gets full, and investing in multiple sizes and types of mixers, especially if you work with different types of overlay materials and project sizes.
Mixing blades and paddles
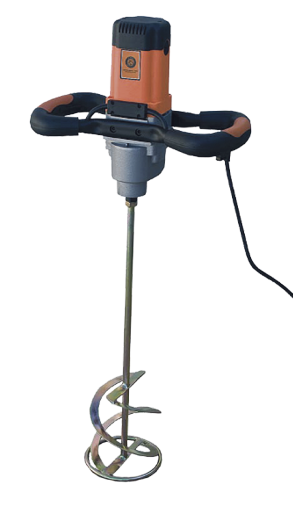
Second in importance to the mixer itself is the mixing blade or paddle. After all, it’s the implement that physically contacts the mix.
Mixing blades range from a thin-gauge whisk to heavy-duty plate at the end of a stick. Each shape is designed to move certain materials in a certain way. “Grout, epoxy, concrete, plaster, roofing coatings, stucco, paints are all very different,” says Kientz. What is often lost is that the blade itself is not doing the mixing per se. It is moving the material into and against itself which facilitates the mix.
Based on my experience, the most popular mixers on the shelves at concrete distribution outlets are the type with round segmented blades placed horizontally along a vertical shaft. Interestingly, these are designed to mix liquids, not heavy-bodied cement-based products.
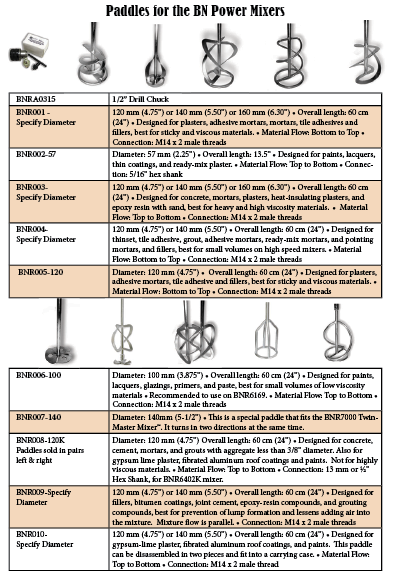
The best blades for cement-based overlays are helical blades which consist of two or more spiral-shaped blades twisted around a vertical shaft, usually including a flat blade around the bottom. “Helical blades provide agitation on multiple axes,” Ryan explains. “The rotation of the blade circulates the material around a vertical axis while the helical shape circulates the material around a horizontal axis. The two combined efficiently disperse materials as well as leave little refuge for pockets of unmixed material.”
The shape of the mixing paddle determines how the material being mixed will flow when the mixer is spinning in a clockwise direction — pulled from the top down or pushed from the bottom up. In the case of a bottom-up mixing paddle, there are typically two blades that wrap counterclockwise around the center shaft. This point brings us to the pinholes, which started this whole conversation.
A blade that pulls and mixes from the top down will suck air into the mix. Extra air increases the chance for pinholes, voids and blisters as the air escapes once the material is placed and starts to set.
Lastly, don’t forget to match the blade shape with the mixing container. Mixing blades with a taper or rounded tip don’t work well with flat-bottomed mixing containers. Ryan recommends tapered mixing drums, without corners, to avoid material collecting, which can result in inconsistent mixes and dry clumps.
Common mixing issues
Common issues associated with mixing are often associated or confused with poor placement issues. According to Ryan, these include striping, tooling marks, pinholes and craze or shrinkage cracking.
“When the wrong mixer is used or too few mixers are used, you extend the time between batches,” he says. “The properties of these materials can vary greatly over the course of minutes so when you can’t deliver batches back-to-back, you end up with bands of varying color and density down the length of the pour.”
This is especially critical when it comes to self-leveling overlays as they have very complex chemistry and tight water demand. “Superplasticizers used in these materials require complete dispersion to be effective,” Ryan says.
Imagine them as ball bearings that surround each cement particle, temporarily suspending hydration and freeing up water to help material flow. If these aren’t completely dispersed in the mix, then you’ll lose much of the self-levelling and healing properties needed to close up tooling marks. “It really comes down to having the right number and type of mixer for the project and material. Modern overlays are more than just cement, aggregates and water,” he says.
“If not properly dispersed, more water may be needed to get the desired properties out of the material, which leads to surface cracking.”
According to Kientz, “The most common mistake is using a drill and burning up the motor to where you have to buy a new drill. Buying a mixer and the right paddle pays for itself quickly.”
It’s important to remember that no amount of equipment can ever replace proper planning. The best mixing equipment is useless if you don’t have the right number of properly trained people to operate it. Managing customers’ expectations remains a key to success, even if you operate the best equipment money can buy.
Mixing equipment has come a long way in the last decade regarding sophistication and efficiency. I encourage installers who are currently in the business, and those who are looking to get into it, to do their research and understand that application of overlays goes beyond surface preparation and material placement. “When the mix is done wrong, it can turn a job from being a profitable experience to becoming a loss for the contractor,” says Kientz.
The right mixer and blade are more important to the success of the project than most realize. It may be time to retire your handheld drill and invest in a mixer made specifically for overlays. Your next project’s success may depend on it.