As polished concrete has increased in popularity, there has been a tremendous number of innovative products brought to the market to help meet customer expectations. One very important product is polyurea. It’s a two-part liquid-applied product that sets up quickly, gets hard enough to polish. This product comes in a wide variety of colors and viscosity levels.

Pretty much every polished concrete project uses polyurea for joint fill. We do this because traditional epoxy joint fillers never get hard enough to polish. Since over half of the polished concrete projects are installed as remodels, there is a wide variety of issues that need repairing. Everything from large spalls up to 3 inches in diameter down to pinhole voids created by air or sand rollout are repaired with specialized polyurea repair products.
This article will help demystify polyurea. We will also discuss best practices, and cover some potential issues that can arise during installations.
Joint fill uses
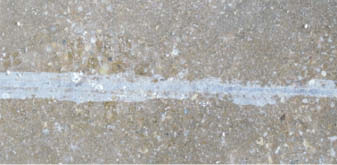
Polyurea is largely used to fill joints. On every joint fill product, you see numbers. These numbers are typically 80s or 60s. It’s important to understand these numbers and what bearing they have on your product selection.
The numbers represent a measurement called “shore hardness,” which is a fancy name to measure how easily a material indents or depresses. The higher the number, the harder the material. The flip side, though, is that the higher the number, the less it’s able to stretch. Hardness is important because of how it affects a project and meets customer expectations.
Control joints are placed in concrete slabs to provide intentional weak spots for the concrete to crack as it shrinks. These joints are typically spaced between 10 and 20 feet apart. Most slabs placed in the last 50 years have control joints cut into them. These joints are typically filled on exposed floors.
Since concrete absorbs and releases moisture from any available source (including the air) it’s always swelling and shrinking throughout the year. In projects like distribution centers or manufacturing plants, the joint fill needs to be rigid to prevent forklifts from constantly breaking the edges of the joints as they go over them hundreds of times a day. In this environment, you’d want a high shore hardness joint fill. It’s less important that the joints be completely closed than it is to have a rigid and flat surface based on the traffic.
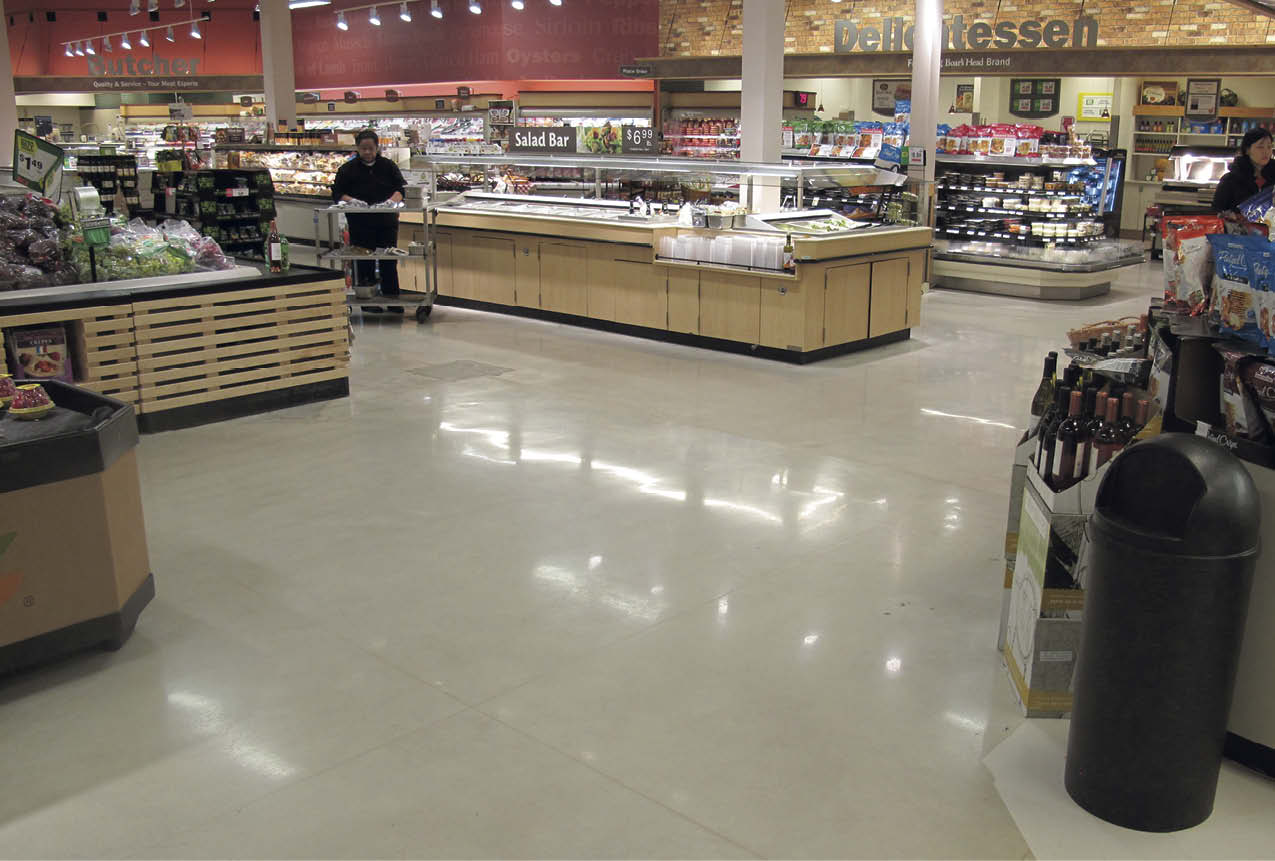
On the other end of the spectrum, you have restaurants, schools and grocery stores. In these environments, there’s not typically a tremendous amount of heavy vehicular traffic constantly going over the joints. Before you say, “Wait a minute. You haven’t seen my grocery cart every Sunday afternoon!” please consider that an extremely full cart weighs about 200 pounds where an average forklift weighs between 7,000 and 8,000 pounds.
In these environments, it’s much more important to have a joint that remains closed than it is to have one that remains flush with the surface. The softer joint fill, with the lower shore hardness, can stretch more which will keep the joints closed as the concrete shrinks. The softer material, once it’s stretched out, will have a slight depression in the joint.
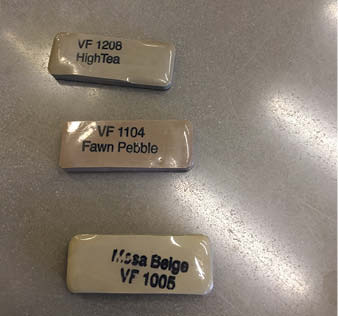
All major joint fill manufacturers make dozens of color packs for their products. This is an extremely important characteristic. Most customers want their joints to blend with the surrounding concrete floor. Rarely do you get a project where the joint colors are intended to be different as a design characteristic.
Typically, when a project is started, the first thing completed is a sample. This allows customers to see a good representation of what the floor will look like when completed, as well as allow the contractor to determine the best process to complete the floor to the customers’ satisfaction.
I carry a joint sample kit with me. I take out multiple chips and place them on the floor. Then I remove the samples until I get to a color that the customer is happy with. Typically, the base material is already on-site and the color packs for the control joints are all that needs to be shipped to the job site.
No matter the color, there’s a polyurea filler that will match the floor. Most customers want the joints to blend in with the surrounding concrete floor.
Grout installs
Polyurea can also be used as a grout fill. This material is distributed as a liquid, but it takes a lot longer to set up and get hard. This allows the material to be placed over a larger area with a trowel or a squeegee. It can be used to fill in small holes caused by air, rock or sand rollout or damaged areas on the surface.
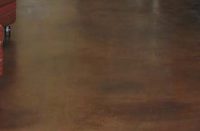
As this material is also colored, the same color selected for the joint fill can be ordered for the grout material. When grout is properly applied and polished, the color is a great match to the concrete and is very difficult to see where grout has been installed.
Typically, grout should cure for six to eight hours before grinding the surface. This allows it to fully harden down in the small holes. If the material is ground before it’s fully cured, it can pull out of the holes which obviously defeats the entire purpose.
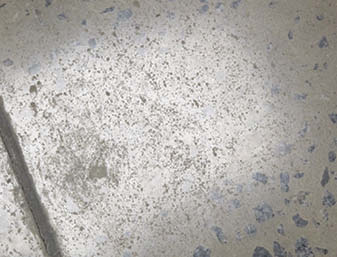
Grout materials and the labor for installation are a bit expensive so most customers don’t opt to do the entire floor. The only exception is when large aggregate is exposed by the grinding process. The small air voids trapped by the aggregate when the concrete is placed that get exposed with the deeper grinding need to be filled.
Grout is the only way to consistently fill these voids. If they aren’t filled, they catch dirt and grease, and with regular traffic the holes act like potholes on a road. The edges break over time and the holes get larger. Using grout to fill these voids is easy and virtually undetectable when complete.
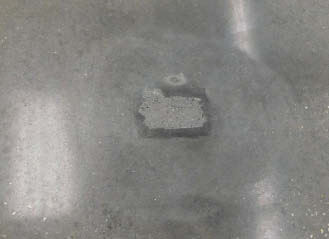
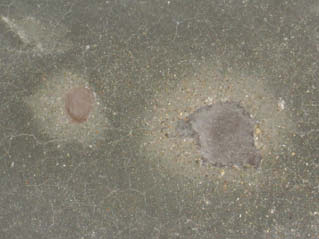
Spall repairs
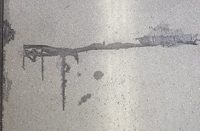
On every remodel project you’ll find spalls. Spalls resemble miniature ponds. They are holes with sloping edges typically shallower at the perimeter and deeper in the middle. They’re common when walls or other fixtures that were anchored into the concrete are removed. They are also commonly caused by dropped tools or even screws imbedded in the tires of lifts.
Because of the small size and shallow edges, these types of repairs aren’t ideal for overlay or cementitious repair materials. Applying a liquid material like polyurea to the hole is the perfect solution. The material used for this type of repair typically sets up in 10 to 20 minutes, allowing the surface to be shaved and the polishing process to continue over the top of the repair.
However, these materials have a size limitation. Anything larger than 3 inches tends to curl up at the edges. This allows the repair to come out entirely with traffic and cleaning. Spall repair products are easy to install, and by matching the surrounding concrete they are harder to spot when looking over a floor.
Potential joint fill issues
Now that we’ve reviewed valuable uses for polyurea products, let’s investigate when you need to be careful.
With joint fill, there are three major issues that regularly occur.
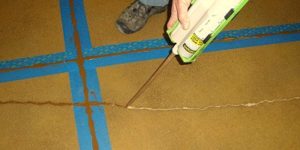
The first is joints that fail because the contractor didn’t thoroughly clean them prior to installation. Some contractors use a saw with a vacuum attachment and run it down into the joints prior to filling them. Others use a wire brush on an angle grinder. Still others wield knives or five-way tools with shop vacuums.
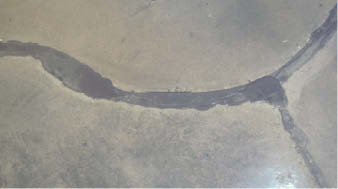
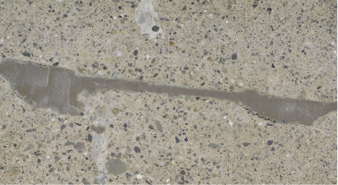
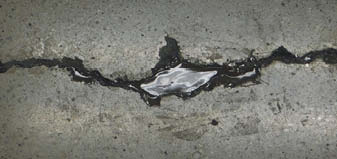
No matter the method, you must get all the dirt out and everything off the joints’ sidewalls. If the sidewalls are still dirty when you install your joint material, the joints will separate cleanly from one side as soon as the concrete starts to shrink. These joints are easy to remove and often come out completely when the floor is cleaned. Obviously, an open joint is both a safety and maintenance issue.
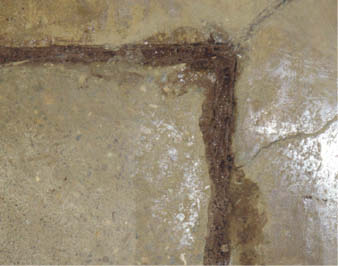
The second issue involves residue along both sides of the joint. This occurs when contractors wait until later in the polishing process to install their joint fill.
When installing joint fill, the only way to guarantee that the joint is completely filled to the top is to slightly overfill the joint to ensure there’s enough material in all areas. The overflow will sit on both sides of the joint. When the joint is shaved, a residue layer is left behind at the surface in the pores of the concrete. A grinder will easily take off the excess during the polishing process.
If you must fill joints later in the process, find a stain-preventing film (some manufacturers offer this) or use inexpensive Ivory bar soap (without dye in the soap) to create a soap barrier down both sides of the joint. If you use bar soap to create a film along both sides of the joint, this prevents the residue from getting into the concrete. With either process, the residue is kept out of the pores and the film layer is removed when the floor is cleaned with an auto scrubber without leaving a trace of the residue or the film protectant.
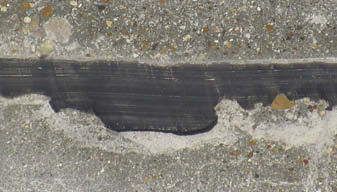
The third and final common joint fill issue is shaving joints too soon or shaving joints that are wider than the manufacturer’s tolerances. This leaves chatter marks and odd scrapes along the joint. These easily stain and the look is usually unacceptable to most customers.
Grout and spall concerns
There are two issues with grout installations. The first is when contractors attempt to install the grout without cleaning the floor or attempting to install grout without waiting until the pits and pores are completely dry. The second issue occurs when a contractor tries to polish the area before the grout has completely cured in the holes.
Both issues result in the grout pulling out of the holes you’re trying to repair. This is a major issue because the customer doesn’t want to pay for grouting a large square footage of the floor if the holes are still visible. This is an uphill battle that contractors never win.
It’s important to set your customers’ expectations here as there’s no way to fill 100% of all the issues. Typically, grout materials will fill between 80% and 90% of the issues in a floor. Setting this expectation verbally early, in writing and with a sample will eliminate a lot of headaches after the install. It will also ensure you’re able to receive payment for this costly repair process.
Common issues with spall repairs
There are also three common issues with spall repairs. One is when the contractor tries to install the repair product without first cleaning the damaged area. If the hole is dirty or filled with grinding dust, the repair will come out as soon as you grind or cleean the floor. Contractors usually use a wire brush attachment on a drill and a shop vac to first clean the spalls.
The second issue regularly seen is underfilling the repair. When you don’t fill the repair correctly, you can’t grind it smooth. This causes the repair to stand out on the floor.
The final issue happens when the contractor doesn’t do the repairs early in the grinding process. Instead, he waits until the project is nearly complete to install spall repairs.
You should install spall repairs before the last metal or transition tooling cut. This allows the surface to remain flush with the surrounding floor. You can then polish the repair like the rest of the floor. Don’t grind and polish the spall with a hand grinder late in the process. Doing this causes an unusual circular “halo” polish pattern around the repair.
Understanding polyurea and its potential uses should help you do a better job for your customers. When customers are happy, they’ll specify polished concrete more and the whole industry will continue to grow.