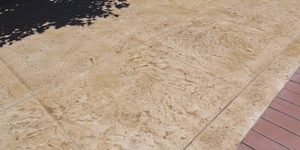

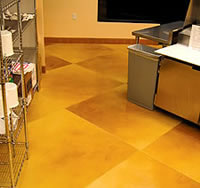
Many decorative concrete artists favor overlays as their canvas of choice. And the artwork that can be produced with these products is often breathtaking. So, it is especially unfortunate when cracks appear in an overlay.
|
|
|
|
What causes cracks in overlays? A number of things.
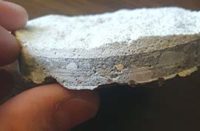
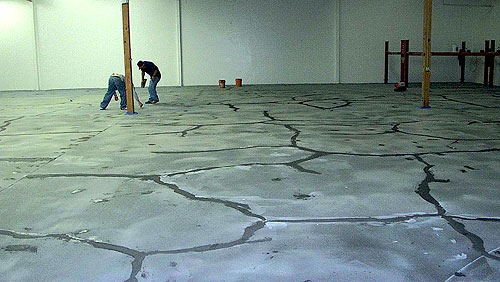
Most overlay experts agree that the most common crack-inducing culprit is the substrate, and there can be multiple factors involved. Expansion joints in the underlying slab that are not honored will telegraph through an overlay. But, more often than not, it’s movement in the substrate that will produce cracks in the overlay.
“No overlays are structural,” says Seth Pevarnik, manager of technical service at Ardex Engineered Cements. “If the concrete [below] wants to move, it can result in a crack in the overlay.”
The simplest solution is to prevent cracks before they happen — before you apply the overlay. Brian Vicari, owner of The Concrete Colorist Inc., says you should always examine the substrate slab and look specifically for areas that may cause issues in the future, such as cracks that are raised on one side (signaling up and down movement), wide cracks, expansion joints, utility trenches and prior patches. “Identifying these trouble spots will allow you to correctly address these areas prior to installing an overlay, hence preventing cracks.”
Another substrate problem that can come to haunt you is moisture vapor emissions. Dave Pettigrew, owner and president of Diamond D Co., says he can’t stress enough how important it is to control moisture. “You’ll open an ugly can of worms if you don’t. Vapor emission through a slab below a nonbreathable overlay can and will lift the overlay.” Again, prevention is paramount.
|
|
|
|
|
|
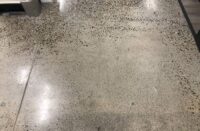
But even if you do everything right in preparing the slab before you apply the overlay, you may still get cracks. You may experience shrinkage cracks, often the result of applying the overlay topping incorrectly or too thick. External forces, such as wear, impact shock or environmental conditions, can also produce cracks in overlays. Thankfully, these kinds of stress cracks are usually hairline cracks.
Assess the problem first
It is important to assess the situation before you commence making any repairs to a cracked overlay.
Removal of the overlay and reapplication after the underlying problem is corrected is the most expen-sive and most labor-intensive solution, and usually, reports Pevarnik, not the chosen method. That leaves repairing the cracks or doing nothing, both options that certainly have their place, he adds.
Ron Borum, executive vice president of Crossfield Products Corp.’s Miracote Division, cautions that before you make a repair you should determine the reason for the crack or cracks in the overlay, and you should have some knowledge of the overlay material installed. Knowing the root cause of the cracking will help direct you as to what kind of repair technique to use, he says. Monolithic, self-leveling products are considered the most difficult to repair, primarily because it is more difficult to camouflage a repair on these surfaces. Stampable and stencil-grade overlays, as well as microtoppings and splatter/knockdown overlays, are considered more easy to repair because you can work back to a joint or use the textured finish to help hide crack repairs.
Repairing large cracks
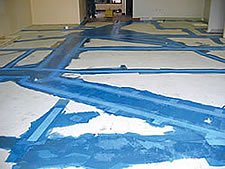
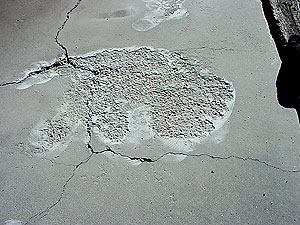
If your crack is wider than a hairline, you will have some prep work to do before you fill it. You will first need to decide whether you are going to repair the crack and try to hide it or whether you will repair the crack but let it become part of the overall design.
If the crack you are repairing is from an existing joint in the substrate below that wasn’t honored when the overlay was applied — say an expansion joint — it might be easier to work the crack into the design.
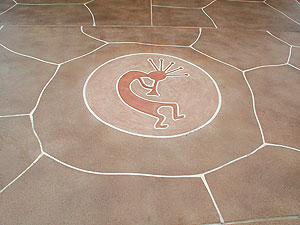
As Borum observes, when you decide to work the crack into the design you will be leaving it exposed, but it can work for you as a relief joint that helps maintain the function of the overlay. In fact, aesthetically, if you choose this option you may want to induce additional cracks. When doing this, he says, you want the additional cracks to be random, so as to hide the naturally occurring crack.
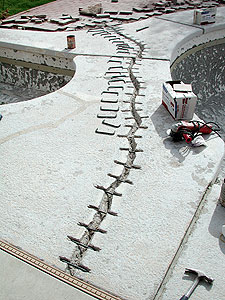
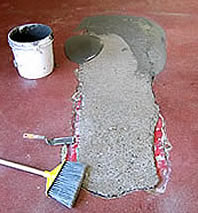
Chasing a large crack is important in preparing the crack to be filled. Some contractors use a router, others saw-cut through the overlay. What you fill the crack with depends on the overlay used and your desired outcome. Some overlay manufacturers offer repair kits; most do not. But, as Borum explains, the kit is not the most important factor: using similar or like materials is.
If the crack is going to remain a functioning joint, you might want to fill it with a semirigid epoxy or elastomeric joint material — something that is flexible. You may want to use a colored product that blends in somewhat, or use a contrasting color for graphic line effect.
Repairing hairline cracks
Fortunately, most cracks you’ll encounter in overlays are likely to be hairline cracks. As Mark Donaldson, owner of Skookum Floors USA Ltd., points out, chasing hairline cracks is too aggressive and would only make them more noticeable. So the job of repair is a little less intensive, but it is that much more important to use the proper material to fill hairline cracks.
“Usually a very fine, nonsanded grout or concrete patch can be used. It can be feathered into the crack similar to grouting a tile joint,” Donaldson explains. Once the grout has set up, you would use a sponge and clean rag to wipe away any residue.
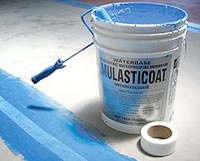
Another technique is to just apply another coat of sealer over the whole floor. If the crack is tight, this can often do the trick.
If the hairline cracks are still apparent, you can use a pigmented sealer and fog it on around the hairline crack. This does two things: It helps seal up the crack, preventing water from getting in the crack and darkening it. It also helps to blend the finish into the rest of the floor. (This technique does take a little practice.) Finish up by applying a clear topcoat.
|
|
|
|
Pevarnik says an option chosen frequently with regard to hairline cracks is to do nothing. The hairline cracks can add an antique look to the floor that some people find desirable. Filling and patching cracks, on the other hand, is still a patch and can make the floor look worse. “Sometimes it’s better to leave it alone,” he says.
One way to help a customer decide the best course of action when it comes to hairline cracks is to make up a sample board to illustrate how a repair might look.
Hiding crack repairs
Camouflaging crack repairs requires skills in faux finishing. “The outstanding artists out there can make these repairs virtually unseen,” Pevarnik explains.
Donaldson recommends using a variety of artist’s materials, such as acrylic paints, markers, water-based paints and an array of paintbrushes. “A color match takes an experienced eye, but usually it is handy to have an artist’s kit with a variety of colors. Usually, by adding water and using different layering techniques and faux finishing as necessary, you can blend in a crack with its surroundings.”
After the repair is made and blended in, it is recommended that the whole floor be resealed. A consistent sheen across the whole surface will also help to hide any repairs made.
No matter what technique you use to repair a crack in an overlay, remember that a crack can be repaired and masked, but never really completely hidden.
As Ira Goldberg, president of Beyond Concrete, points out, “There is no 100-percent-perfect solution. Some of the successful methods I have developed have taken many years of trial and error.”
And, I suppose, that really is the crux of the matter. Contractors have developed a variety of techniques to repair cracks in overlays — different methods for different situations. What appears to be consistent across the board, however, is the need for an artistic eye, finesse and practice.