Ingredients
S-12000 Heavy Duty Degreaser
S-1300 Pene-Krete
S-1800/S-1801 Super-Stamp: Gray or White
S-2000 Integral Color
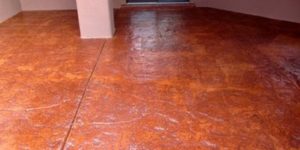
S-9500 Color Stain
S-1710 Liquid Release Agent
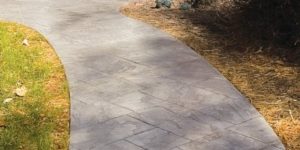
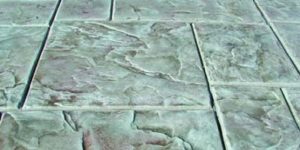
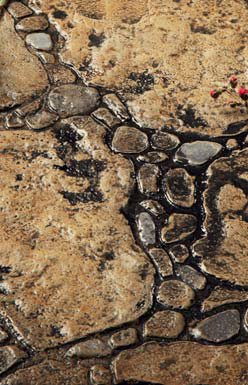
Proline Texture Stamp:Random Garden Stone Pattern
S-200 Super-Scrub
Super-Krete sealer of choice
S-16000 Flex Smoother
S-19000 Gauge Rake, set with 1/4-inch Cams
Directions
All existing concrete surfaces must be structurally sound, solid and completely clean. Remove all sealers, curing compounds, curing agents, dust, dirt, oil and other contaminants that may act as a bond-breaker.
Mix each bag of Super-Stamp with 4 quarts to 5 quarts of clean water per bag. Additional water may be required in warmer climates to achieve a pancake-batter consistency. Less water may be used in cooler weather or on cold concrete. This system does not require a surface bonding agent.
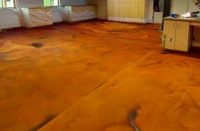
Mist the concrete surface with water and, from the wall out, apply Super-Stamp with a gauge rake at a 1/4-inch thickness evenly over the surface at a rate of approximately 25 square feet per bag. Use a Flex Smoother to remove any lines that may appear from the gauge rake application. A light mist of water on the overlay will assist in finishing. Remember to honor all expansion joints by marking them with a trowel, and clear Super-Stamp out of those areas completely, following the line of the joint from beginning to end.
Allow Super-Stamp to set so that it is pliable, but do not allow Super-Stamp to set completely before the surface is stamped/textured. Overlay is to be pliable, but not sticking to the touch or tools.
Using a hand-held sprayer, spray Liquid Release Agent onto the stamp tool and onto the surface area to be stamped simultaneously. Do not spray Liquid Release Agent too far ahead as it will evaporate before you are able to get to the area and stamp it.
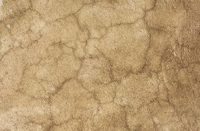
Lay the stamps onto the surface, and either walk or tamp in the impression. Then remove the stamp, move to an unimprinted area and repeat the process until the entire surface has the impression of the stamps. Be sure to lock the stamps tightly together to create your pattern when stamping. Pay attention to the lines, joints and details of the pattern when placing the stamps side by side. Always check the impression before you remove the stamp to ensure the pattern has been fully compressed into Super-Stamp. Allow Super-Stamp to completely dry for at least 24 hours.
On the following day, tool out the unclean grout lines, and use a diamond cut blade to open the expansion joints. Sweep or blow off all debris.
Wet the stamped area with water and clean the entire surface with Super-Scrub using a broom. Rinse surface thoroughly with clean water.