
Stenciling and coloring go hand-in-hand to create works of art in concrete. Acid- or water-based stains are the most widely used — and most versatile — materials for coloring stenciled projects. Acid stains tend to produce muted, earthy colors, while water-based stains are available in brighter, more vibrant colors.
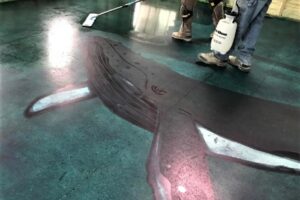
Perhaps the simplest coloring technique is to apply stain to the concrete, apply a stencil and then sandblast or etch away the exposed surface, including the stain. In the finished project, the stained color will remain in the pattern protected by the stencil, while the background will be the original color of the concrete and any aggregate exposed during the process.
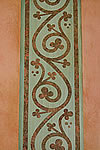
The mirror image to that technique is to create a resist. Apply the stencil. Then apply a sealer to the exposed areas, whether sandblasted, etched or plain finished concrete or overlay. Remove the stencil and apply the stain. Only the unsealed areas, the pattern of the stencil, will be colored.
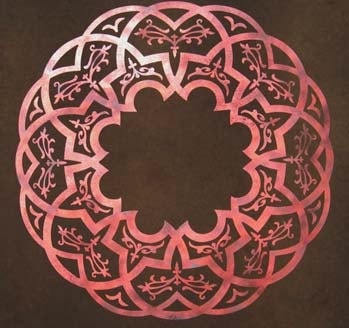
Melanie Royals of Modello Designs also uses adhesive-backed Modellos to create resist patterns. The design area can be left untouched or colored with acid or water-based dyes. The area is then sealed with a concrete sealer before removing the Modello pattern. After removal the surrounding area can be acid-stained. The sealed areas of the design resist the stain, resulting in a lighter-colored design on a darker field. The technique looks complicated, but the effect is actually quite easy to achieve.

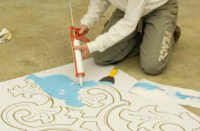
Multiple colors of stain may be added to various parts of the design. Keep in mind, though, that liquid colors may migrate. Porous concrete can wick the liquid, drawing it under the stencil. The solution is to use a gelling agent such as Stain Mule stain carrier from Surface Gel Tek or Modello Gel-lo from Modello Designs. Aqueous gels can carry acid-based, water-based and powdered coloring agents. Once the color is neutralized according to the manufacturer’s instructions, the gel can be rinsed off.
Contractors can apply many colors to a single stencil by “weeding” the stencil. Tamyrn Doolan of Surface Gel Tek explains, “I cut the whole design into the stencil, but only punch out the parts of the pattern that will be, for example, blue. I apply the blue and then move on to other colors in order.” Doolan applies a temporary sealer to previously colored sections to prevent mixing colors.
Royals sometimes sprays a diluted stain over a finished project where a border has been etched with gelled acid. The stain settles into the deeper areas of the etch to add more color there.
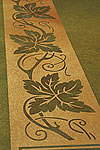
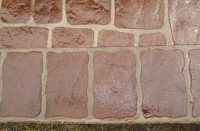
Contrasting colored overlays are achieved by applying the base coat in one color, placing the stencil and applying the top coat in another color. Stains can also be used. For example, applying a stain by hand to random stones or bricks in the pattern makes it look more natural and more interesting. Grout lines are also enhanced by the addition of stain.
Brickform’s Glen Roman described an interesting coloring technique to be used on fresh concrete or an overlay of 1⁄4 inch or more. After the stencil is placed, throw on a dry-shake color hardener and float it in. Then run a texture roller over the top of the stencil and push it into the surface. When the stencil is lifted, the texture will be visible.
Finally, sealers impact the look of the colored project. Utah contractor Clark Paepke heightens contrasts by staining the concrete and sealing it with a high-gloss sealer before sandblasting. After the sealer and stain are blasted off the exposed areas, he reseals them with a matte sealer so the glossy logo stands out even more.