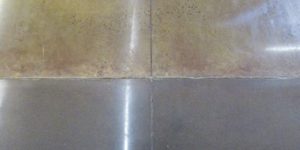
Few things can compare to freshly sealed concrete. Hues of hidden color explode the minute a coat of fresh sealer makes contact with the concrete’s surface. Customers smile with satisfaction and concrete artisans swell with pride. The end result, when done properly, is a shiny hardscape that complements any outdoor living space. Unfortunately, though, not all decorative outdoor concrete projects end this well. Some turn milky or flakey on the surface not long after the sealing process. The reasons why this happens are no longer a mystery.
Nothing can tarnish a concrete work of art quicker than sealer that goes bad. I know the disappointment myself all too well. After doing this work for several decades, I’ve had to scratch my head and ask myself why a recently sealed project sometimes looks appealing while other times it looks anything but. Even though I’d practice 100-percent consistency and follow manufacturers’ recommendations, often my sealer would fail. Nothing, and I mean nothing, is more disheartening than watching an otherwise amazing work of effort become tarnished by a thin film of failed sealer.
Sealing new concrete
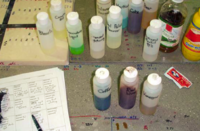
Sealing concrete for the first time is less complex than resealing an existing slab. In most cases, following the manufacturer’s recommendations results in a good bond to the concrete’s surface. Regardless of whether the sealer is water- or solvent-based, three key steps ensure long-lasting sealer-to-concrete adhesion.
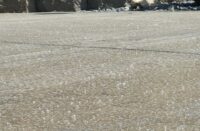
The first step is to ensure the concrete mass is cured and completely dry before applying sealer. Enemy No. 1 for concrete sealer is moisture. Moisture still being expelled from uncured concrete can become trapped between the thin sealer and the concrete surface. Our industry commonly calls this “blushing.” Trapped moisture can also result from not allowing the surface to completely dry after cleaning. Most often, trapped moisture comes from impatience, as contractors push to finish something that needs more cure time.
The second step to sealing success requires applying thin coats in ambient conditions. The first pass of sealer should be so thin that the concrete barely looks sealed. The outside temperature and the concrete surface should be cool enough that the thin layer of sealer cures without overinfluence. Excessive heat adversely influences how the sealer cures and can make it bubble. Only after each layer is dry should a subsequent application take place. Rushing, or stacking new sealer over wet, rarely works in a decorative concrete artisan’s favor.
The third step is equally crucial. The newly sealed concrete needs to harden before any foot, car or pet paws touch it. Keep water off the fresh surface for as long as possible. Be mindful of the weather and make sure a home’s watering system (if it has one) is turned off in that area.
Be sure to seal not only the concrete surface but also the slab ends or edges as these areas are often overlooked. Unsealed edges allow moisture to wick in and be trapped just beneath the sealer when it tries to dissipate. Encourage a landscape design that allows for an irrigation buffer between the sod and the concrete’s edge.
Resealing existing concrete
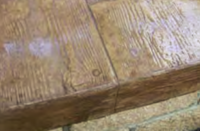
The majority of resealing challenges pertain to solvent-based sealers. Customers falsely believe a new coat of sealer is the only step to “fixing” distasteful or unappealing decorative concrete. After all, customers recall how nice and shiny their concrete once looked and assume a fresh coat of sealer will make their hardscape look new again. This, my friends, is rarely the case. The fact is, a new layer of good sealer will not fix multiple coats of bad sealer. Sure it will look nice long enough for a check to clear, but the long-lasting effect is less than desirable.
You muse address failing sealer, but this does not usually require stripping. Far too often I read or hear sealer remedies that involve stripping perfectly good sealer. It’s expensive to remove sealer, so why extract old sealer if it isn’t necessary, right?
Resealing concrete is nothing like sealing new concrete. Sealing new concrete requires a good bond to a concrete surface. On the other hand, resealing a surface requires adhesion to an existing sealer. Applying new sealer is most often perceived as a new layer over an old one, but this should not be the case. Instead, visualize mixing over stacking. The new sealer must “mix” in order to release trapped moisture and reactivate previously applied sealer. The reactivation will melt undesirable “chalky” or “flakey” areas simultaneously. This reactivation requires more than a pump-up style sprayer.
Tricks of the trade
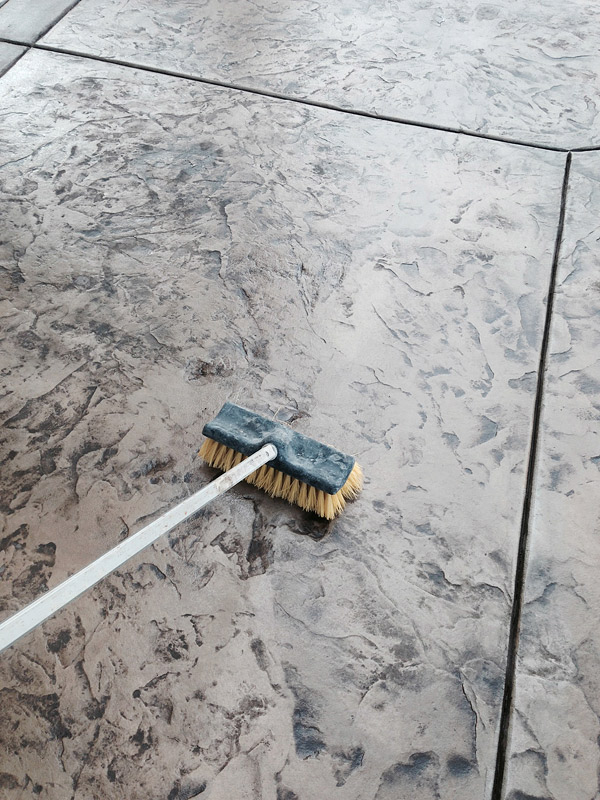
The secret to resealing is agitation. Pick an area of a manageable size and apply a coat of new sealer. Immediately agitate the surface with a chemical-resistant broom before moving on to another area. This agitation will not only reactivate the old sealer but will cohesively mix the two sealers.
I usually treat the troubled areas first, let them dry and soon after reseal everything else. Back-brooming with the chemical-resistant broom is beneficial beyond simple sealer reactivation. Back-brooming is a beneficial way to distribute puddled sealer from low-lying areas which is often the case in stamped concrete.
Finally, when sealing and resealing decorative concrete, use a nonskid additive if you want to improve traction.