
 |
 |
There’s a lot of misinformation and confusion surrounding delaminations in concrete. To help clear up things, let’s review different types of delaminations and associated repair options so you can use this information to better plan, manage or correct delamination issues.
In its simplest form, delamination occurs when the surface paste or top layer of cement on a concrete slab lifts and separates from the body below. Essentially, delaminations are blisters in the concrete. Just like a blister, the top layer of skin isn’t significantly changed.
There are two main causes for delaminations — air-related issues and water-related issues.
Air-related issues
The first question you should ask when you’re looking at a new slab is, “What is the air content?” as all concrete contains some air. Naturally occurring air, caused by small bubbles getting trapped by the aggregate spinning in a concrete truck’s drum during transport, is called “entrapped air.” Additional air injected into the concrete is called “entrained air.”
Entrained air on exterior slabs creates voids that allow moisture room to expand when it freezes without breaking the concrete. Entrained air should never be used on power-troweled interior slabs.
When looking at a specification, make sure the entrapped air content is 3% or less. If the air content is below 3%, you typically won’t have any issues.
If the air content is higher than 3%, these small bubbles will start to merge in the slab during placement while the concrete is still in a wet state. When troweling occurs and the surface paste is tightened up and closed, these larger air voids get trapped under the surface skin. As you can imagine, this trapped air forms a blister covered with just a thin skin of portland cement paste.
Water-related issues
The second major cause of delaminations is related to moisture trapped in slabs. Recently, I was called to a project where the concrete was placed in multiple smaller pours on a huge building. We’re lucky that the site had cameras that recorded the place-and-finish operations because without the video, I’d never have guessed the main cause for these delaminations was the contractor routinely getting on the slab early and trapping bleed water consistently across most of the pours.
The concrete was placed in the Northeast during winter. Each pour was setting up extremely slowly because of the temperature and the building process that called for the building’s walls and roof to be built before the slab was placed. This prohibited the concrete from being exposed to the sun or the wind.
The placement contractor got tired of waiting for the slabs to finish releasing bleed water and got his guys on the concrete early. This helped him get the job done while saving a bunch of money in labor not having crews sitting around getting paid to wait. There were 24 pours of between 10,000 and 20,000 square feet apiece. Evidence shows that all but two pours had early entry troweling.
By getting the power trowels going early like this, the contractor, using friction to create heat, flash-evaporated the water in the surface’s top 1/16 inch. Once this water evaporated, the surface could be troweled tight creating a skin. As the slab was naturally still trying to push out water, this bleed water became trapped under the skin creating blisters. Over time the water dissipated leaving the blister with a void — that’s a delamination waiting to happen.
Identifying delaminations
At the start of a project, delaminations aren’t easy to identify. The skin looks consistent with the surrounding slab. Typically, these blisters don’t delaminate until a combination of traffic and cleaning causes the collapse of the surface skin layer.
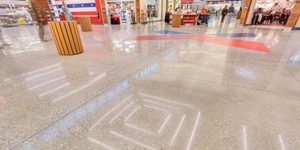
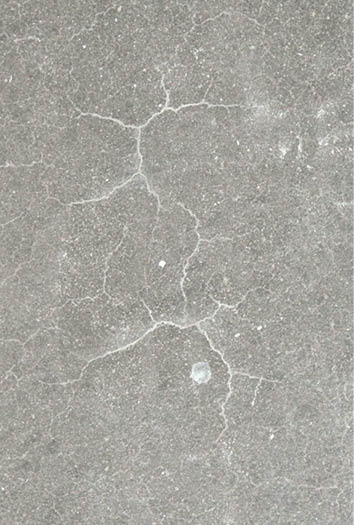
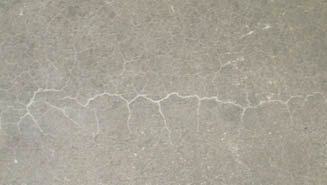
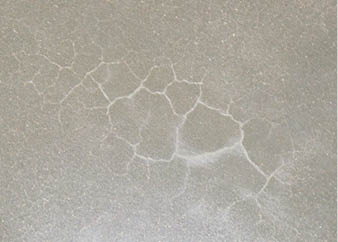
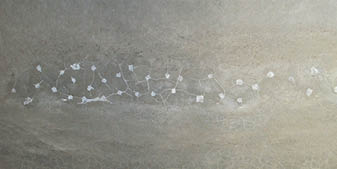
During construction that may mean that delaminations don’t become noticeable until the store starts to get merchandised or starts to receive significant traffic. Once the blisters break, there’s a distinctive cracking pattern typical for delaminations. These cracks begin to look more radial as the edges of the blisters collapse.
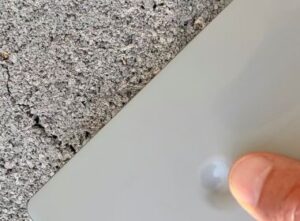
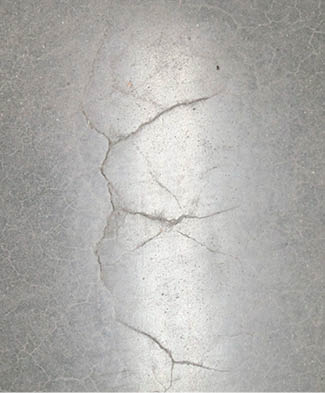
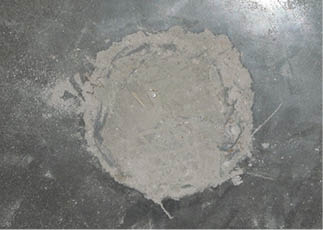
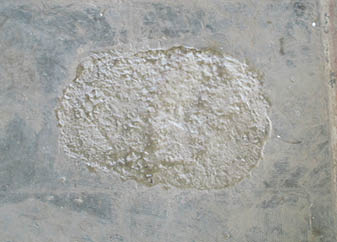
The two different causes of typical delaminations exhibit in different ways. Trapped air-related delaminations will almost always be spherical. They aren’t always perfect circles, but they will always be somewhat round.
 |
 |
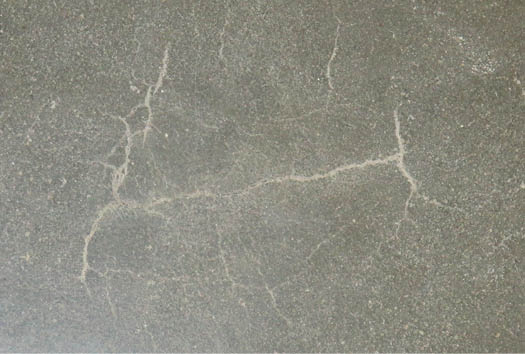
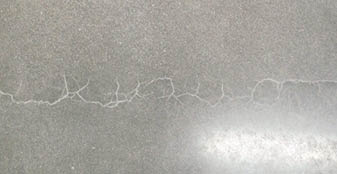
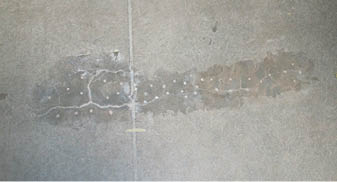
Trapped water-related delaminations come in all shapes and sizes. There’s not a specific pattern to water-related delaminations. They can be roundish in one spot and long and rectangular in adjacent areas. These delaminations can be affected by things like screeding or people walking on the slab while the concrete is still wet.
Other than spotting the radial cracking, which is an easily identifiable indicator, the only realistic way to determine delaminations is to tap or “sound” the concrete. Blisters or delaminations will have a distinctive hollow sound. I’ve dragged large chains across the floor but unless the delamination is very large, this doesn’t work as well as other methods.
My favorite method for testing is to use a 5-foot-long section of steel or metal bar (these can be found at any hardware store) so you can stand on it and tap the surface to determine an affected area. This allows you to identify smaller delaminated areas where you can identify the distinctive cracks, but the area is too small to identify with a chain-drag technique.
 |
 |
Repairs can vary
Based on the facility and its use, there are multiple ways to treat delaminations. For industrial or warehouse-type projects, an epoxy injection may work. With this option, multiple holes are drilled in the delamination area. Epoxy is injected into these holes to fill in the delamination area and make it more solid.
This process isn’t very attractive as the drill holes are very noticeable. The epoxy will always set up darker than the existing concrete. The epoxy will seep through the slab and come back through every crack. This darker appearance also highlights the drill holes and any cracks in the area.
A second repair process, which is better for polished concrete floors, is to cut the concrete in the delaminated area and install a polished overlay in its place. If polishing isn’t needed this repair can be done with a standard concrete repair mortar. When using a concrete repair method, you must determine the edges of the delaminated area and extend your repair 6 inches on all sides past the recognizable edge.
I’ve seen many repairs where the contractor followed the exact edge they could identify. Unfortunately, the paste at the edges is usually separated as well, but since the edge is close to being sound, it doesn’t sound hollow when testing. Extending the repair 6 inches past the visible or sounded edge ensures that you’ll cover the entire delaminated area.
Once the cut size is determined and the 1/2-inch depth is achieved, you must remove all the delaminated concrete regardless of the depth. Most delaminations are in the top 1/8 to 1/4 inch of the slab but I’ve seen some that occur a bit deeper.
After removal, follow the manufacturer’s requirements for installation and if necessary polish to match the surrounding area. It’s important to let your customer know that the repair material probably won’t perfectly match the color of the base slab. It will have the same texture and the same maintenance but the color may be a bit different.
A third option is more invasive and is typically only used for new higher-end buildings with multiple delaminations. Earlier, I told you about the project with the early-entry troweling that trapped bleed water. In that large project (slightly more than 150,000 square feet) there were about 1,500 delaminations ranging in size from 3 inches in diameter to 10-by-10-foot areas.
To provide a consistent finish, the only option was to shave 1/4 inch off the top of the entire slab and then repolish everything. This allowed the surface in the entire building to be removed evenly throughout. This was an important feature because all the doors and interior fixtures were in, and the customer and the architect needed assurance that they wouldn’t have to remove, redesign and reinstall all these interior details. The resulting finish was a consistent exposed aggregate that polished up beautifully.
This repair took care of all the random-sized delaminations without having to measure, cut, overlay and polish more than 1,500 separate areas. The customer was much happier because the floors, with the large aggregate exposure, look like they were intended to appear like a terrazzo floor. This option also removed warranty liability from repair material manufacturers and the involved contractors.
Test for air content
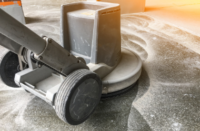
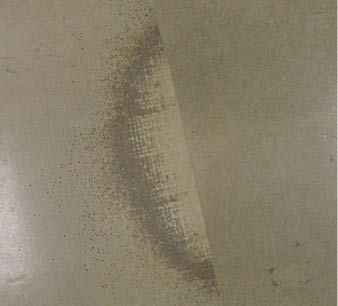
Delaminations are never fun to repair and can be found in new buildings or existing structures. When a grinder goes over the surface, it will force the blisters to break on 80% to 90% of all delaminated areas. The sound of grinding areas with delaminations also changes and is a dead giveaway to any experienced polishing contractor.
One way to help eliminate half of the potential delamination issues is to have the concrete coming out of the truck tested for air content at the time of placement. This can be done at the same time the slump is tested, a test normally required for commercial building projects. The same testing agency can perform both tests.
At least this variable can be removed from the equation. The bleed water-trapped issue requires an experienced contractor that can look at the slab and determine if there is still water ponding on the surface or if this process has stopped before starting the troweling process.