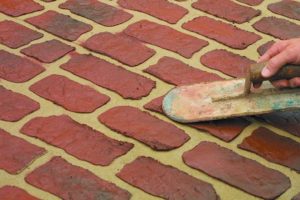

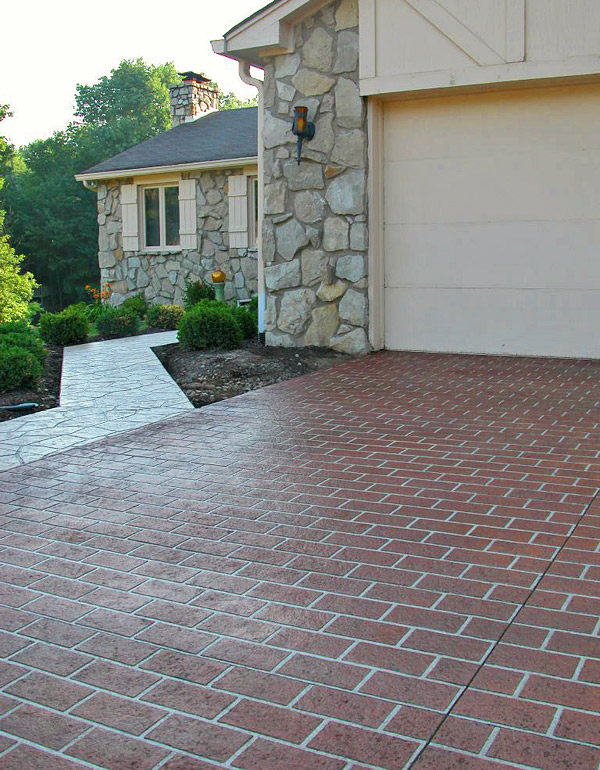
In the early 1980’s the first commercially available concrete stencils were introduced. Back then, there was only one pattern: Running Bond Brick. When used on fresh concrete, the disposable paper stencils allowed contractors to easily, quickly and accurately duplicate the look of hand-laid bricks over a large area. The finished product looked just like colored bricks with natural gray mortar between them.
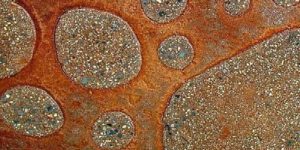
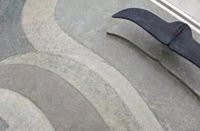
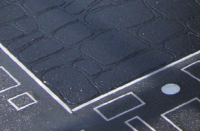
Results were so strikingly authentic that stenciled concrete quickly caught on. Since those early days, many additional stencil patterns have been produced. You can now obtain stencils in brick, cobblestone, flagstone, slate and tile patterns, as well as compasses, rosettes, borders and geometrically shaped accent pieces. There are about 40 patterns in all.
As a contractor, I bought my first roll of stencil in 1994. I had been stamping for a little over a year, and the stencil advertisement in the back of a concrete magazine intrigued me. I liked the idea of getting stamp-like results without ever getting out on the slab. After using the stencils on a small patio, I was immediately hooked. I found stenciling was so much simpler than stamping that I could produce great looking work more quickly and would be able to tackle much larger areas at a time.
A great alternative to stamping
The reason stenciling is so much quicker is that all work can be done from outside the forms using long-handled tools. The pattern is provided by the stencils, and texturing may be accomplished with lightweight textured rollers. Unlike stamping, there’s no need to get out on the slab, waiting until it can bear your weight and then hurrying to stamp every square inch by hand.
As any stamper can attest, the window of opportunity is often very short. Concrete sometimes sets too quickly to be adequately textured. This situation can be alleviated with stencils. The stenciling process can begin as soon as the concrete is bull floated and can sometimes be completed before the concrete even reaches the stage where stamping could begin. I’ve gone home from finished stencil jobs while the concrete was still incredibly soft.
Because stenciling is quicker, it’s ideal for large areas. Larger pours eliminate the need for cold joints or construction joints between slabs, and this in turn eliminates potential color differences between those two separately poured slabs. Driveways, especially those on a moderate to steep incline, are ideal for stencils. An entire driveway can easily be done in one pour, whereas if stamped, it might take several pours. When stamping on an incline, stamps will sometimes creep downhill as they are being tamped, creating misalignments, drag marks and ugly joints. Stenciling eliminates these problems.
Since my first stencil job in ’94, my company’s work was about 50:50 between stamping and stenciling. So why didn’t I use stencils all the time?
Potential problems with stencils
Although stencils are often much simpler and quicker, stamps are a better option at times. These instances include when pouring slabs that are not easily accessible from two opposite sides (such as a patio poured back in a corner), on breezy days, or when using patterns such as Ashlar Slate or Herringbone Brick.
To easily place stencils, two people must be able to stand outside the forms on opposite sides of the slab. From this position, they lay the stencil onto the concrete surface. In a corner though, this is impossible to do. One person is going to be standing in the concrete. Eliminate this situation can by talking the homeowner into incorporating a planting bed between the wall and the slab. Aesthetically, it looks better, and it gives the second person a place to stand while placing the stencil.
Windy days wreak havoc on stencil placement. The wind blows the stencil around, making it very difficult to line up. In addition, wind often dries the surface prematurely and makes it difficult to stick the stencils to what would otherwise be wet concrete.
Some patterns simply look better stamped than stenciled. Ashlar Slate stencils exhibit “stones” which are much smaller than typical real pieces of slate, so the finished work doesn’t look as realistic as stamped Ashlar Slate. One stencil pattern in particular — Herringbone Brick — is just plain difficult to use. Because of the way the stencil is cut, it is a nightmare to use on areas wider than 8 feet. A walk board bridging the pour is often required to place this pattern. In most cases, though, stencils are a great alternative to stamps.
Economy and ease of training workers
The stenciling process is so simple and almost any competent finisher can complete it his or her first time out. Stamping, on the other hand, has a much longer learning curve.
Stencils make it easier for contractors to train new workers. Plus, since the disposable stencils are single-use items, stenciling contractors can offer their customers more than 40 patterns, with the cost of the chosen stencil paid in-full with each job. With expensive stamp mats, it may require contractors to sell several jobs of the same pattern to recoup their investment. What if they buy a set of stamps and the next customer doesn’t like that pattern?
The stenciling process in a nutshell
Here are the basic steps in a stencil application:
- Pour, screed, bull float and edge the concrete as normal. Stenciling can begin immediately thereafter.
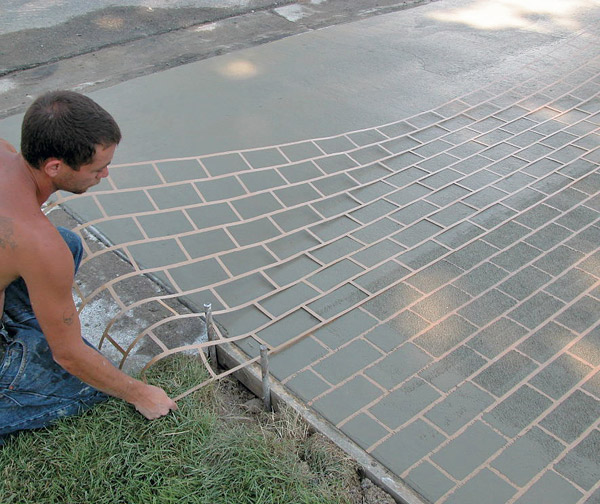
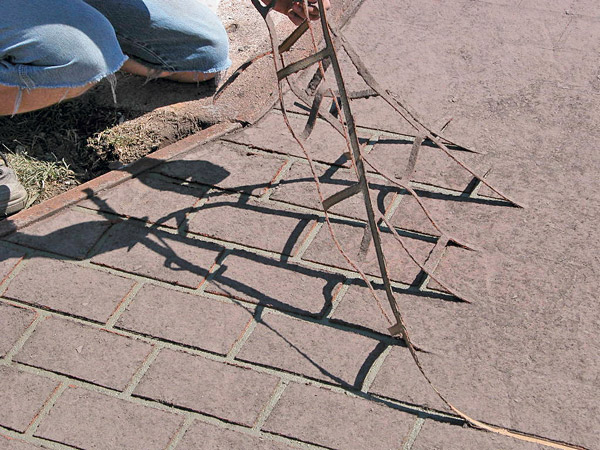
- Unroll and stretch the stencil across the slab with two people on opposite sides. Cut from the roll with scissors. Lay the stencil atop the slab and plaster it to the wet surface with a special roller, making sure it’s securely stuck down so that no color can get beneath it. Repeat the process, overlapping the previous piece of stencil by one “mortar joint.” Continue covering the entire slab.
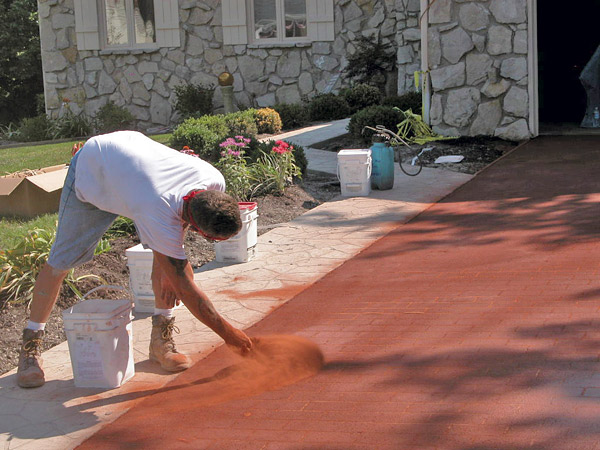
- Once complete with the stencil section placement, apply dry shake color hardener and float into the surface. The stencil masks the color from the “mortar joints” so they will remain gray. Do not work the stencil into the concrete or you run the risk of embedding it too deeply and create problems. The stencil should remain on the surface, not under it.
- Apply release agent (either clear liquid or antiquing powder release) to the surface.
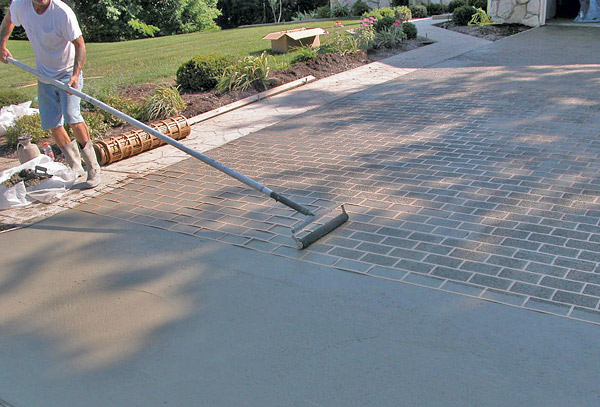
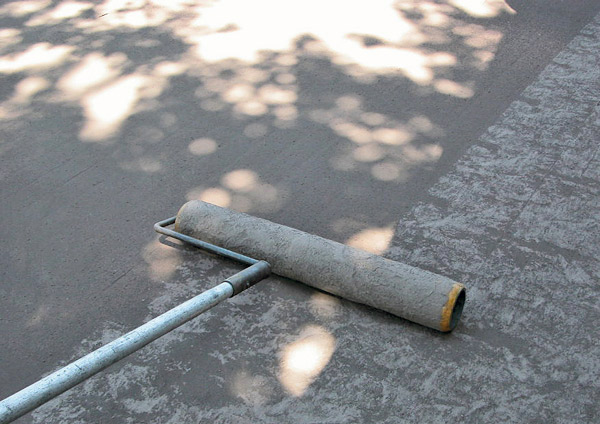
- Pass a texture roller over the slab. It is helpful to do this in random directions to minimize obvious repetition of texture.
- As soon as texturing is complete, remove the stencil using two people on opposing sides of the slab, starting with the last piece of stencil placed. Lit the stencil straight up so as not to drag it, carry it off the end of the slab to discard. Repeat steps to remove the entire stencil.
- Removing the stencil while the concrete is still soft will result in sandier, more natural-looking joints. Leaving it in longer will yield slick, plastic-looking ones. Under no circumstances should you wait until the next day to remove the stencil.
Almost there
The following day, saw-cut the crack-control joints, and wash off the dust and excess release agent. When dry, seal the slab.
That’s it. Decorative concrete can’t get much easier than using concrete stencils!
Questions from Readers
Question
Can you use a stencil roll with an existing patio rather than newly poured concrete?
Answer from Concrete Decor
Yes, you can use rolled stencils with new or existing concrete applications. The stencil will relax in the sunlight and lay down but you can also assist in getting it to lay flat.
Contractors often use the stencil on existing concrete when applying a knock-down finish. Essentially it’s a polymer-modified cement that you spray onto a prepared concrete surface and while the material is stiffening up a trowel is used to flatten the surface. An acid (reactive) stain or acrylic antiquing stain can also be applied once the overlay is dry to create a mottling effect. At that point you will remove the stencil and apply a sealer to the entire surface.
Concrete Stencils for Sale
Offered by Concrete Decor Store Running Bond - Concrete Stencil Roll
by Decorative Concrete Impressions Ashlar Tile - Concrete Stencil Roll
by Decorative Concrete Impressions