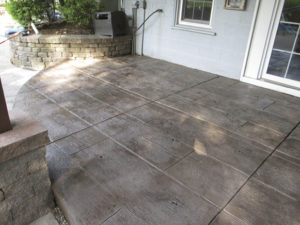
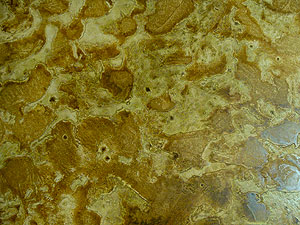
It has been said that mistakes in life are what build character, and the same can be said about finishing concrete. Your finishing technique can make the difference between an almost perfect finish with clearly visible blemishes and an artistically rendered hand-troweled surface filled with character.
While self-levelers and stampable overlays are superior when it comes to creating a consistent finish, nothing can beat the artistic appeal of a hand-troweled finish. There will always be some clients who desire a completely smooth concrete surface with no trowel marks at all, but while achieving a flawless finish is not impossible, many others appreciate the hand-troweled finish, much like we enjoy the textures in Venetian plaster or an artist’s brush strokes.
That said, each type of topping does have its time and place, and distinguishing when and where to use which is a decision that can make or break a project.
 |
 |
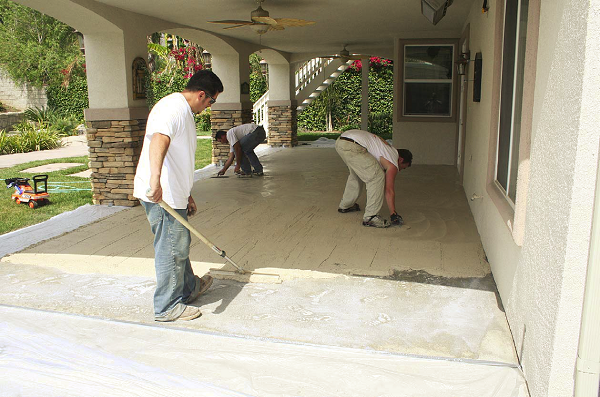
Trowel-down toppings are usually scratch-coated into the substrate, explains Bruce Newbrough, director of application development and product advancement for Ardex Engineered Cements. Then, a second, very thin (1/32 inch to 1/16 inch) layer is troweled immediately over the surface, with the trowel expertise of the installer relied upon to create the desired look.
Self-leveling toppings, in contrast, are usually installed at a minimum thickness of 1/4 inch and are spread and smoothed into place from a standing position. Stampable overlays are in the neighborhood of 1/2 inch thick, as they need to have enough depth to receive the imprint of the stamp.
Microtoppings and spray-down systems, while both requiring bond coats, can also both be troweled. Microtoppings are often used when the application will not allow any type of thickness, explains Trevor Foster, principal trainer and sales manager for Miracote Products. “These toppings can be installed over wood, vertically, and can be pigmented in a variety of colors and either left alone, or troweled to achieve any type of texture.”
The big difference between microtoppings and spray-down systems, says Newbrough, is the appearance of the finished product. Spray-downs and microtoppings both go down in a thin layer. But if left alone, the spray-down surface will dry and harden in a pattern of small dots or mounds randomly spaced over the surface. This pattern will not occur with microtoppings.
The spray-down surface may also be allowed to set for a short period of time and then flat-troweled over the slightly hardened surface, creating what is called a knock-down pattern.
 |
 |
“Whatever other financial and logistical requirements there are, to trowel or not to trowel is most often an aesthetic call,” says Michael Miller, owner of The Concretist in Benicia, Calif. “Troweling looks like troweling, and troweling can look a lot of different ways.”
Miller explains that troweling is often used when color and special texture is an afterthought, in a remodel for example, because it can be thinly applied on top of an existing surface. For this reason, it also is used when turning a decorative job gone bad into something good.
Troweling is also used when critical aesthetic decisions must be made on portable samples far from the actual project site, as these finishes are generally very reproducible and consistent.
Foster explains that troweled toppings are often also used when preserving the landscape around a project is important. “With troweled toppings you typically hand-mix everything and hand-unload all materials with only foot traffic going back and forth,” he explains. “On the other hand, if you are pouring a new slab, you have Bobcats, buggies, and wheelbarrows. If they can’t fit through a gate you have to remove it. The grass and landscaping usually gets beat up pretty badly. You also do not have to worry about replanting new sod or mulch around the new surface (when applying a troweled topping) because there is no form work.”
He also explains that toppings in general can be installed in a very short period of time, with minimal cure time before sealing or topcoating. They can be sealed in the same day or the following day, depending on the topping chosen.
Foster gives the example of a pool deck as an ideal troweled project. If a property management company wants a new surface for a pool deck, there are two choices, he says: rip out and repour concrete or use a topping. With a rip-out application you have to jackhammer the concrete, potentially damaging coping stones around the pool, the tile in the pool, and skimmers. Then you have to pay to take the concrete to a dump or recycling center. With a topping, he continues, you only have to prepare the concrete, which creates little dust and noise. “Once that is finished, you are ready for installation, and in a day or two you are done and the pool is ready to reopen.”
Additionally, if there are existing cracks in the deck, you can do crack repair and take steps to remedy the problem when planning to apply a topping. “With a new slab, there are a lot of what-ifs, and hopefully it does not crack during the curing process,” Foster says.
The marks or decorative effects that a trowel leaves behind can be a primary reason one decides to use a troweled finish. But depending on the look you want, this can be bad too. “Chattering is a condition that happens often around the perimeter when you are troweling near the wall and your trowel edge catches the wall and bounces down the edge, leaving rows of trowel marks,” explains Newbrough. “It can also occur as you are smoothing, there are imperfections in the surface, and the trowel bounces as you apply pressure.”
Chatter and “windshield-wiper marks” can make a good job look bad, says Rob Sonders of Brighton, Colo.-based Surfacing Technology. The key to any resurfacing project is to produce a result that looks natural, not manmade. Chattering can be visible through the pattern. If a trowel-down is done correctly, with the correct material, there should be minimal chatter. In some cases, however, chatter with a very thin topping is unavoidable. To solve this problem, Sonders says, multiple thin coats are required. Also, using certain trowels can help eliminate undesired chatter. Sonders suggests using blue steel trowels with rounded edges, often called pool trowels, as their flexibility and shape helps avoid creating these markings.
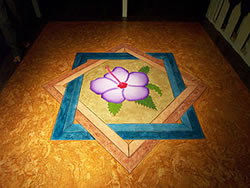
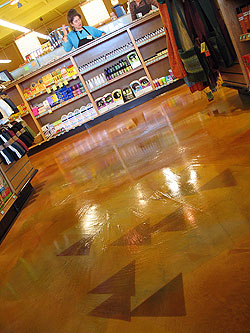
As for achieving desired patterns from these patterns, Sonders says your imagination is the limit. He suggests using tape for creating patterns on the concrete, as you can create whatever pattern you like and aren’t held hostage to a stamp pattern. This also allows you to make adjustments before finishing. Creating taped patterns or using stencils works well for creating company logos and other recognizable patterns in concrete finishes.
Sonders says using water and chemical stains on top of these patterns creates the visual effect of depth, and the overall effect can rival the appearance of real stone, tile and slate.
He also says any type of trowel can be used to create the textured effects necessary for a stone or tile appearance. Carving tools can greatly vary and can even be self-made. Miller suggests Magic Trowels (similar to really fine and responsive squeegees), notched trowels and putty knives for sculptural purposes. Small margin trowels with a handle can be used to clean out joints and carve material horizontally and vertically. He says materials can also be applied by pouring or using squeeze bottles and subsequently troweled or not, for fine line-work and illustration.
Because the material can set very quickly on trowels, having plenty of wash buckets on hand is useful. Sonders suggests that as a general rule, the temperature of the slab and ambient temperature should be above 40 F. “Cooler water is recommended for blending the materials on hot days,” he says. “Setting up shade areas can take the heat off a liquid waiting to be blended.”
And running the hose until cool water returns is also a good practice. Ice can be used in certain mixes on very hot days, and lightly misting the slab for the initial bond coat is also effective.
He also suggests that in cool weather, dry and liquid accelerators be added to the topping mix that will not affect coloring or the final product but will allow the contractor to get more projects completed before real cold weather sets in. Additionally, moisture during certain steps can kill a project. Sonders suggests good old-fashioned common sense for knowing when to push the weather.
Miller concurs that weather will likely affect any project, and while some materials and applications are more sensitive than others, each job is different and requires thoughtfulness, consideration, skill and a certain degree of luck.