

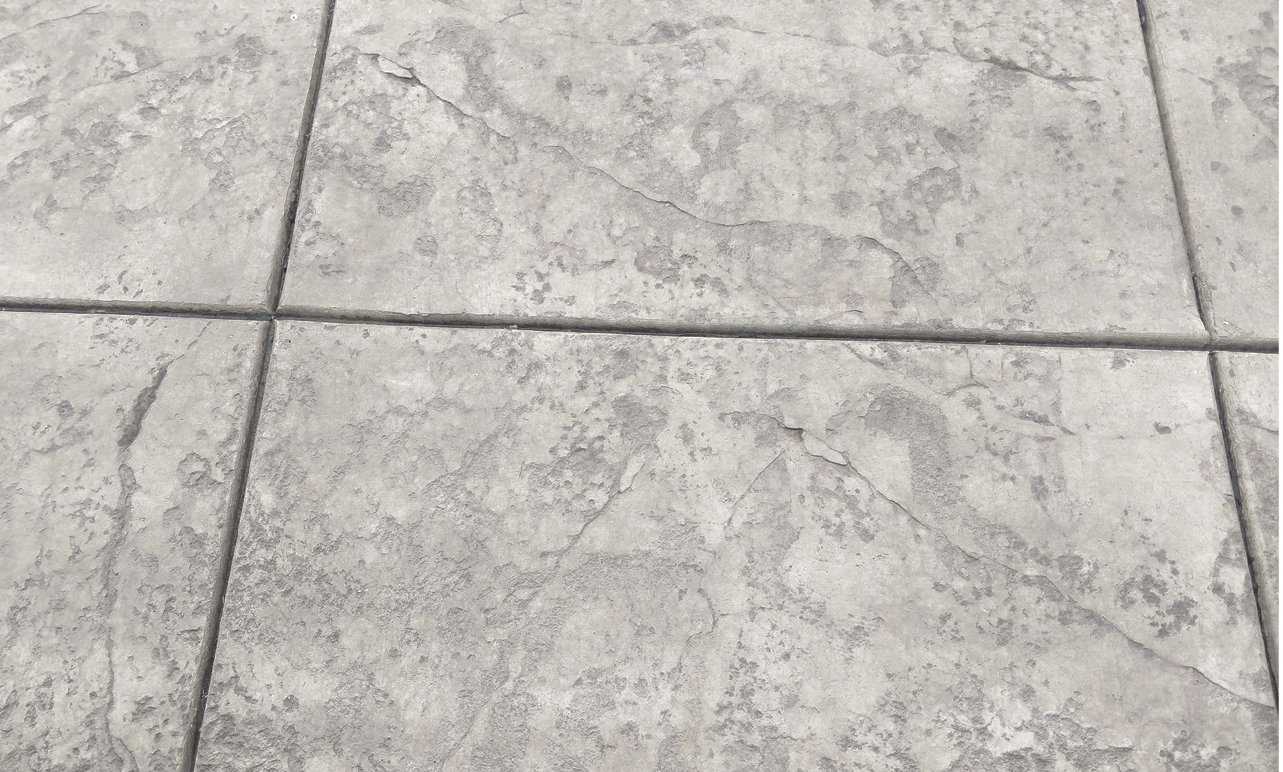
When it comes to concrete — as with so many other things in life — people tend to judge a book by its cover. There’s nothing like a giant crack or a crumbling corner in a recent concrete placement to make an unhappy customer.
It’s not the concrete’s fault. Its very nature is going to guarantee that as the water in the mix evaporates and as the concrete cures it’s going to shrink, and clients need to be educated about that upfront.
Good contractors also know that the proper placement of joints in new concrete can make a world of difference in channeling cracks to where they won’t show, meaning downward and out of sight.
Command performance
Sadly, it doesn’t take much to find examples of poorly jointed concrete.
Is that big crack in the supermarket aisle because the 16-by-16-foot slabs are too large or not properly isolated? Who thought a single center joint would do for a 25-by-40-foot patio?
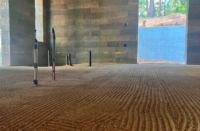
At its simplest, placing joints is just that: Simple. The American Concrete Institute (ACI) sets standards for their installation. While a construction joint (the point where different placements meet) should encompass the entire depth of the slab, the depth of a contraction joint should be one-quarter the depth of the slab, whether tooled or saw-cut.
Other important things to remember:
- Spacing should be square, and in feet no more than two-to-three times the slab thickness in inches. For example, a 4-inch slab should have joints spaced no more than 8 feet to 12 feet on center.
- If not square, keep the ratio at less than 1.5:1 (for example, 12-by-8 feet).
- Never create a space of more than 225 feet2 (15-by-15 feet) without jointing.
- Always install joints with straight lines, never staggered.
Whether they’re construction or control (also called contraction) joints, the importance of joints can’t be stressed enough. Tom Ralston, president of Ralston Concrete in Santa Cruz, California, says joints help the concrete perform.
“They become the weakened plane of the surface, and as the concrete cures, it not only wants to shrink, but it also curls on the edges,” he explains. “The joints help the cracking when it will occur, and it usually starts at the top because concrete dries out more quickly at the surface than at the bottom.
“By weakening the plane at the joint, it allows the concrete to crack into that joint,” Ralston adds. “That’s why they’re called control joints, because they’re controlling — or at least trying to control — where the cracking is going to happen.”
They’re certainly important enough that it pays contractors to plan them out in advance. Fairfield, California-based concrete contractor Lee Levig admits he may go overboard on his approach but, being a CAD (computer-aided design) enthusiast, he diagrams his joints ahead of time.
“It depends on how complicated a job is, and what they want,” he says. “I lay out ‘mandatories’ such as inside corners where I know it’s going to crack and where I know I’m supposed to cut a joint. Once I lay out the mandatory joints, I try to create a pattern where they’ll look aesthetically pleasing.”
Even if the job is a little larger, says Lance Boyer, president of Trademark Concrete Systems Inc. in Anaheim, California, good planning helps.
“Fortunately, I think landscape architects and architects in Southern California have a good working knowledge of joints,” Boyer says. “But, projects can vary in complexity, so we use shop drawings to make suggestions. It’s a way to communicate and get joint layout clarified before we start the project.”
Strong … and good looking
Although well-placed contraction joints can make or break a nice, flat concrete placement both literally and figuratively, paying attention to construction joints also contributes to a great-looking project.
Concrete placements against existing walls, vertical restraints and architectural features, or around columns can all benefit from isolation, or expansion, joints. There are several different options to do them.
Ralston, for instance, uses a commercially available strip foam product.
“When the concrete shrinks around whatever it’s touching, it has some give,” he says about the strip foam. “On an interior floor, for instance, against the walls you can probably put a baseboard over it and never see it. It has a little breakaway strip at the top that pulls off and you can also fill that with elastomeric caulking.”
“You’re just creating a barrier between the new and the existing concrete,” says Steve Chmelar, vice president of commercial sales for Carroll Construction Supply in Ottumwa, Iowa. “Some people I know just use a waterproofing tar or waterproofing membrane they brush on the concrete before the second pour.”
The main idea, regardless of what’s being used, is to create a bond-break between the two expanses so they move independently of each other where a construction joint is implemented.
Certain architectural features and isolated columns also can play a role in the placement of control joints. The reason, says Chmelar, is the concrete has changed direction, and so control joints are a must, as well.
|
|
|

“Concrete looks for a weak place to begin its cracking,” he says. “For instance, if you have a corner that points inward into a structure, or if you have multiple corners, then it’s not equally loaded from side to side and end to end.” In these scenarios, you must divide the concrete into square units and provide a method for its breaking otherwise cracks will take off from a corner.
While control joints are critical to many smaller jobs’ success, load transfer devices may be needed for larger projects involving multiple placements — particularly where something beyond foot traffic is expected — to keep construction joints from curling and to decrease damage to them later.
Keyed joints, basically forms that notch the edge of a concrete placement, provide another option. Today, there are many different types of keyed joints, including some that allow for dowels that bridge the gap between slabs and assist in load transfer. Generally, dowels have replaced keyed joints for many contractors, including Brian Osterhaven, owner of Osterhaven Concrete in Caledonia, Michigan, as these joints tend to crack.
“Whenever we have a break between pours on residential jobs, we use a #4 smooth dowel,” in one of two ways, he says. “Sometimes we drill holes in our form board and grease them and put them in. Other times, we drill them in after the fact.” He adds that he prefers smooth dowels because they expand and contract quite a bit.
“We put in dowels, whether they’re specified or not,” says Trademark’s Boyer. “We typically use a 5/8-inch steel diamond or smooth bar. Typically, we place them about 24 inches on center. A product called Speed Dowel has become our go-to product.”
And, of course, Boyer adds, if the job specifies something else, such as diamond-shaped load plates or load transfer plates, the engineer’s specifications are met.
No one best answer
Just as there’s no one best answer for handling load transfers, there’s also no single answer for how and when to install control joints.
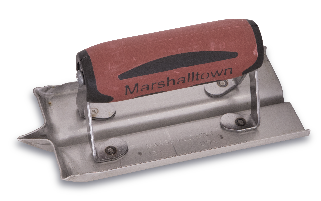
Probably the simplest — and certainly the one that’s easiest to complete as part of the same-day finishing process — is using a grooving tool, aptly called a groover.
Osterhaven says he uses a groover on a lot of smaller jobs like sidewalks and patios.
“We have one that’s 4-foot and one that’s 2-foot,” he says. “They can cut 1 5/8-inches deep, which is just thick enough to work on 6-inch concrete, but I like them for 4-inch concrete. I follow the theory that a little (too) deep is better than not being deep enough.”
Groovers come in a variety of lengths, such as the Torpedo Groover that’s available as small as 24 inches and as large as 56. The innovative tool was designed for finishers who wanted a handled groover they could push across the slab instead of having to work on their hands and knees.
Charyl Dommell of Slip Industries in Manheim, Pennsylvania, a company that manufactures the Torpedo Groover, says their advantage is that you can put in your control joint almost immediately.
“All the groover is doing is displacing the aggregate,” she says. “It’s pushing the stones into a straight line on either side of the groove so when it cracks, it cracks down.”
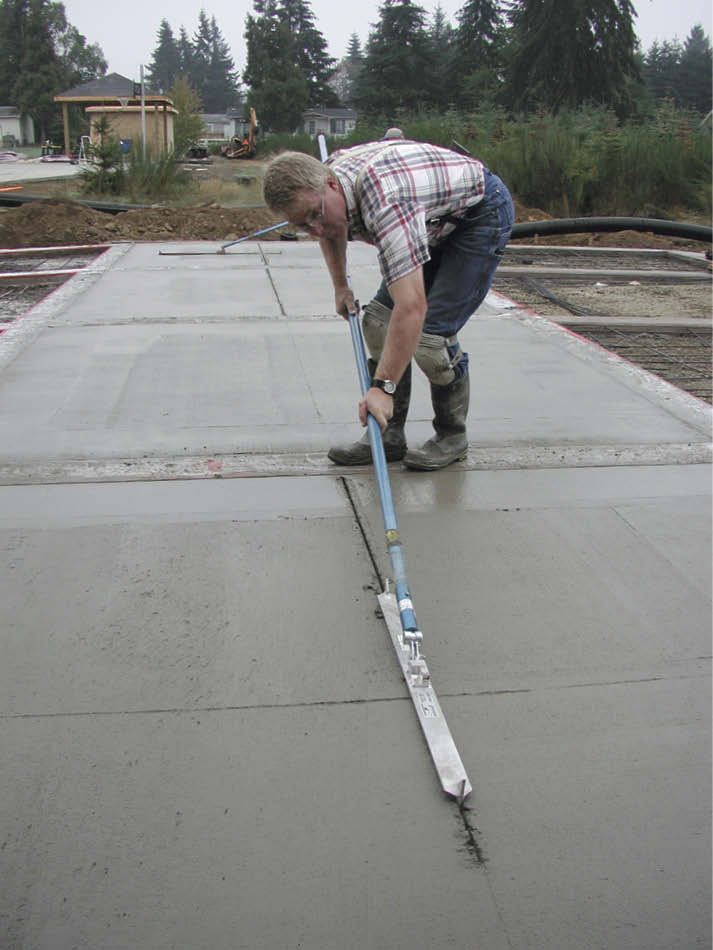
Ralston, who prefers to set his joints early in the process, has developed his own method that allows him to mimic a saw-cut joint.
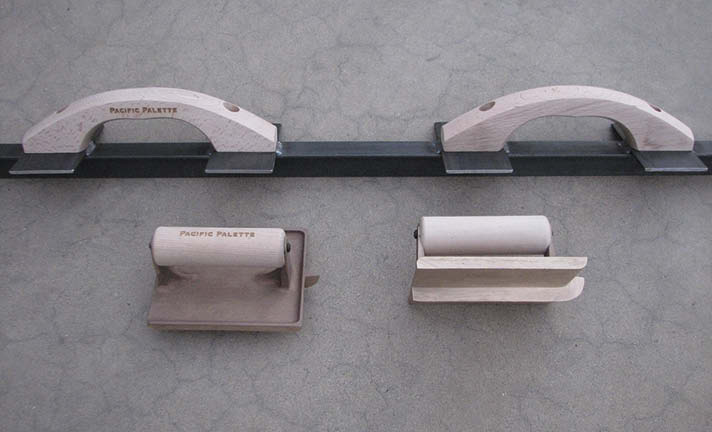
The Saw-Cut Joint Tool set from Pacific Palette is made up of a chisel and a jointer tool. When used together properly, they create a clean line without any frayed edges.
“Our Saw-Cut Joint Tool is just a smidge wider than a saw-cut,” he says. “We chisel out an inch deep, and then come back with the tool, which has nice, crisp, rounded edges, rather than the square edges of a saw. It also compresses the concrete very densely so there’s not much cause for it to fray or crack.”
The following day, his crew returns to score the joint to the needed depth with a diamond blade.
The other option is to saw-cut the control joints after the concrete has cured enough to support the weight of a saw — typically the following day.
“The argument against an early saw-cut with traditional saws is that it tends to ravel the aggregate and cause a really irregular joint, not the nice 1/8-inch or 1/4-inch cut,” says Carroll’s Chmelar. “However, in the late 1980s, Husqvarna came up with the Soff-Cut saw, which is lighter in weight and has a faceplate that holds the aggregate down.”
As with a groover, it offers the option of installing the control joints the same day the concrete is placed. Still, many contractors, such as Trademark’s Boyer, opt to return the next day and saw-cut their joints then.
“We typically do sand finishes using top surface retarder, and it works better, in my opinion, with the saw-cut joints.,” he says. “We also typically cut dry and use an OSHA-compliant HEPA vacuum to control the dust.”
In addition, Boyer strongly suggests purchasing ACI’s “Placing and Finishing Decorative Concrete Flatwork CCS-5(16).” “It has a very good chapter on forming, reinforcement, dowels and jointing,” he says.
Regardless of which joints you’re installing and the methods you’re using, Levig offers this advice. Learn to manage your customers’ expectations and continue studying concrete by taking advantage of classes offered through ACI, the World of Concrete and the upcoming Concrete Decor Show in the fall in Texas.
“I’ve also taken classes in civil engineering at the local community college,” he says. “I continue to educate myself.”
www.carrollsupply.com
www.osterhavenconcrete.com
www.slipindustries.com
www.tomralstonconcrete.com
www.trademarkconcrete.com