

Sometimes we make things harder than they need to be. I was in a small airport the other day, and as I was leaving the men’s room I stopped at the paper towel dispenser to dry my hands. For some reason, when I moved to activate the motion sensor, nothing came out, and I found myself waving my hands back and forth under the dispenser with no results.
I could feel the presence of someone standing behind me, and this compounded the situation. That is when I heard an elderly voice say that we could stand here all day or I could turn the little handle on the side of the dispenser. It seems I complicated a simple situation.
You, like most, will thumb through this issue of Concrete Decor and see pictures of the best of the best. True artists have mastered our decorative trade, and this is something we can all be proud of. Now think about this: These guys all started at the entry level sometime or another.
I personally have found the most profitable decorative jobs have been the ones kept simple. Let’s run through some entry-level stamping to get you started.
The pattern
Hands down, the easiest patterns to imprint into concrete are the texture patterns. These stamp tools overlap one another and do not interlock. The nice thing about this stamping type is that it covers a large area and fast. This is a huge benefit to the beginner as you learn your stamping window. Try starting with one of the texture patterns by making a sample. This sample will give you practice and will work great as something to show potential clients. Be sure to label the color(s) and pattern used somewhere on the sample. I like to make our samples 2 feet by 2 feet by 1 1/2 inches deep with a wood frame and plywood bottom for support. You might seal all or half the sample so folks can see the end result and how the color changes when sealed. Be sure to let your client know this is a product that will need resealing from time to time.
Pattern tip: Many rental yards are renting out variations of texture stamps, so save your purchasing money until you find a pattern you like.
The coloring
For argument’s sake, you have two options when it comes to coloring the concrete. The most basic option is to have the ready mix colored as it’s batched from the plant. Most ready-mix salespeople can supply you with a color chart to help with color choices.
Now, remember that these charts are only a guide to color and not an exact replica of what your color will be. In fact, one color from the same plant will produce varying results from pour to pour depending on a multitude of things. Try using this “integral” style of coloring when a job can be completed with up to one load of ready-mix concrete.
The cost of coloring concrete with most integral colors will be close to the same as long as you’re choosing a light to medium tone. Darker colors or colors like green or blue will not be cost-effective as integral colors. These colors are best achieved through the use of color hardeners, which brings us to the second way to color concrete.
Color hardeners are the most effective and affordable way to color the concrete surface. The hardener not only has color pigments, but also strengthens the surface of the concrete. Some homeowners will have a problem with the idea of just coloring the surface and not the full thickness, but a little educating on your part will help with that. Be sure to start with small jobs or areas to get a feel for coloring with hardeners. They can be a little challenging at the start.
Coloring tip: Be sure to warn your client that the integral color will appear much darker when first poured, but will lighten as the concrete cures. I have had many frantic calls concerning this over the years. This does not happen when using color hardeners.
Release and stamping process
Now this is where the rubber hits the road. In most stamp jobs, colored release powder will be used just prior to the stamping process. This powder will sit on the concrete surface but will not be troweled in. The release powder serves two purposes, the first being as a barrier so the stamp tools don’t stick to the concrete surface. The second purpose is to highlight or antique the base color.
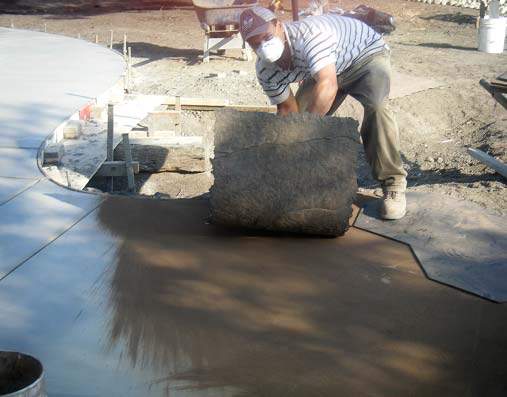
Be sure to fluff up the release powder prior to broadcasting it across the concrete surface. The surface should be in a plastic state but not wet when the broadcasting starts. Do yourself a favor and wear a respirator to protect your lungs and airway. Broadcasting can be quite messy, so be sure all windows and doors are closed to prevent fogging.
Once the surface is covered in release powder, the stamping can take place. The depth of imprint is dependent on the set of the concrete and the weight of the stamptician. It will be best to lightly walk the pattern in and then “thump” the tools as the surface tightens. A good stamp job will be consistent, and your clients will have no problem pointing out irregular areas. What can be challenging is gauging the depth of pattern within the release powder. Don’t be afraid to look across the surface at several angles to see the depth of pattern.
Release tip: Try to make the release powder darker than the base, or integral, color. Remember, most of the release color will wash away from the surface when cleaned.
Stamping tip: Be sure your sub-base is damp before concrete placement. This will help the surface to dry evenly compared to spot drying. Keeping the concrete thickness the same will help with this as well. Good luck and send pictures.