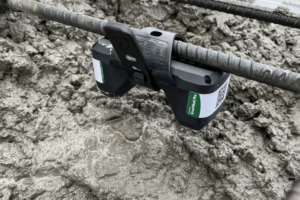


To eliminate the guesswork associated with which diamond abrasive bond tool will best polish or abrade a particular concrete slab, contractors could consider adding a Mohs hardness test kit to their toolbox.
“If you don’t know the hardness of the concrete, how do you know what (diamond abrasive) bond to use?” asks Brian Wilson, president of WerkMaster, a polishing equipment company that has been making a Mohs hardness test kit explicitly for concrete since 2007.
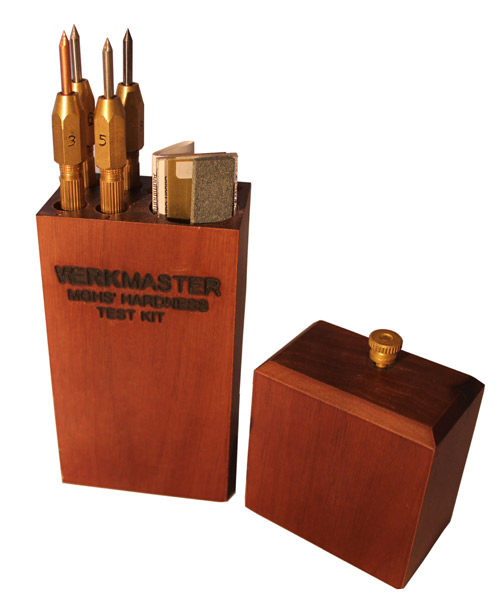
The kit includes a United States map depicting the hardness of each region’s concrete. The map is color-coded to match a set of four sharply pointed double-ended picks of varying strengths. The numbered picks allow you to determine the hardness of concrete in a given region by testing which ones are strong enough to scratch the surface and which aren’t.
Mohs tester kits, which typically retail for about $100, are also available from Sears, Amazon and eBay. HTC Inc., a polishing and grinding systems company, includes its tester as part of a set of accessories for floor grinding.
Proper pairings
Knowing the hardness of concrete helps increase productivity, reduce tool wear and improve a slab’s shine, experts contend. Not to mention, it can lower a contractor’s frustration level.
“I can’t tell you how many people put the wrong diamonds on and then have to wait for the right diamonds to be overnighted to them,” says Joyce Jorgenson, an inside sales rep for National Flooring Equipment. “You need to have the correct diamond in hand from the get-go.”
“If you put soft diamonds on soft concrete, they will cut like crazy and the diamonds’ abrasive tips will disappear in 500 square feet,” Wilson says. “If you use a hard-bond diamond on a hard floor you’ll get very poor production. You’ll be glazing the tools to the point where they are no longer usable.”
If you don’t properly pair the diamonds with the surface’s hardness, you’ll either have diamonds that don’t last too long or diamonds that last forever with no production, he says.
“All concrete is not created equal,” says Jorgenson. “Anyone who buys a grinder needs to invest an extra $100 to buy a Mohs tester.” Most of the contractors she deals with, she adds, heed this advice.
For the history buffs
The Mohs scale of hardness can be traced back to 1812 (although some sources say 1822).
Back in the early 1800s, Friedrich Mohs, a mineralogist living in Austria, was tasked with categorizing a wealthy banker’s mineral collection. He developed a system to rank the minerals’ hardness on a scale from 1 (the softest) to 10 (the hardest).
To devise a reliable method to assess a material’s resistance to scratching, he selected pure minerals commonly available back then and gave each a hardness ranking. He’d then try to scratch the test material with the ranked minerals. On his original scale, if a material could be scratched by topaz (hardness of 8) but not by quartz (hardness of 7), for example, the test material had a hardness of 7.5 on the Mohs scale.
Although minerals are usually classified by their chemical composition, this simple scratch test allowed him to group together minerals with common properties.
Today, the Mohs scale of mineral hardness is still widely used by geologists to help them identify unknown pieces of minerals, particularly in the field. Modern-day kits, which are offered by scientific and industrial groups as well as concrete equipment manufacturers, usually consist of a set of picks with hardness values equal to 2 through 9 on Mohs hardness scale. There is neither a No. 1 pick, which would equate to the hardness of talc, nor a No. 10, which is as hard as a diamond — the mineral no other mineral can scratch.
If a specimen can be scratched by a 7, 8 or 9 pick, it is hard. Five and 6 depict medium. And 2, 3 and 4 are soft. “If you’ve got concrete that scratches with a 2 you’ve got a big problem,” Wilson says. Most concrete within the United States has a Mohs hardness rating of No. 5 to No. 7.
Today’s kits also normally include an assortment of test plates with specified hardnesses and come in a sturdy carrying case.
Proper pairing won’t always result in a quicker job, Wilson notes. “A lot of people don’t realize that polishing hard concrete will always take longer than polishing medium concrete even if you use the right diamonds on each.”
Practice makes perfect
Matt Rogers, an installer and finisher with Fab-u-Floors Refinishing Services Ltd., in North Vancouver, British Columbia, has been using a Mohs kit from WerkMaster for about six years. “It’s pretty accurate for the most part,” he says, and particularly helpful when it comes to quoting a price. “If a job scratches at a 5 it will be 30 percent cheaper in terms of labor than one that scratches at an 8.”
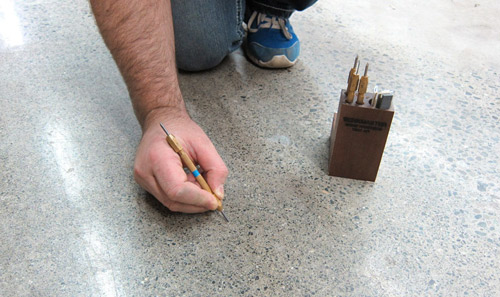
It takes a little time to learn how to properly use the tester, he says, advising contractors to practice scratching on the labeled hardness sheets that come with the kit.
“It all comes down to the way in which you scratch a floor. You can get inaccurate readings if you scratch too light or too hard or if you don’t keep the tips sharp.”
The trick to using the tester tool properly is to hold the pick like a pencil with your fingers close to the tip. Then make a downward stroke with the same amount of pressure you would use to sign your name on paper. “But,” he cautions, “make sure the point stays vertical, not at an angle, so you have even pressure. Don’t force it to scratch. Let the tip do all the work.”
As with your kitchen knives, Rogers says, it’s very important to always sharpen tips before you use them, as dull tips won’t properly do their job. “If the point becomes rounded,” he says, “it’s time to get a new tip.”