
Imagine being hired for a new job, then having for your first assignment a project outside your area of expertise. That being digital fabrication. Oh, and by the way, it will display the new employer’s capabilities and be installed at the building’s front door.
That’s the challenge faced by Evan Emery when he was hired as a designer by 180 Degrees Design + Build. And, while he’s still learning about concrete, the geometric wall he created from concept to finished product is being well-received by the firm’s architectural clientele.
That’s not to say Emery was a complete novice. He’s trained as an architect, with previous expertise in digital fabrication and visualization. However, “This was my first experience with concrete fabrication,” he says.
One of the main goals of the project, dubbed a parametric CIP wall, is to show 180 Degrees’ capability to bring mass customization through digital fabrication to its clients.
“That’s the reason it’s at our office as a showpiece,” Emery says. “Plus, we wanted to utilize CNC fabrication and parametric design so we could streamline the formwork production. Rather than picking from a catalog where there’s a certain number of patterns, we wanted to develop a mass customization of that and develop it fully in-house.”

The Pattern
It sounds like a straightforward idea, but parts of the project went much more quickly than others. First came the design, and Emery says he was given design inspiration from the owners for getting a textured pattern in the wall.
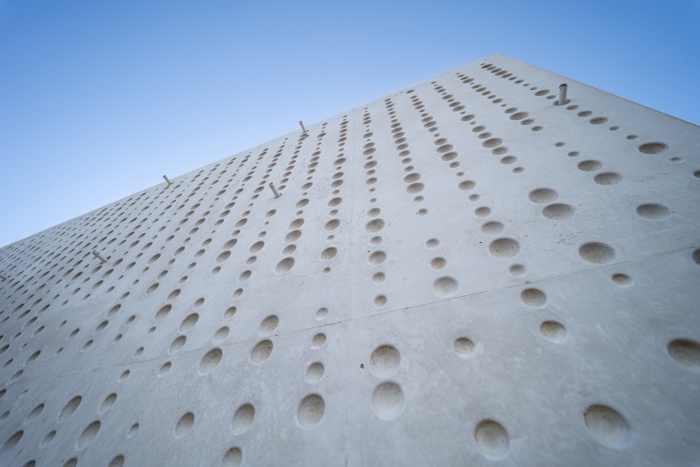
“There wasn’t a defined pattern they were interested in, but one really struck me because it had a visual hierarchy from top to bottom and was somewhat organic in nature,” Emery explains. “It looked to me like a sort of ivy but was more geometric.”
From there, he developed a parametric script in a program used for 3-D modeling. It gave him some 20 different versions that he was able to present to the owners for approval.
“Some were switched to squares, some were a little more subtle, and some were a little crazier,” Emery says. “From there, I developed a simple rendering that showed the one I thought would make the most sense, rendered onto our building.”
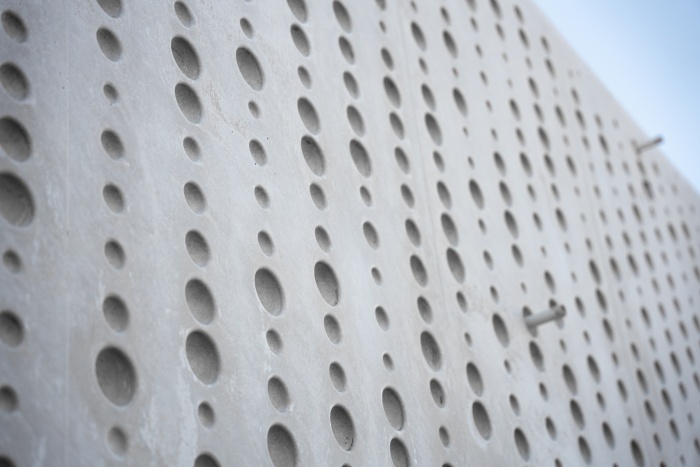
The approved version, circles of varying depths, was then created in a 4’ X 2’ size. Emery says the prototype only took a few days to develop, gave him time with the company’s in-house CNC machine and provided him a product on which to experiment with various sealers.
Out for a Spin
It also allowed him the opportunity to develop an estimated schedule with the production of the form liner, but “I had to back off on my overall goal of trying to streamline the process.” He adds that it took a year from design to erection, although the wall was not his only project during that time.
Once the prototype was in hand, Emery did some experimenting with various sealants, including leaving the surface raw, or sealing it with a sanding sealer, oil- or water-based Varathane, shellac or PermaLoc. Emery says his choice of the oil-based Varathane was done partly due to his ignorance.
“It did the best in the prototype,” he says. “As far as scaling it to the full thing, well, that should be the topic for another research and development project. It provided a great surface finish, but its overall longevity in the heat presented some problems.”
With the sealant issue at least appearing to be solved, Emery began actual production of his panels, breaking the design into machinable components, writing code, and beginning the CNC process. Although he had hoped to produce one panel per day, the actual production rate became one panel every three days, “And, I pushed the machine just about to its max.”
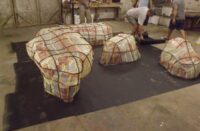
Emery explains that he was machining three layers of Medex® medium-density fiberboard (MDF) that were laminated together using a vacuum process to eliminate delamination.
“I needed three layers of MDF because it was such a thick process,” he explains. “The majority – almost two full sheets – was machined away from that. It was quite a bit of machining.”
Ultimately, he ended up laminating them to a backer to help back-screw them into the form work.
 |
 |
CNC Challenges
Although he did develop some flow to his process of laminating a sheet, then machining it, the CNC provided the big challenges. For one, with the material, it couldn’t make perfect transitions from sphere to sphere.
“I had to embrace the aesthetic and let the bit create the transition,” he says.
However, Emery found doing the work in-house on the 180 Degrees’ two-horsepower Legacy Woodworking Machinery’s CNC to be a big challenge.
“It’s essentially a higher-end hobbyist machine,” Emery explains. “I was trying not to have to outsource this work. But I did have to outsource some of the sanding to smooth out the panels prior to the finishing. It was quite a bit of manual labor.”
He adds that one of his next tasks is to figure out how to have less finishing on the panels. It was also at this point that the use of the oil-based Varathane. It proved to be an issue beyond its overall longevity in the heat.
Emery explains that he sprayed the Varathane through a gun to optimize the application. He did not realize he would have a problem with its drying time.
“We had to get on top of the form once it was sprayed and do some sealing of the seams, and it was still gummy,” he says.
 |
 |
Going Up
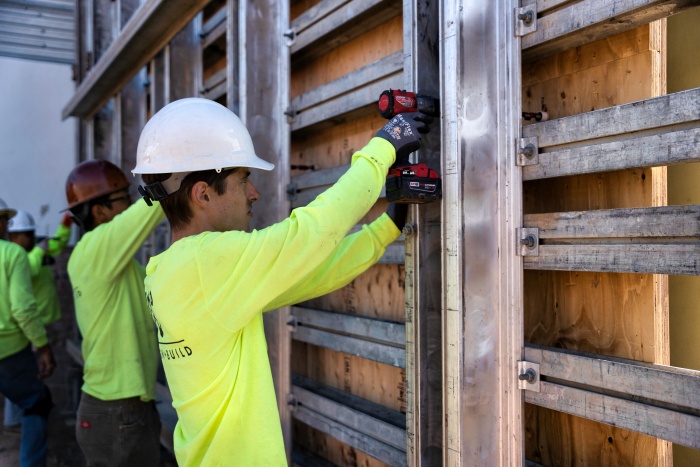
From there, he was able to put the forms in the hands of 180 Degrees’ talented concrete crew. The crew set them up.
“We tried to lay out our seams so that we could minimize them,” Emery says. “We had to incorporate rods to tie it back to the other side of the wall. I was able to randomize them by putting them in the centers of some of the spheres. The ones at the bottom are below grade.”
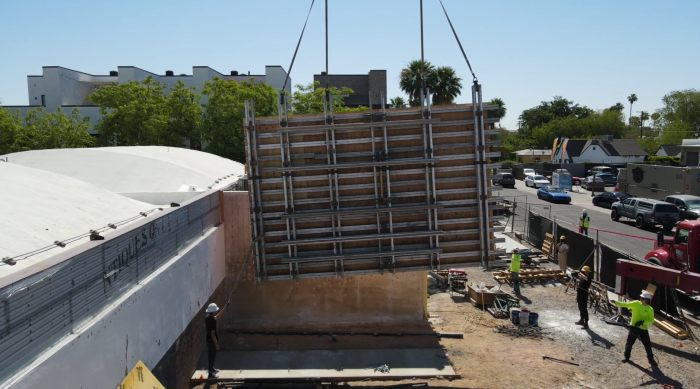
After the rebar was installed, the form was craned into place. Then it was completed with two truckloads of a custom white mix of concrete that was pumped in from the top and vibrated.
“It was very hard to do this because we have a very delicate form liner,” Emery says. “We were, really, cautious. Making sure not to have the long vibrators hit the outside and ruin the form liner.”
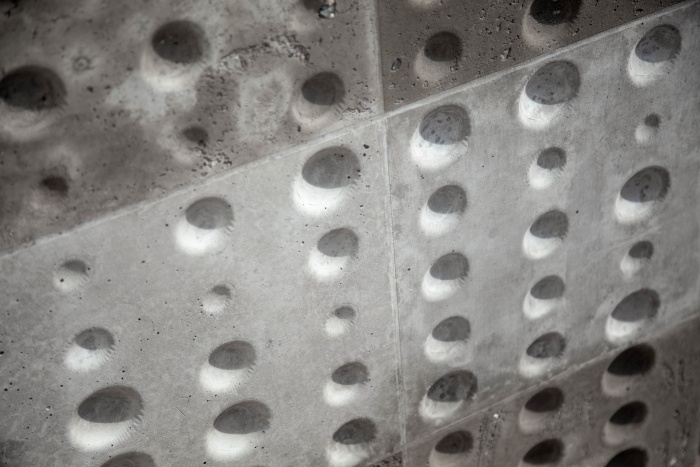
He adds that the white was chosen to mute the overall design.
“The minimal color creates an interplay and dichotomy between the visual complexity of the scripted pattern and the minimal yet textural quality of the concrete,” he explains.
Even so, once the wall was pulled, Emery says he had concerns because there was some yellowing. He perceived as a possible transference from the yellow of the MDF.
“This was probably four-to-six days cure,” he says. “But, after roughly 14 days, the UV rays burned that off. It sweated itself to a nice, white uniform surface, that’s really shiny with minimal imperfections.”
Social Media
Once the project went on social media, Emery says the company got a lot of positive responses. Its architectural clients wanted to come by to see the wall. For now, it’s behind protection because he has one last R & D process to complete.
“Right now, I’m resting which graffiti-proof product works the best on white concrete. Which is going to work the best for our application,” he says. “We’re trying to minimize the possibility of a graffiti stain to it.”
For Emery, the whole project has been a learning process, and in some ways more than he expected.
“I really learned such admiration for specialists who work in concrete,” he concludes. “It presents a whole other level of complexity that I hadn’t anticipated.”
 |
 |


