
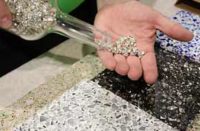
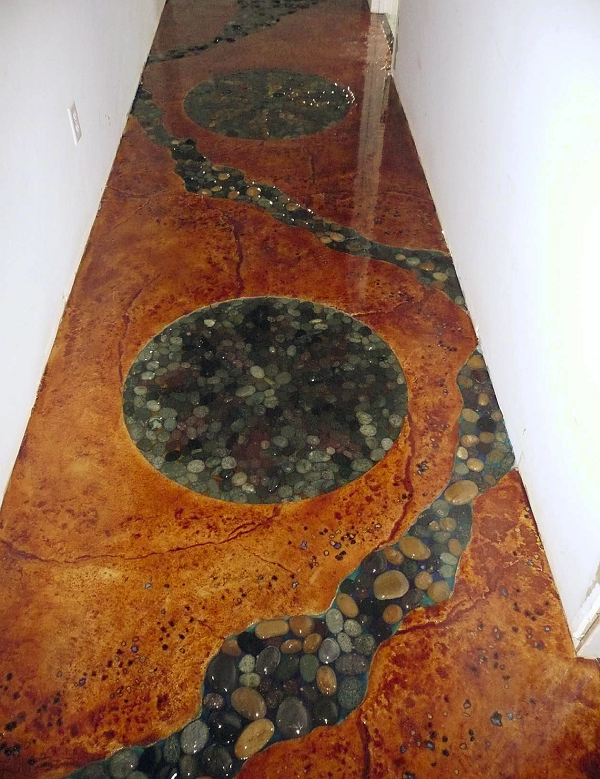
Traditionally, seeding was simple. It meant scattering pieces of rock into the surface of concrete, where they would give decorative flair to a slab. “Nowadays, seeding has taken on a broader realm,” says Tom Ralston, CEO of Tom Ralston Concrete, in Santa Cruz, Calif. “We seed glass bits, silicon carbide, sometimes even bits of metal. Different things can be seeded – or broadcast – into the concrete, later to be exposed.”
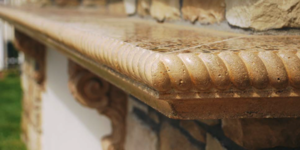
Seeding helps create unique looks that aren’t obtainable with other materials, explains Bob Harris, president of the Decorative Concrete Institute. “There are thousands of options available, when you consider tinting the matrix of your ready-mixed concrete or cement-based topping with a variety of colors as a base into which you can seed exotic aggregates.”
One reason contractors might seed concrete rather than adding decorative aggregate to the mix before pouring or casting is the overall cost. “You could be adding 2,500 pounds of aggregate, and aggregate can run 10 cents to 20 cents a pound,” says Tim Blankenship, concrete specialist at Blankenship Concrete Specialties. “You could end up adding a couple hundred more dollars per yard to your concrete costs just from the aggregate.”
Rather than adding a couple thousand pounds of aggregate into the mix, you can add six pounds of aggregate to the surface and get close to the same look, he says. “For example, we did a project several years ago where they wanted the aggregate in the mix. The cost when installed was around $14 a square foot. Had we broadcast the aggregate, it would have cost between $7 and $9 a square foot.”
Other considerations include the desired appearance, the difficulty of placing the chosen aggregate, and the availability of the aggregate, says Doug Bannister, owner of The Stamp Store, in Oklahoma City. “Something (also) to be considered is how the performance of the slab might change if the aggregate is integral. With seeding, the integrity of the mix design is maintained.
“One offsetting cost factor is the labor required to broadcast and work in the aggregate,” he says. “If the contractor has the latitude to make a choice in methods, he or she must assign costs to these considerations to ensure profitability and still deliver the look and the long-term durability of the project.”
Types of aggregate that are readily available for seeding into projects vary from region to region, Bannister notes. “The Southeast part of the country has beautiful river rock, while the Northeast has strikingly handsome dark gray granite.” Harris takes that idea a step further, saying that even within a region of the country, such as the Southeast, the aggregates available can vary – for example, there’s granite in Georgia, but limestone in Florida. And areas near the seaside have ready access to crushed shells.
Sowing the seeds
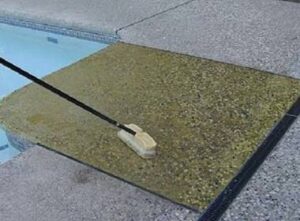
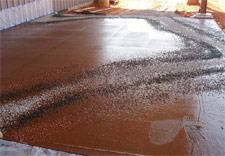
The most effective way to seed decorative aggregate into the concrete varies, depending on the dimensions and the cost of the project, as well as the skill level and availability of labor. “Clients want a nice, even, heavily laden aggregate finish,” says Ralston, “so it is all tightly compressed and compact. In order to get that, you need to broadcast your aggregate correctly.”
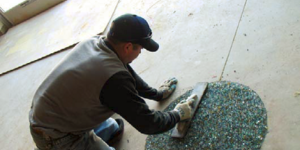
Although there are mechanical spreaders for more even coverage, the most common method is hand broadcasting.
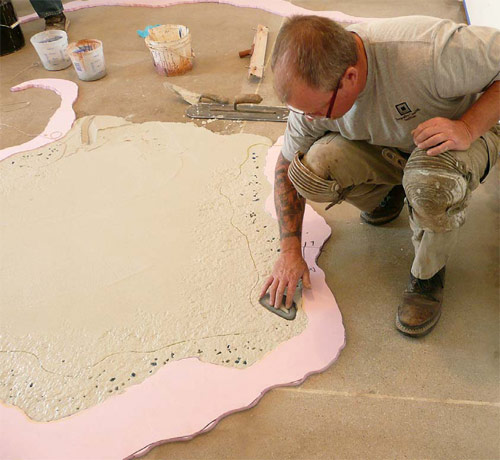
“I have seen some, mostly old-timers, throw the aggregate using a square-point shovel,” says Harris. “Regardless of how you apply it, you have to be careful to not mound the aggregate up because the aggregate will not become encapsulated in the cement paste. Sometimes it takes a delicate touch that may require building a temporary bridge allowing you to drop the aggregate straight down as opposed to broadcasting it out.”
Peter Tomé, founder and CEO of photoluminous aggregate provider Ambient Glow Technology, uses adhesive to stick hand-placed aggregate to a form before casting. “Some people will just put the aggregate into the form and then pour. Without an adhesive, when you add the concrete, it pushes the aggregate, so you have areas without any aggregate in them.” Tomé uses a water-based carpenter’s glue or a contact cement spray adhesive. He brushes or sprays a fine coat into the form before hand-broadcasting glass or other aggregate, then casting.
Alkalinity and other challenges
While seeding doesn’t require significant changes to the mix design, there will be times when the contractor will want to do some tweaking. “It all depends on what you are seeding into the surface itself,” says Blankenship. “Is it anything that will affect the ASR – alkali silica reaction – which can be caused by glass or shells or different minerals, depending on where you are in the country? Is it being used for an exterior mix or will it be polished? There are a lot of variables when it comes to tweaking, and the best way to figure out to try it out on test samples first.”
Tomé calls ASR the concrete cancer, explaining that if the alkalinity isn’t neutralized, the concrete will begin to break up over time. The way to combat it when using glass aggregate or another potential catalyst is to add another type of filler, he says, like fly ash or pozzolanic materials. “This creates a chemical balance which neutralizes the possibility of any alkalinity issues.”
Saw-cutting should also be taken into consideration when seeding.
“You need to be careful about saw-cutting early – on the same day – when you have heavy aggregate exposure, since this could cause pop-outs along the saw cut,” says Harris. “In most cases, we have not had issues with saw-cutting as long as the concrete has had sufficient cure time, which typically means the next day.”
Controlling cracking is something else to think about, Blankenship adds. “We want to make sure we plan our layouts to consider corners, obstructions, and hallways.” A well-planned layout will allow for more precise broadcasting and saw-cutting, which will reduce crack problems.
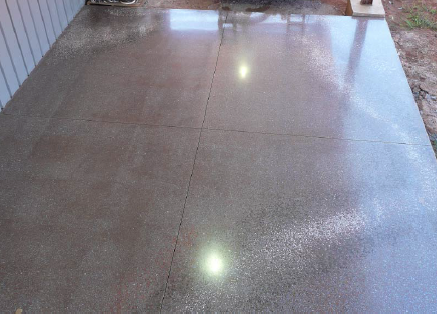
The final reveal
Aggregate can be exposed in several ways, depending on the application. The floor can be shotblasted to expose the aggregate and then polished, for example. “If polishing instead of exposing through washing, you might increase the PSI of the concrete or wet cure the concrete to be polished,” Blankenship says.
Another decision, says Ken Thornley, owner and vice president of Heritage Glass Inc., is how far to grind to bring to a polish. If you seed with large pieces, you generally have to grind a bit more to expose them, he says, while if you use small pieces, if you grind too much, you risk grinding them until they don’t exist. Typically, glass aggregate comes in sizes that range from 1/16 inch to 3/8 inch.
All that said, the most common way to expose seeded aggregate is to use a top-surface retarder. According to Harris, the spray-applied product retards the setting of the surface paste, allowing for the paste’s easy removal. “When I worked in the theme parks, we were doing 50-plus yards everyday with just water and brooms,” he says. “We would start with just water and then move to fine- to medium-bristle brooms as the concrete stiffened. If it was needed, we would then move to a coarser broom, sometimes needing wire-bristled brooms and on occasion even a pressure washer.
“I look back now on how much we were pouring and exposing and I’m amazed at how good it still looks today,” he says.
www.ambientglowtechnology.com
www.decorativeconcreteinstitute.com
www.heritageglass.com