

Over the years, I’ve seen articles and presentations galore addressing different ways to manage customers’ expectations. And today, as I review multiple projects by multiple contractors around the country, it’s still one of the largest issues I deal with. As a former contractor, manufacturer and now basically an owner’s representative on most projects, I’d like to share a relatively simple formula that will handle this issue for 90 percent of your projects.
Right size your sample area and don’t try too hard
The first and simplest mistake I see are contractors who regularly make the sample area too small. If you are installing a polished concrete floor, generally your machine-cutting path is almost 3 feet across. If you do a 5-by-5-foot sample or even a 10-by-10, you’ll grind and polish the sample two or three times more than you ever will the floor because you can’t turn your machine around properly in the space you’ve allowed.
Generally, when you’re polishing a floor you take long passes and turn around at the end of the run. The smallest area you can realistically provide a good finished sample is about 300 feet. Twenty feet long by 15 feet wide gets you five to six 20-foot-long passes with room to turn just like you would on the floor.
Recently, I was on a project where the sample had an average gloss reading of 70. But when I came to review the final product on the main sales floor, it had an average gloss of 45. The issue, after working it backwards, was that the contractor had done significantly more to the sample area than to the main floor.
I see contractors concerned with selling the job put extra effort into the sample. While occasionally this helps you win a project, more often than not it makes the project overall hard to sell, which in turn means it becomes harder to collect your money at the project’s end. If you had to choose between losing a project at the start, before you have spent any money, and not being paid at the end, after you are heavily invested into the project, which would you choose?
As a contractor, I would rather lose the job early on. Teach your crews to do the sample exactly as they will the rest of the project and leave the sample in place as a comparison. It will make the customer experience much smoother.
Choose sample area that needs repairs
Instead of doing your sample in a project’s best-looking area, choose an area with some damage. It doesn’t need to be the worst area, but if you pick the best area then that’s the finish the customer will expect everywhere.
Have some repairs in your sample, especially on remodels. Try to show several different types of repairs so that you have reference points later if you run into areas where the damage is worse. If possible, do spall or hole repairs, a crack repair, joint repairs and pinhole grout fill repairs in the sample.
You can take your customers back to the sample (which you have left in place for reference) and show them a joint repair or a large hole that was repaired with polishable overlay material and say, ‘This is what I believe the damaged area will look like when the job’s complete.’ By doing a larger area, you are much more likely to encounter these scenarios than if you did a smaller section.
Joints are a big issue in samples. Selecting a complementary joint color is extremely important. Installing it in the sample allows the customer to see your selection and agree or disagree with the final color choice. I recommend doing at least 10 feet of joint fill in the sample area. With the larger sample, you could even install two colors and let customers select which one they like best. Choices like this help your customers become more involved in the selection process. This small tip goes a long way toward helping to get projects closed out and getting you paid in the end.
Include edges in your sample
Edges are the last major thing that should be addressed when it comes to samples. Without providing customers with a good example of the quality of edgework that can be completed on their project, you will fail at managing your customers’ expectations.
Samples are done in the middle of the slab all the time, but this doesn’t allow customers to see what the hand-finished, porous and rough-textured edges will look like after they are polished. They are not given the opportunity to see what the height difference looks like.
When you eventually polish the edges to the best of your ability, and they fall short of what is demonstrated in your sample, the customers are dissatisfied. When you try to explain the issue, as often as not, the customers think you’re just trying to get out of doing the extra work. This creates disagreements, and even if you prove it to them, the goodwill of the project is irretrievable.
You are much better served to provide what the edges will look like as part of the sample. The issues can be addressed at the beginning of the job and potential alternative solutions agreed upon. This may allow for a change order for extra work, or an alternative decorative option may be agreed upon. I recommend you do at least 10 feet of edge work in your sample. Twenty feet is better.
Manage expectations
With all of the topical guards available today, there seems to be a lot of floors sold on the shine and merits of the stain protection rather than the quality of the mechanical polish. On my projects, I always require that half the sample be stain protected and the other half left unprotected. This allows the customer to see what the slab will look like after the topical stain protection has worn away.
This will keep you from having to come back later and explain why the gloss is gone in the traffic areas. Again, this sets that expectation and allows opportunities for maintenance discussions. It also shows the customer the quality of your work without a stain protection product dressing it up.
If you provide a large sample with the same finish process that’s going to be used on the main floor, with repair options, joint fill and edge work, customers can’t say you didn’t give them an accurate representation of your work. This will keep them from feeling they are receiving less than what they paid for when the job is complete. Managing your customers’ expectations through the sample allows you to get paid easier and the goodwill between you and your customers to remain strong.
As a final aside, over the years I have had a lot of difficult customers. These are the people who have a hard time being happy with whatever is done. Whenever I thought I might have one of these customers, I did something that lightened the mood — as well as tied the customer to project agreements.
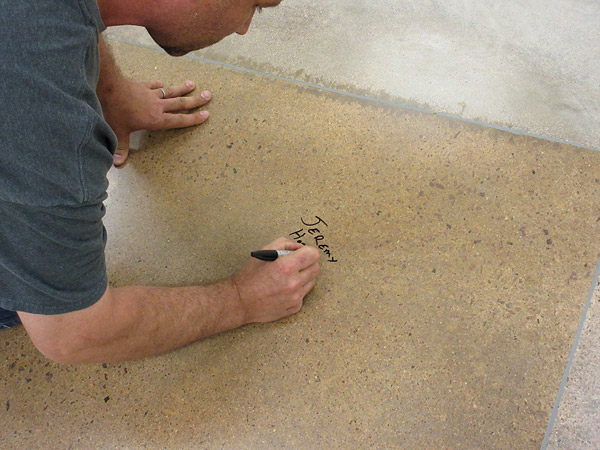
After the customer reviews the sample and we have something he or she agrees to, I ask: “If I can get the floor to look just like this sample, would you be OK with that?’ Inevitably, the answer is yes. Then I pull out a big Sharpie and say: ‘Great! Sign your sample showing me that you love it.’ Then I take a photo and send it to the customer.
We leave that sample in place until the very end of the project (make sure they sign in the unprotected area) and then we hit the signature with 100 resins and a hand grinder and polish it out with no residue. This has worked many a time with difficult customers. Just remember, keep it light and fun.