
 Liquid release agent is quickly becoming the choice of many decorative concrete contractors. With the increased demand for quicker turnarounds, cleaner job sites and environmental concerns, using liquid release agent for stamped concrete becomes an obvious choice.
One concern for contractors who are currently using powdered release is whether they could still create highlights in the stamp work if they were using the liquid. It can be done through a simple process I will explain here.
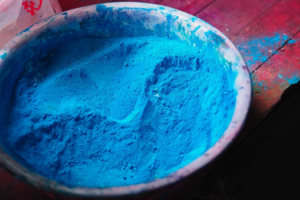
The most common way to achieve color highlights is to add an oxide pigment directly to the liquid release before the texturing process begins. Raw pigments may be used, but they are very concentrated and difficult to control. Adding a powdered release agent in small amounts is a clean and simple way to accomplish our goal. That way the liquid release acts as a carrier for the powdered color, which is already formulated and easy to use. Usually I pigment an entire five-gallon container at one time in order to maintain uniformity with the job. The amount can be adjusted to the size of the project.
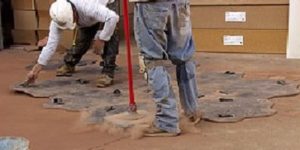
I recommend starting with a small amount of pigment to begin with. You can always add more if needed, but you will not be able to go lighter once you begin applying the solution. A quarter-cup per gallon should be sufficient to start. Apply the liquid release to the stamping tools and to the concrete surface with a low-pressure sprayer — set it to a fine mist so you will not over-apply. Continue to move the stamping tools as normal.
As you move your texturing tools you will find that some of the pigment will lift with the stamps. This is normal. To compensate you will mist lightly over the already textured areas to even out the highlighting. After the texturing process has been completed you may apply a touch-up coat as needed.
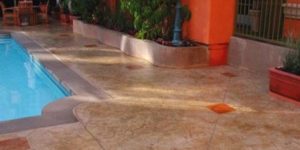
As the liquid puddles it should carry the pigment into the relief areas of the texture and the joints, where you want the highlighting. The liquid release should evaporate from the surface within 12-24 hours depending on the ambient temperature, leaving the pigment we added on the surface. With a little practice, your technique will improve. You may not want to attempt this method on a steep grade, as runs in the color process may occur.
Tips for success
- Make sure that you mix the dry pigment thoroughly before adding the solution to the sprayer.
- Test your sprayer off the slab to ensure proper color and dispersion.
- Continue to shake your sprayer from time to time to keep the pigment suspended.
- Always start with a light solution. Darken as necessary.
- Do your detail and touch up work before you re-apply.
- Prepare samples using this method whenever possible.
- Use caution not to begin stamping too wet, as impacting of the release may occur. This can also occur with powdered releases.
Happy stamping!