
A good set of tools goes a long way. When it comes to applying urethanes, epoxies and other concrete coatings, it’s a necessity. In a world where you have to constantly monitor moisture issues, pH, efflorescence, alkali-silica reactivity, surface temperature variants, and constantly changing weather conditions, the last thing you need to worry about is an underperforming tool.
So, which ones are best? As far as brands go, that’s relative. Ask around. Talk to people you trust. They’ll tell you.
But when you ask around, you will also find you keep hearing certain types of tools recommended again and again.
What follows isn’t a comprehensive list, but these are some mainstays you ought to include in your arsenal, whether you’re installing a garage floor or a warehouse surface. We also asked the experts how best to use them.
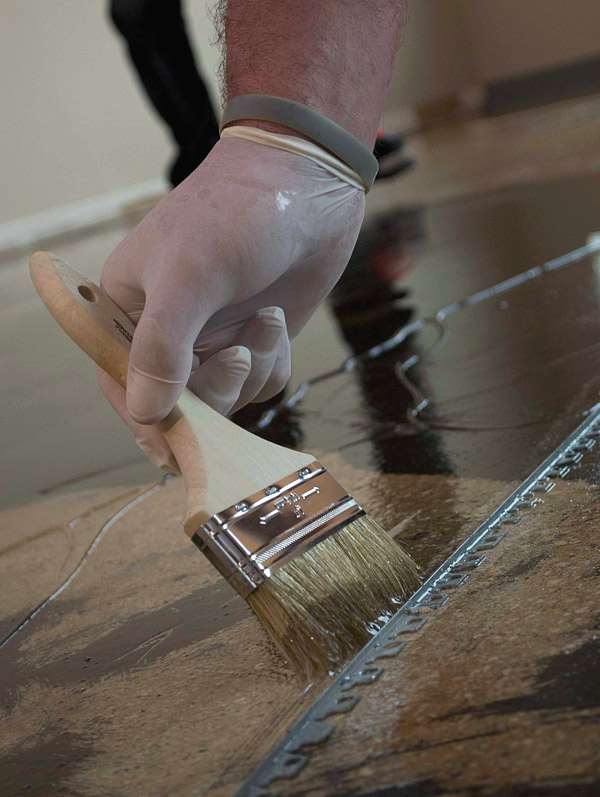
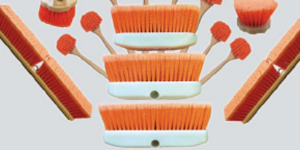
Chip and synthetic brushes
Not all brushes are created equal, and there is a wide variety to choose from. So how do you select the best brushes to fit your needs? Let’s take a quick look at two of the most common: the standard chip brush and the synthetic.
Standard chip brushes are cheap. They are smaller brushes and usually come with a wooden handle. The bristles are made from inexpensive materials, such as horsehair or polyester. Chip brushes are meant to be used once and then discarded.
Tim Seay, of Decorative Concrete of Virginia, a full-service concrete finisher out of Lynchburg, Va., says chip brushes are the best choice for “cutting in” edges when applying thicker coatings.
“We use chip brushes on epoxies and urethanes that will self-level on their own after we cut in the edges,” Seay says. “These brushes are much less expensive than the synthetic brushes, so we just throw them out after we use them with any two-part epoxy or urethane.”
Another important factor when choosing a brush: What should you use when applying a solvent-based product? Epoxies, urethanes, acrylics and other coatings are either water-based or solvent-based. If the formulation is based on water, you typically won’t see an interaction with the brush. But if the formulation is based on any type of solvent, the glue that holds the bristles in some brushes could dissolve, which could leave brush fibers on the finished surface.
Victoria Simpson Collins, of Capitol Decorative Concrete, Easley, S.C., has been installing decorative concrete for 22 years, and she is very careful about her choice of brush.
“I’m always very aware of what a xylene-based product can do to my brushes and rollers,” she says. “If they are not designated for use with solvents, they will melt down and fall apart.”
Like Seay, Collins uses brushes as a cut-in tool. She also uses them to install specialty logos in her signature acid-stained floors. “I have even used artists’ horsehair brushes to install logos requiring acrylic application of primary colors,” she says.
Seay uses synthetic brushes whenever he cuts in edges with any lower-viscosity clear sealer. “I always buy angled synthetic brushes because I think it helps you to keep a cleaner edge,” he says.
Rollers
On smaller floors, rollers are a great way to apply a wide variety of coatings. There are obvious differences in nap. For epoxies, and clear coats over acid stains, Collins recommends a roller cover with a 3/8-inch nap. “This lower nap ensures that no hairs are pulled from the roller during a solvent-based install,” Collins says. “It also leaves a smooth, even glossy finish.”
For stamped concrete and reseals, Collins suggests using a 1/2-inch to 3/4-inch nap. “When sealing stamped concrete, you don’t want to leave extra sealer in the grout lines and textures of the pattern. This can cause shinier spots. Using higher-nap rollers, you can pick up the extra sealer that can settle into these depressions in the patterns.”
Seay prefers a mohair roller for low-viscosity sealers. “These put down a thin and even coat and leave less lint than other rollers.” Seay also has a good tip for rolling sealers: “We roll it in a V pattern across the floor. Then we backroll it by pushing the roller forward and lifting as it is moving. I feel like when we roll the last pass by only pushing it one direction and lifting the roller, it leaves fewer stop-start lines between each roller pass.”
On occasion, Collins uses various faux rollers to achieve special effects. “I especially prefer a sea sponge roller, which comes in both 6-inch and 12-inch lengths,” Collins says.
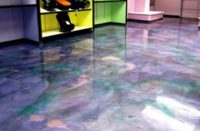
She recently installed a 5,000-square-foot project using solvent-based pigmented sealer. The customer asked her to mimic a Corian countertop using sealer tinted cream and white. “I used a low-nap roller to install the white and then used the sea sponge roller to add the highlights of cream. Both being solvent-based sealers, the two colors emulsified and became a blended color.”
Most roller frames (the part that holds the roller) are manufactured to fit on telescoping extension poles that will easily allow you to reach out across a 10-foot by 10-foot section. Avoid using wooden poles as they can bend and crack.
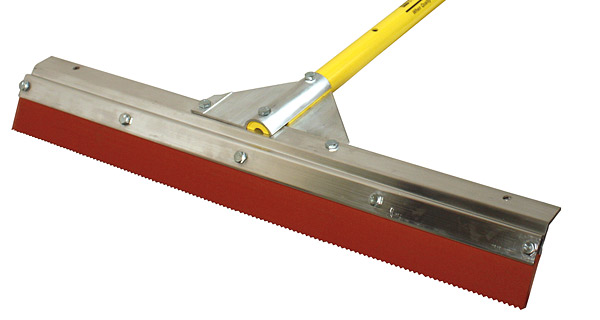
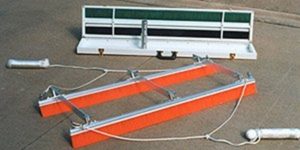
Squeegees
Large-surface floors are no longer rolled these days. Instead squeegees are becoming the popular choice, especially when it comes to very large, commercial surfaces.
“We use a rubber squeegee whenever we spread epoxy,” Seay says. “We typically use a 14-inch or 16-inch squeegee instead of the 2-foot- or 3-foot-wide ones, because they don’t leave as much epoxy in the lower spots on the floor.” Seay explains that most floors have a certain degree of waviness to them and a wide squeegee will not be able to pull enough material out of the low spots.
Magic Trowels
Thanks to a blade designed to smooth and spread while minimizing trowel lines, a Magic Trowel (from TexMaster Tools) is handy for most overlay projects, Seay says. “When we pour stamped overlays, we use a Magic Trowel to get the material smooth before we stamp it. We also apply skimcoats with a Magic Trowel for many of our troweled or sprayed overlay products.” One good tip, Seay says, is to cut the points off of the edges of the blade. “We try to round them so that it leaves fewer lines in the floor.”
Seay also likes to use a hand-held rubber squeegee to remove water from concrete countertops after they’ve been ground. “Just rinsing a countertop to remove the water and slurry doesn’t do a good enough job of cleaning it,” he says.
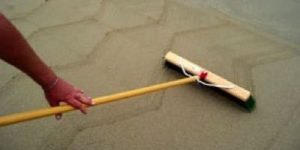
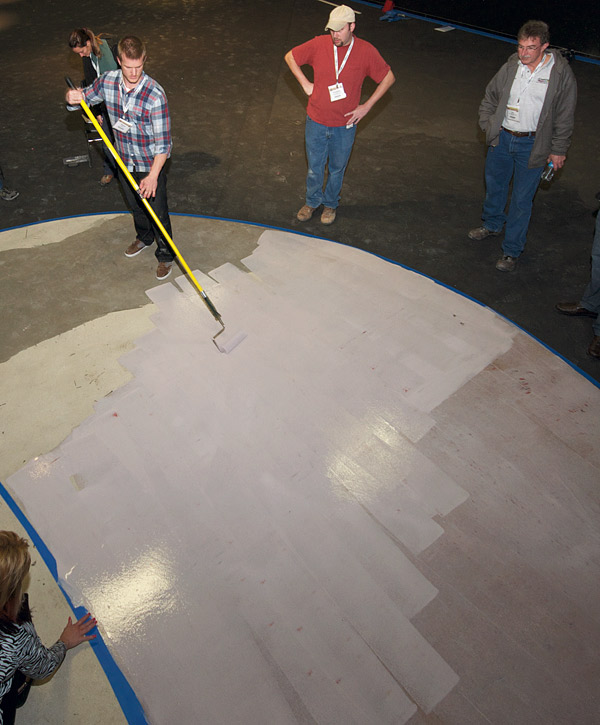
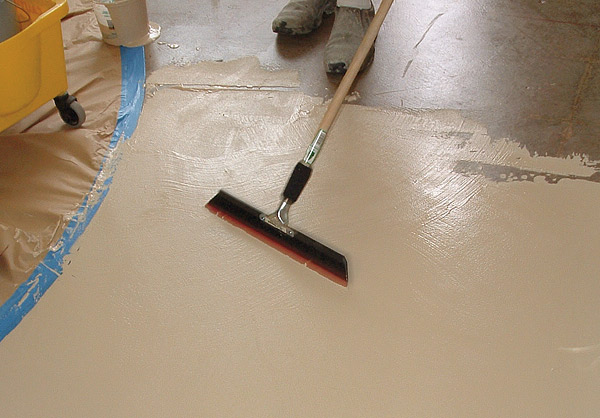
T-Bar applicators
Where squeegees have replaced the use of rollers for applying coatings over larger square footages, T-bars are fast becoming the tool of choice for applying smooth and even sealers.
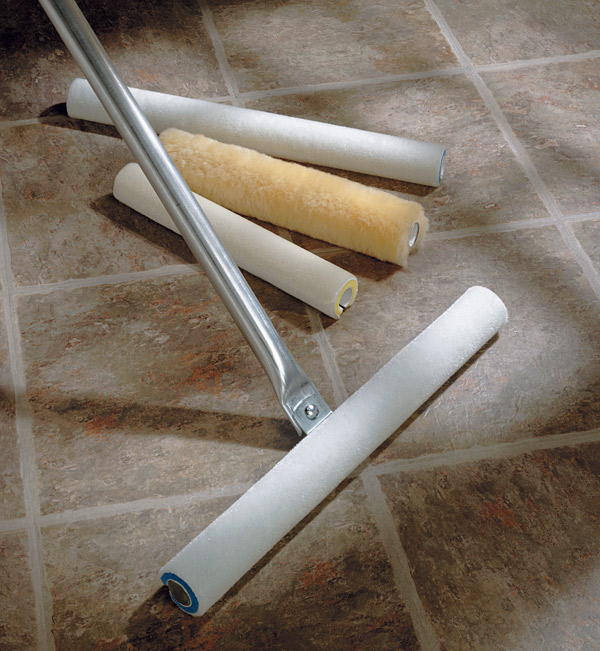
A T-bar applicator is a weighted, rigid frame fixed to a 90-degree swivel. They are used to rapidly pull thinner coatings smoothly and evenly over large surfaces. Depending on the application, different pads can be attached to the tool, including microfiber blades, foam sleeves for water-based and solvent-based coatings, and even mop heads. Some even work with backpacks that autofeed to the head.
Julio Hallack, of Concrete by Hallack, in Turlock, Calif., became interested in concrete coatings when he visited the World of Concrete in the early 1990s. Today, he swears by the T-bar applicator.
“In the old days, you used mops to put down your sealer,” Hallack explains. “Then you had to backroll it. It took four employees two days to get the job done.” By using a T-bar applicator, Hallack has cut that time in half — and with half as many employees. “You can apply up to six coats of sealer to 45,000 square feet in just two days.”
Doug Bhatt, of Re-Crete, in Bedford, Texas, also sings the T-bar’s praises. He uses one to apply sacrificial acrylic finishes.
“Interior decorative concrete projects aren’t complete until an acrylic floor finish is applied as a sacrificial coat to protect the stain and sealer,” Bhatt says. “Acrylic floor finishes protect the sealer and can be reapplied when they are worn down without having to strip the finish every time.”
Bhatt says that whenever the surface starts to show signs of wear, usually in high-traffic areas, it’s time to reapply. “This is done by thoroughly cleaning the floor and then applying the floor finish the same way in the areas that show wear.”
Like Hallack, Bhatt says that building up thinner layers is better than applying one thick coat. “Putting down a thin coat is very important,” Bhatt says. “This dries faster and is the floor finish manufacturer’s recommended application method.”
Bhatt says that with a T-bar fitted with a 30-inch floor coater he can apply 1,000 square feet of a sacrificial floor finish in about 10 minutes. “You just can’t beat the ease of use of the T-bar.” Another advantage, Bhatt says, is that it leaves no roller marks.
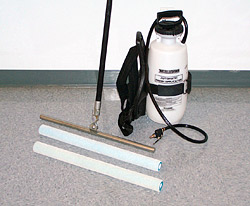
David Marling is the senior sales and consulting manager for DCS Facility Services, a Rocklin, Calif., company that maintains more than 9,000,000 square feet of retail and grocery surfaces every night. Many automated versions of the T-bar are gravity-fed, which limits them to thin, water-based sealers. But Marling uses one that connects to a pressurized backpack that can hold up to 2 gallons of product and can accomodate both water-based and solvent-based sealers. “It works well for all types of coatings,” Marling says. “I use the T-bar for all coatings that require coverage of 550 to 1,000 square feet per gallon, and for both waterborne and solvent-based coatings, including the wet-look lacquers used on decorative concrete.”
For solvent sealers, he adds about a half a gallon of solvent, shakes well, and runs the solvent back into the solvent container. “This keeps the unit from becoming contaminated and sticky.”
Basic Steps for Using a T-Bar Applicator
(Always read the manufacturer’s instructions.)
Choose the type of head depending on the type of sealer (waterborne or solvent), and the application (coat or recoat).
For new surfaces, make sure the floor is free of moisture, dust and debris and that the surface is the proper temperature for applying the coating (check manufacturer’s specs).
For recoats, clean the surface with a mild detergent floor-cleaning product. Rinse well. Squeegee remaining water off the surface. Allow plenty of time to dry.
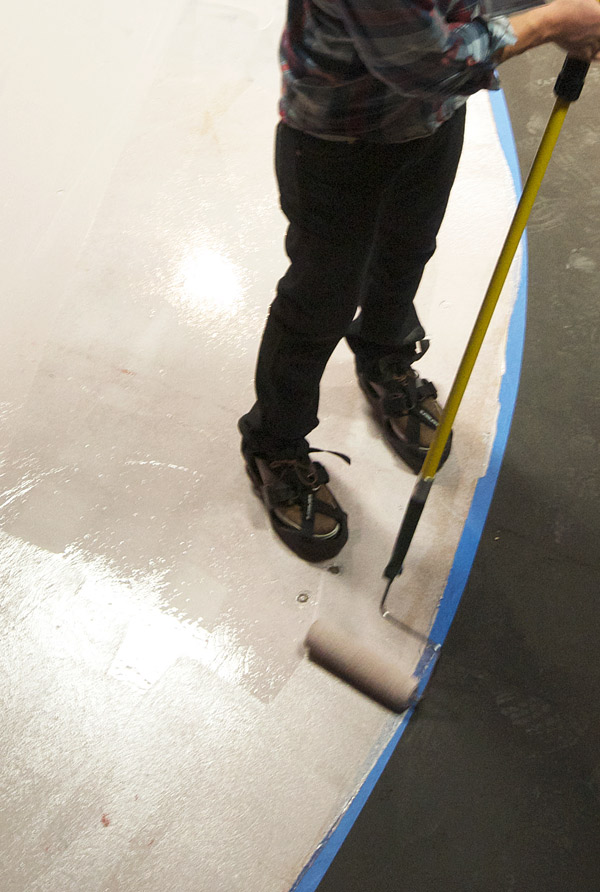
This is a two-man job. Have the first person pour a long bead of product across the floor.
Dampen the head in the bead. Angle the head at a 45-degree angle and pull along the bead, moving steadily across the floor.
Turn the head and travel in the opposite direction. Maintain the 45-degree angle. Continue until the entire surface is coated. Backroll if necessary.
Hallack says that applying thinner-build coats is very important when applying sealers, and using the T-bar allows you to do just that. “Thin, thin, thin. There’s no comparison to the T-bar,” Hallack says. “When you’re dealing with sealers it’s all about how thin you can get the coating and how fast you can pull it down.”
Basic Instructions for Cleaning a T-Bar Applicator
(Always check the manufacturer’s instructions.)
For waterborne coatings, rinse the head with water. Use a bread knife to gently scrape the material off. Be sure to clean the entire assembly as well. Air-dry.
For solvent-based coatings, use the corresponding solvent (check manufacturer’s specs) to wipe the head clean. Be sure to clean the entire assembly as well. Air-dry.
For automatic T-bars, follow the directions above, making sure to pump either water or solvent through the hose. Hold down the trigger and pump until the fluid runs clean. Be sure to dispose of your rinsing agent in accordance with state and federal regulations.