
If you pour it, it will crack.
This unwritten law of concrete may as well be written in stone because — try as you might — there’s no getting around it. So what’s a contractor to do? In short, learn to master the art of placing control joints to encourage concrete to crack where you want it to crack.
 According to the Portland Cement Association, control joints — also called contraction joints — should be placed at two times the slab thickness in feet for a maximum aggregate size of less than 3/4-inch.
For example, the PCA maintains, the maximum joint spacing for a 5-inch slab with a 3/4-inch coarse aggregate would be 10 feet. If the maximum coarse aggregate size is greater than 3/4-inch, the spacing could be increased to two-and-a-half times the thickness. This would increase the spacing to 13 feet.
Lee Levig, owner of Concrete Works in the San Francisco area, cites what he says is the American Concrete Institute’s “rule of three.” If you have a four-inch slab, he explains, you would multiply it by three. “So every 12 feet, you would have to cut a control joint,” he says. In his area however, he adds, he uses the “rule of two,” where his crews cut a joint every 8 feet for a 4-inch slab. “We’re in a real clay soil area, where soil expands 8 percent volume from dry to wet.”
How low should you go
After determining how far apart you should place the control joints, how deep should you cut them? Well, that all depends on whom you ask.
Levig says the rule of thumb is 25 percent the depth of the slab. “So if it’s a 4-inch slab, you’d cut a 1-inch joint.”
Dustin Ferch, owner of Dustin Ferch Concrete Construction in Roseburg, Ore., agrees with Levig for the most part. But in his neck of the woods, where the soil is bad and they have a lot of issues with cracking, he says, “I cut 50 percent on rebar. The aggregate will hold the slab in place, but we have to rely on rebar and lots of control joints.”
Charyl Dommel, president of Slip Industries, the company that manufactures the Torpedo Groover, thinks joints should go at least a third of the depth of the slab. “A nice deep groove isn’t going to hurt the concrete,” she says. Her company makes a 1 3/4-inch, as well as a 1 3/8-inch groover, which she says will accomplish most jobs nicely.
Chris Sullivan, national sales manager for QC Construction Products in Denver, believes in making cuts a bit deeper than most. He maintains they should be two-thirds the depth of the slab.
Cutting the joints
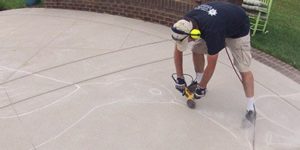
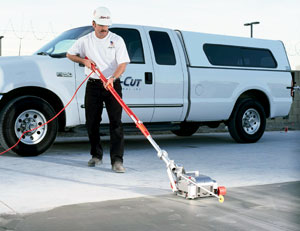
According to Sullivan, there are three methods to cut in control joints. You can hand-cut a joint with a groover while the concrete is still wet. You can use an early-entry saw to cut a joint as soon as the concrete is hard enough to walk on. Or you can use a standard saw to cut in joints 24 to 72 hours after the concrete is poured.
“With early-entry saw cutting, you’re out of there before the concrete has any cure on it,” Sullivan says, adding that Soff-Cut is the leader in the industry for making these tools. “You’re able to put a joint in there before the stress begins. Early-entry saw cuts eliminate random cracking dramatically.”
The downside to this method, he concedes, is that only certain types of equipment can be used and early-entry saws are expensive compared to other types of concrete saws.
But not all Soff-Cut saws are expensive, says Brenda Nabarrete, marketing manager for Soff-Cut in Corona, Calif. Five years ago, Soff-Cut introduced an economical line called Prowler saws. “These saws allow contractors who could not previously afford to Soff-Cut their joints to get into the game at less than half the cost of traditional Soff-Cut saws,” she says.
The early-entry sawing not only eliminates the need to come back the next day, but allows the cutting to be done dry. “It’s cleaner and it’s healthier,” Nabarrete points out. “There’s no slurry running off and very little clean-up involved afterward.”
The early-entry method also uses a shallower cut, resulting in improved aggregate interlock.
The Soff-Cut system’s technology was developed by a California concrete contractor back in the 1980s. He designed the cutting edge of the blades to move upward during operation, Nabarette explains, pushing debris out of the joint. There’s also a skid plate through which the blade is inserted, which many consider to be the key element to prevent edge raveling. “The skid plate holds everything in place while the operator makes a ‘surgical’ cut,” she says, likening the saw to a knife.
“If you come back to cut the next day, cracks are already forming,” Nabarette says. “You may not be able to see them, but they’re there.”
Most contractors contend that cutting with an early-entry saw is no more difficult than using a conventional saw. But some report that the quality of the cut isn’t always as good as a wet cut, especially if the blade is worn or the skid plate isn’t flat against the surface.

Getting in the groove
Another tool that’s very handy to have when it comes to cutting control joints is the Torpedo Groover from Slip Industries. Designed for finishers who wanted a handled tool they could push across the slab (so they didn’t have to don kneeboards and crawl), the groover comes in four lengths: 24, 36, 48 and 56 inches.
If jointers have difficulty cutting a straight path, this tool is designed to give them a straight path to follow, says Ferch. “The Torpedo Groover makes a beginner cut joints like a pro. You have to really try for it not to go perfectly straight. You almost can’t make a mistake.”
Ever since he began using the Torpedo Groover, he says, he spends more time on other details of the job rather than on his hands and knees fixing joints. All of his subs who have seen the groover in action, he adds, have bought one for themselves. “Where it won’t eliminate any tools, you’ll find your quality control will be much better and the amount of manpower and time will be shaved down.”
However, Ferch says, “The groover is super at control joints, but it’s not a finishing tool.” For that job, Slip Industries has a stainless-steel tool, also guided by a handle, which can be used after the groover to produce a rounded joint. Tools made by other companies are also compatible with the groover, Ferch says.
Dommel with Slip Industries says that her company makes all sorts of finishing tools to follow the groover, including custom tools. “They just tell us what they want and we make the tool,” she says. One contractor, she adds, ordered what they call “a butterfly groover,” which makes a design like a picture frame. “That’s his trademark,” she says.
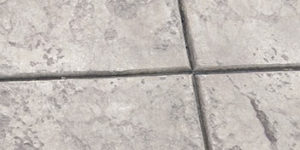
Most contractors clean up their control joints with a V-shape or beveled tool to give a professional look.
For art’s sake
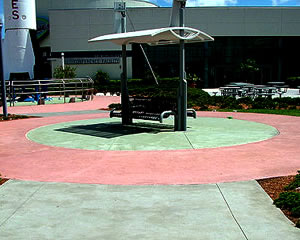
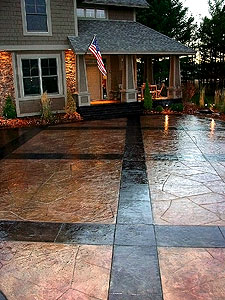
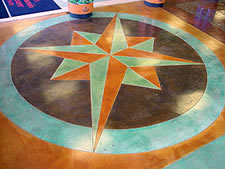
Control joints can be more than utilitarian cuts. With a little imagination, they can transform a slab of concrete into a cement canvas that livens up the landscape.
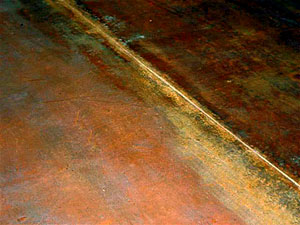
 “We do everything in one pour,” Levig says, “so we like to use cuts as a border. That’s also where we change colors.”
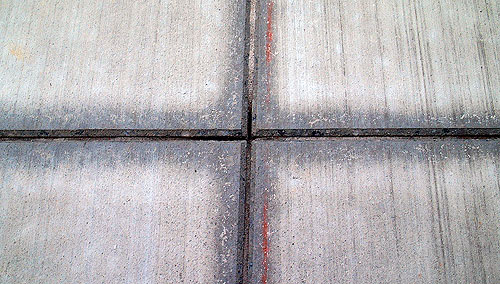
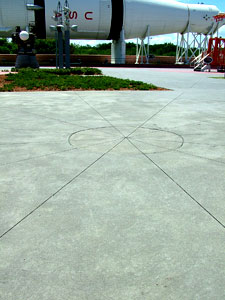
The first thing you should do is lay out your mandatory control joints, which include joints in those pesky corners. “We like to cut our joints on a 45-degree angle,” he says. “Joints don’t have to be totally square all the time. They can be used in your patterns. You don’t have to just cut straight lines. Get artistic. Get creative. Make control joints part of the art.”
Sullivan with QC says that joints allow you to put different textures on either side of the cut. And with some simple blocking, you can also throw down different colors to create patterns. “The sky’s the limit,” he says.