
About four years ago, I had a client tell me about a finish he had seen on a project that he really liked. It was about three hours south of where we lived. To make a long story short, we took a drive to view this finish and found it to be an acid burn finish.
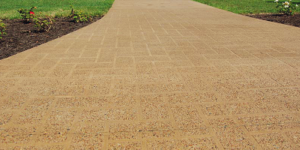
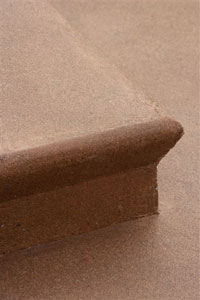
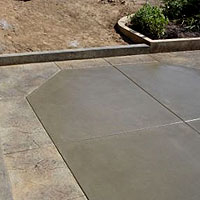
It had the appearance of old weathered concrete, where Mother Nature and time had eroded the top to create a light sand finish. It was gray in color, and the consistency of the sand appeared to be semi-spotty.
 What my client liked about the finish was that it had a natural look. So we set out to achieve this sandy effect ourselves.
What he didn’t like was the inconsistency of light sand to heavy sanded areas. So we worked with this technique a lot, trying to find the best approach to achieving a deeper and more uniform exposure of sand.
We also stumbled across a second obstacle using this finish with colored concrete. As the acid was burning the top away, it was changing the integral color. We finally found a solution: concrete surface retarders. No more color problems, no more nasty acid fumes, and a controlled sand exposure. What a breakthrough. Throughout the next year, we researched and tried many different surface retarders, and we finally found what worked best in our area.
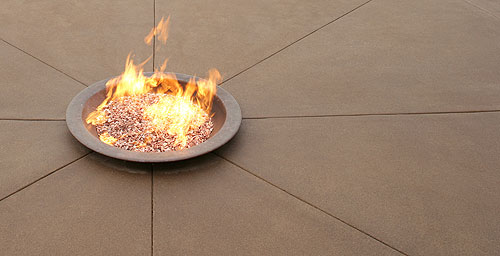
This product allows you to create a finished surface that is comparable to the feeling you would get by taking off your shoes and walking down a sandy beach beside the ocean.
As you work toward this goal, keep in mind that as with all concrete you place and finish for an exposed look, your finished product lies under the surface you see.
Here’s how you do it:
1. Research your local supply houses and see what products they offer in your area.
There are many different manufacturers and many different choices of depth and exposure of aggregate. You will need to consult with your client and supplier as to how deep a finish you will be trying to achieve.
2. Spend some time with your local ready-mix supplier and have them help you create a mix design that will allow you to achieve your client’s expectations.
3. Start experimenting at your shop — I cannot express this enough. You may have the perfect mix design, the best surface retarders and a seasoned finish crew with years of experience, but give your crew the opportunity to work with these products before you send them out. You will all appreciate this learning time.
|
|
 |
 |
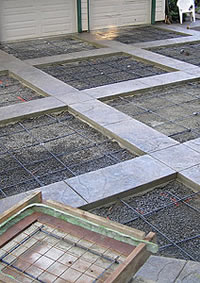
4. A proper lay-down technique is the key to success. Strike the surface off very carefully so you have the least possible amount of seeding back once you bull-float the surface. Some installers prefer wood bull floats while others prefer magnesium. We use both depending on weather and site conditions. Allow the bleed water to rise and the surface to go plastic.
5. Now, run your edges, cut your control joints and make sure you mag out any edger and jointer marks. Remember every mark and little divot you leave in your lay-down stages will transfer through in your final wash.
6. We prefer running through the finishing steps, including edging, joints and troweling, at least two more times. This has proved to be successful for us.
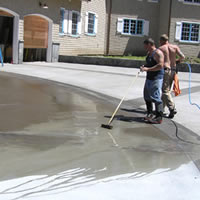
7. Once you are satisfied with your finished surface, it is time to apply the retarder to the surface. Make sure to follow the manufacturer’s recommendations prior to applying product. Protect all surrounding work from overspray. The surface retarder can be difficult to remove.
If you have allowed the crew to experiment with the product you are using, this is the moment in time that will give you great success or costly failure. If you apply the retarder too soon you can actually dimple the surface. But if you wait too long to apply the product it will not penetrate and give you that consistent etch you are looking for.
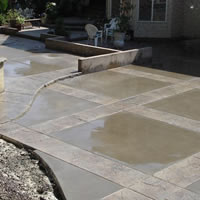
How long do you wait before you wash the surface? The manufacturer’s recommendations will tell you that you can rinse the same day or pressure wash the next morning.
8. ;The timing of this step is critical. A lot is going to depend upon your weather conditions. Are you in direct sunlight? Is the wind blowing? Are you dealing with sunnier and shaded areas of your pour? Did you have your pour plan designed to eliminate cold joints between loads? Most importantly, were the multiple loads of concrete placed at a consistent slump?
There is an easy way to test different wash times. If you are placing multiple loads, have a small test panel set for each load. Follow the same finish steps to placing the retarder with that load. This will allow you to wash the sample panel to see if your timing is right.
You may find you can easily wash the surface with hose pressure and get the desired finish you are looking for. Or you may find that a soft to medium broom will do the trick.
If you are planning on coming back the next day to wash, use extreme caution.
It may not be a bad idea to go back to the job and check that concrete before you put it to sleep. If you don’t, you may not like the surprise that will be waiting for you in the morning.
9. Once the surface is washed, we like to wait at least three to seven days, depending upon the time of year, before we come back to final wash and seal the concrete.
Again, this is a time to lean on your local supplier for the proper cleaning materials and sealers. If you prefer to use acid to cut any efflorescence that has surfaced, I would start with a very light ratio. You can always go stronger.
10. Once you are satisfied with your final wash, neutralize the slab. We prefer the Johnson & Johnson Neutralizing packets. Apply this to the slab, brush it in, and rinse with water. Use a pH test strip to make sure the concrete has a neutral reading of seven.
11. Finally, allow the slab to fully dry and apply the sealer of your choice.