

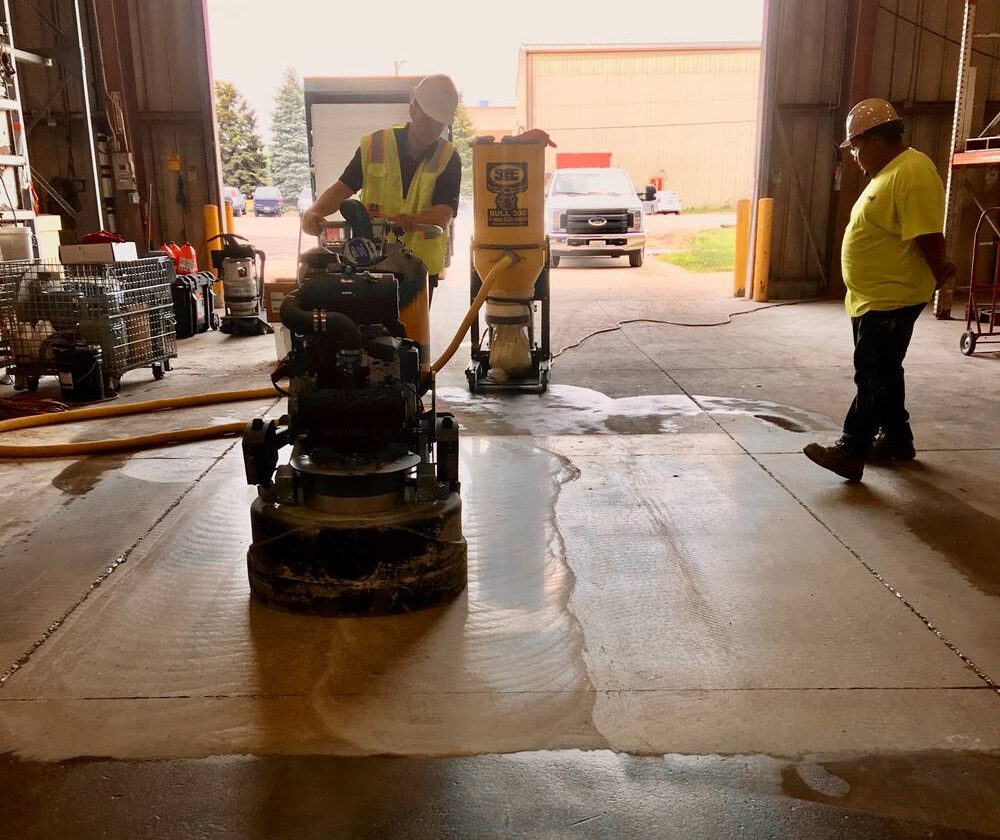
There are many benefits of doing polished concrete mockups prior to starting a polished concrete job.
These include:
Seeing the job site firsthand. Learn locations of things like the power, parking, loading and unloading, water, wastewater disposal, dumpster, elevators and lighting, among other things.
Learning how hard the concrete. By performing a Mohs hardness test, you can learn which metal bonds to order. Maybe it scratched at 9, 8 and mostly 7. This is a common result. Decide which route you’ll take. In this case I would choose the 8.
Learn what’s under that concrete cap. For example, if Class B sand aggregate is in the specification, you could try an 80-grit double segment, an 80-grit single segment and a 40-grit double segment, all in the same bond hardness. When done, clean and inspect the surface. It will be obvious which diamond tool produced and which was less than adequate.
If you’re not sure, try a few bond levels (yellow, gold, blue). This is crucial so that not only is the aggregate reveal correct but the diamond life is maximized, too! Too soft wears too quickly. Too hard wastes a ton of time.
Establish the diamond tool sequence. For example, if a Level 2 gloss is in the specification, which diamonds will accomplish that goal in the least number of steps? Try a few different styles: use a transitional diamond instead of a second metal or try transitional diamonds back-to-back (50 then 100 grit). Then densify and polish with a 200 and burnish with a 400 grit.
Doing this research now during the mockup with two guys, rather than on the first day of the job with a full crew ($$$), will allow the crew to hit the ground running. They’ll have the tools required to make it happen in 4 ½ steps. That’s production!
Get approval from the construction team. Whether from the owners’ representative, the owner, construction manager, the architect or the GC, get approval in writing (cya). Take plenty of photos and measure the floor with a gloss or DOI meter for your own reference.
Keep the data just in case someone has a complaint at the end even though the work was done to the same standard as the mockup.
The Mohs hardness test kit will give you the other 50% of the valuable information necessary for a successful and profitable job.
- Remember the diamond bond used during the mockup won’t show premature wear. It also won’t glaze like in production mode. The mockup area is too small.
- Remember once it’s hot, the tooling also won’t tell you whether it will cut, smear or skim across the surface when there is existing mastic, sealer or coatings.
Here’s the tip
When there’s an existing layer (coating/mastic/patch) to remove, choose the number in the middle. For example, let’s say 7, 8 and 9 scratched. The softest (9) will provide less diamond life. The hardest bond (7) provides the most diamond life (but not enough removal). The one in the middle (8) will provide that extra work needed to leave the slab maximally refined. That layer will be all but gone.
In the Class B sand aggregate scenario and working with bare concrete, I’d choose 7 and benefit from longer diamond life. Remember 70% to 80% removal from that first metal is enough. The next grit will pick up that small amount of slack.