
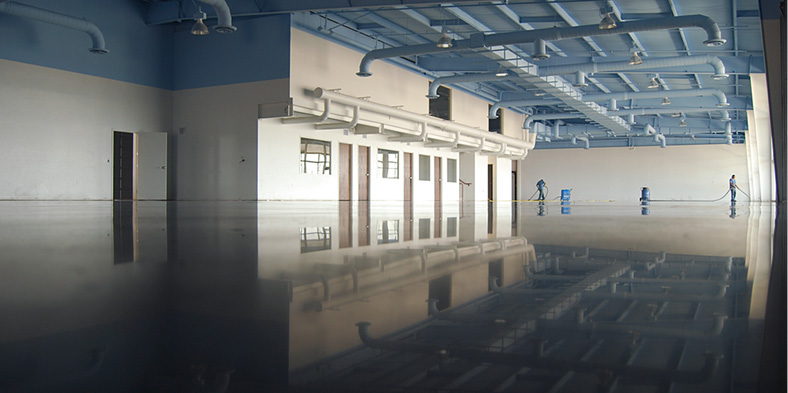
In management or leadership training classes worldwide, you can learn about the five Ps for success: “Proper Planning Prevents Poor Performance.” I think these Ps can apply to polished concrete projects as well. There are several specific planning items that can be addressed that will help any polish project be successful.
Start from the ground up
Just like a structure, you should build your concrete slab from the bottom up, beginning with a vapor barrier. Without a good vapor barrier, concrete slabs will absorb moisture from the ground. This moisture travels up through the slab and is released at the surface.
As water travels, it has a tendency to erode materials in its path and carry bits with it. In concrete this is usually salt. The salt crystals get deposited at the surface in a process called “efflorescence.” The salt by itself etches the concrete and the crystals appear white so they lighten the color. Efflorescence is an issue that’s controllable with proper planning.
Design the right mix
The next item that must be reviewed is the concrete mix design. The term “mix design” refers to the recipe of materials that, when combined together, turn into concrete. All mix designs have cement, sand, aggregate and water. In addition to these, there are other items that could potentially be included in the mix design.
A common item used today is fly ash, a recycled byproduct of the coal-burning power industry. It’s used to replace some cement in a concrete mix. Manufacturers figured out a long time ago that if a mix has too much fly ash there isn’t enough reactive material left for densifiers to harden the concrete appropriately. You should check with your chemical manufacturer to understand tolerance levels. Most manufacturers don’t like anything above 20 percent fly ash.
You can look at other things as well, like water reducers, finishing aids or other products that retard or increase concrete’s set time. It’s important to review these items in the mix design because once the concrete is poured you can’t change or remove something that’s harmful to the floors.
Place properly
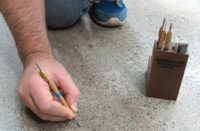
As we continue to review concrete from the ground up, let’s consider “placement.” This is the standard industry term for getting the concrete from the truck to its actual location. Placement is important to polished concrete because generally this is the only time that the concrete flatness can be controlled.
Usually, the concrete is physically deposited from the concrete truck either by buggy or a pump. As the material is placed into a form, it is extremely wavy. The part of the placement process where the flatness is controlled is called “screeding.” There are many methods to screed a slab that will get it fairly flat, but a fairly flat floor will have high and low spots that will be evident when the concrete is polished.
High spots will get cut off more by concrete grinders which expose more aggregate. The low spots are harder for a grinder to reach. Typically, they show little or no aggregate and will usually be darker in color than the rest of the slab.
The best method used to screed a polished concrete project involves a “laser screed.” This machine uses a laser to level the screed boom and produce a much flatter finish than any type of hand screed.
Finish with pans
The next level of planning is called “finishing.” This is the process where trowels are used to get the concrete tighter and the surface hard. If concrete is only screeded and not troweled, its surface will be rough and porous, which isn’t conducive to polishing because the concrete’s texture is like pumice stone. It’s impossible to polish an extremely porous piece of stone and the same rule applies to concrete.
Finishing can be done many different ways. The process I find works best begins with the finisher using pans, which are basically like big round cake pans that a power trowel blade sits in. The pan knocks off some of the concrete that’s high and fills in some of the areas that are low. Along with the screeding process previously discussed, this helps with the overall flatness.
Pans are the only method of finishing that can help with the flatness of the concrete. Obviously they need to be used while the concrete is still slightly wet and soft.
Use the right blades
After the pans, the concrete should be troweled with steel blades. These are large, rectangular, thin pieces of metal that are flat and slightly angled (like ceiling fan blades). With a slight pressure, they push down on the concrete and consolidate the surface. In the process, sand particulates are also pushed down and a creamy paste of concrete fines is brought up and deposited at the surface. This condensed, tight layer is what you need for polishing
I like to use plastic blades for the final pass because a steel trowel blade significantly darkens the surface with a process called “burning in.” This really dark finish has to be cut through before you can begin polishing or chemically treating the surface. This is unnecessary extra work you can avoid. By using plastic blades to finish, the concrete doesn’t get burned in but is still really tight and well compacted. This is perfect for polished concrete.
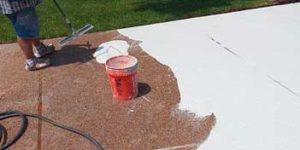
Find the right cure
The final process of placing and finishing concrete that pertains to the polished variety is the curing. Concrete gets hard through a chemical reaction where water is key. It naturally rids itself of water as it cures. By holding water in for a period of time, the concrete gets much harder and lasts much longer. This process of concrete holding in moisture is called curing.
The most common type of curing involves spraying a membrane sealer onto the top of the concrete right after it’s been finished. This membrane traps the moisture and allows that cure to happen.
However, when it comes to a decorative concrete finish, the sealer is problematic. Whereas it holds moisture in, it also keeps chemical treatments out. This membrane sealer has to be ground through to allow the concrete to be polished, which costs the decorative concrete contractor time and money.
Instead, I recommend a water-curing method where you basically keep the concrete surface wet for seven days after the concrete has been finished. This allows the concrete to get hard, and it doesn’t leave any film that needs to be ground through. A lot of general contractors don’t like to water cure because they can’t do any other work on the slab during this period. This slows down the construction schedule and requires extra manpower on site to ensure the slab stays wet.
When water curing is not an option, I recommend a dissipating cure. These curing agents create a membrane that holds in the moisture for the required seven-day period and then begins to chemically break down. There are lots of variations of dissipating cures so do your research and figure out which option works best for your project.
In my mind, these steps make up the five Ps: “Proper Planning Prevents Poor Performance.” If you follow them, you’re almost assured you’ll have a good slab that’s easier to polish and more likely to meet your customer’s expectations.