
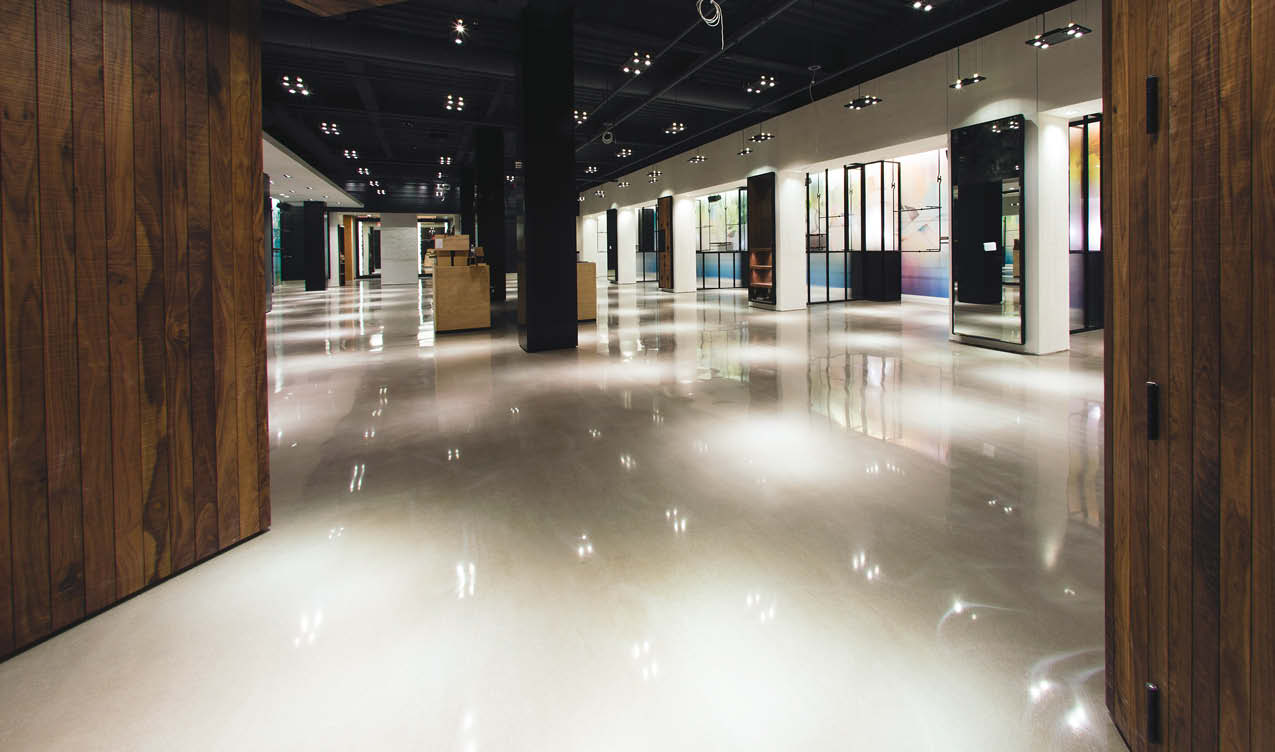
Polishable overlays are a popular alternative to polished concrete where the existing concrete slab isn’t a good candidate for regular polishing. Infilling trenches, patching, spalling and removing existing modular floor coverings often result in a concrete surface that doesn’t meet with customer approval.
Additionally, wavy concrete and edge curl will often yield a polished surface with varying degrees of aggregate reveal. While this may be acceptable to customers, often a flat, smooth, level surface with predictable aggregate distribution is what they really want. In these situations, a polishable overlay is often the answer to achieve that look.
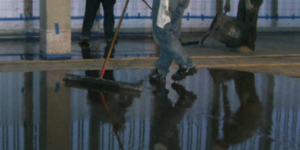
With polishable overlays, as with polished concrete, one consideration above all others will ensure the success of the installation — managing customer expectations. The best way to achieve this is by creating a mock-up on the project site.
On-site mock-ups
During my tenure as a technical manager for an overlay manufacturer, as well as in my current role as business development manager, I’ve seen firsthand how mock-ups are critical to managing customer expectations so that the installer can avoid potentially contentious claims. What is discouraging is how rarely I’ve seen them placed.
Many of the polished overlay claims I managed dealt solely with a failure of the overlay to meet the anticipated aesthetic. On such claims, my first question was, “Was the mock-up approved?” Unfortunately, this simple question was frequently met with silence. This is an acknowledgment that there was either no mock-up or that the topping received approval based on a hand sample.
At this point, the situation would often devolve into a series of finger pointing that yielded little but frustration for all involved. The result was an unsatisfied customer and an installer with a compromised reputation.
So why do installers rarely perform? I believe many installers don’t appreciate their value and deem them too costly or time-consuming. For a finished surface that’s unique and where the final surface is manufactured on-site, this can be a costly error in terms of money and reputation. For those who want to showcase their abilities using polishable overlays, start by managing your customer’s expectations. Mock-ups greatly facilitate this process.
First, let’s define what we mean by a proper mock-up. For the customer to understand the aesthetic of the polished overlay, a mock-up must meet the following criteria:
Proper size
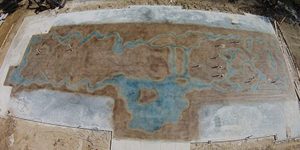
Mock-ups should be a minimum of 90-100 square feet. At this size an understanding of the final aesthetic is achievable which can’t be attained with hand samples or smaller footprint mock-ups.
Aggregate reveal, blemishes, smoother marks, spike roller marks (where used), mottling and polymer lines are evident in larger footprint mock-ups. When these same characteristics inevitably appear in the general installation, they are anticipated and appreciated for the uniqueness they add to the character of the polished overlay.
Proper placement
You must place the mock-up in the installation area. This allows the evaluation of the polishable overlay under the space’s ambient light. As with any flooring finish, the environment can affect the aesthetic. Natural and artificial sources of light unique to the installation space will impact the polished overlay’s final aesthetic.
Equipment, tooling and talent
You must place the mock-up using the equipment, tooling and talent that you will use for the general installation. The purpose and design of mock-ups are to provide an accurate representation of the installation throughout the larger space.
Process replication, from mock-up to general installation, can only be achieved where the equipment, tooling and talent are the same. This includes the use of any chemicals (grout coats, densifiers, sealers, etc.) that will be used for the general installation.
Each of these criteria are achievable with a temporary mock-up.
Temporary, transportable mock-ups
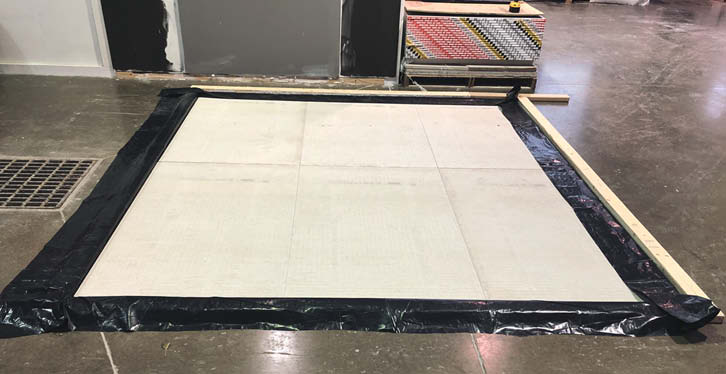
Temporary, transportable mock-ups are simply and quickly created using cementitious backer units (CBUs) and the polishable overlay material. A temporary, transportable also mock-up provides several advantages.
First, you can create the mock-up at the installer’s facility and then transport it to the job location. This allows you to create it without either delay or interruption by other trades at the project site. When completed, you would then transport the mock-up to the project site, where the customer can evaluate it under the installation area’s ambient lighting. (You can also do a temporary mock-up on the project site when conditions are favorable.)
Once approved, you can disassemble the mock-up may be and place in storage for reference should issues arise after you have finished the general installation. Issues related to the general installation failing to meet the desired aesthetic may be quick to resolve by reassembling and referencing the mock-up.
Issues related to removing or integrating a mock-up that’s bonded to the concrete substrate on the project site are eliminated.
Creating a mock-up allows the installer to establish a process that he can then follow for the general installation.
Creating a temporary mock-up using CBUs is a rather simple exercise. A sufficiently sized mock-up will require 6 CBU panels. Recommendations call for 3-foot by 5-foot by ¼-inch CBUs for ease of assembly/disassembly, transportation and also storage. This will create a 90-square-foot mock-up which is typically large enough to fairly evaluate the polishable overlay’s aesthetic.
The following include both materials required and the process to follow to make a temporary mock-up.
Materials
- 10-mil plastic
- 6 CBUs @ 3-foot by 5-foot by ¼-inch
- 4 wood studs @ 2-inch by 4-inch by 10-foot
- Painter’s caulking
- Polishable overlay primer
- Polishable overlay material (adequate material for 90 square feet at the desired depth)
- Chemicals (densifiers, grout coats, sealers/guards, etc.)
Process
- Place 10 mil-plastic over a 10-by-11-foot area of the concrete.
- Place the CBUs three across and two deep creating a 9-by-10-foot footprint.
- Frame the CBU platform with 2-by-4 wood studs.
- Overlap the frame with the plastic that extends beyond the CBUs.
- Skim over (not in) the joints between the panels with painter’s caulking. This will prevent the primer and overlay material from seeping into the seams where they can bond the panels together making panel separation more difficult.
- Prime the CBUs with an acrylic primer (experts do not recommend using sand-broadcasted epoxy primers typically specified for polishable overlays for the mock-up).
- Install the polishable overlay at the desired depth.
- Remove the frame after the polishable overlay has cured.
- Polish the mock-up according to manufacturer’s recommendations.
Use the same equipment, tooling, talent and also polishing process on the mock-up that you will use on the general installation. This eliminates the polishing process as a variable that could impact the finished surface.
After approval of the mock-up, you can carefully lift, separate and then store the CBUs for future reference.
Managing the customers’ expectations when it comes to the final aesthetic provided by polishable overlays is critical to the project’s success. Managing those expectations starts with the mock-up. For both your peace of mind and your customers, incorporate the mock-up into every project where a polishable overlay is specified.