Klassen Concrete, and Amber Arlt 2E Perspectives
Winnipeg, Manitoba
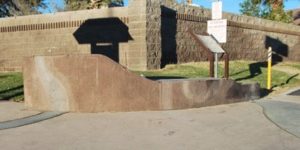
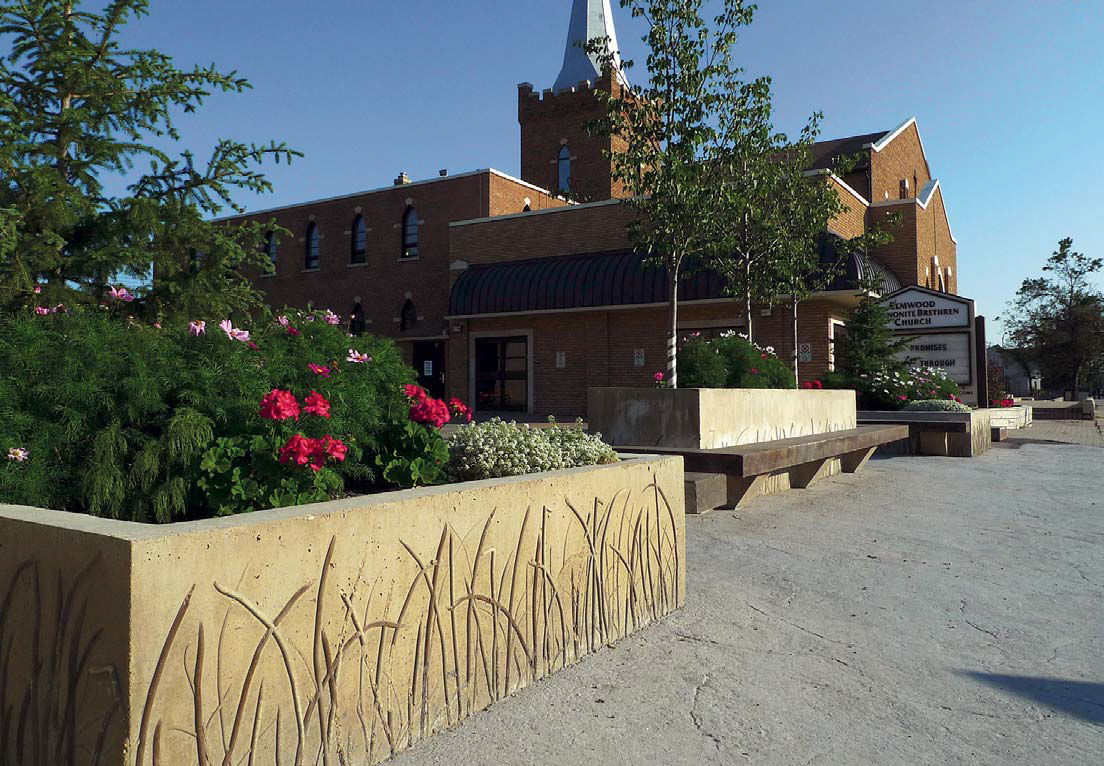
Structures like these – with a smooth, weathered surface and a nature-inspired pattern, cast in relief – have the power to turn unused sidewalk space into a lush roadside minipark.
Ingredients:
- High-density particleboard
- Randy Klassen’s “Canadian Special” concrete mix:
- 32 MPa (roughly 4,600 psi) concrete with 5-7 percent air entrainment
- 20 mm (roughly 0.8 inches) stone
- Grace Construction STRUX 90/40 macro fibers for precast applications – 1 bag per cubic meter
- Grace Construction MicroFiber – 1 bag per cubic meter
- Interstar Integral Color, 4416 Buff – 0.5 bags per cubic meter
- Rebar, 10 mm and 15 mm gauges
- Universal Concrete Accessories Acid Stain: Black – diluted 1:1 with water
- Sonneborn Kure-N-Seal 30
- Required equipment: router with an assortment of plunge bits
Directions:
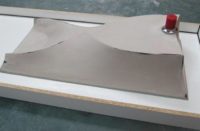
- The relief design is the first step on these boxes. Take sheets of high-density particleboard and, using your router and plunge bits (Klassen used a 1/2-inch, a 1/4-inch and a 3/8-inch bit) carve your relief design into the board’s surface. Klassen went with a simple, soothing blades-of-grass design, but the possibilities here are pretty limitless.
- When building your forms for the planter boxes, line them with the high-density particleboard. Even on the sides of the planter with no design, use uncarved board – it will give the boxes a smooth, natural surface.
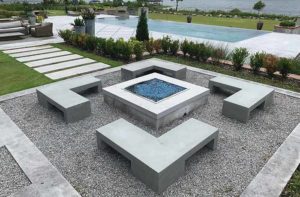
- To achieve the floating look of Klassen’s planter benches, incorporate two or three cantilever supports for each bench into the form design,
- Mix your mix and pour the planter boxes monolithically. Do this at your shop. The benches themselves will be poured once the planters are on-site.
- As you fill your forms, stop when they are a quarter, half, and three-quarters full, and each time, place 10 mm rebar corner ties at each corner for reinforcement.
- Once your planters have fully set, transport them to the job site (with forms still attached) and install them. Only when the planters are installed should you strip the forms – this will help to protect the relief designs from damage.
- Planters installed, build a support structure for your bench forms so the benches can be poured right atop their waiting supports.
- Mix up another batch of the “Canadian Special” and pour your benches, incorporating three bars of 15 mm rebar per bench for reinforcement. Let them cure for 4 days.
- To finish the planters, apply a single coat of diluted acid stain to the grass blades and the benches, and let it dry.
- Finally, the grass blades get a single coat of sealer and the benches get two coats. The rest of the planters’ surfaces are left unsealed, to maintain the natural, raw concrete feel.