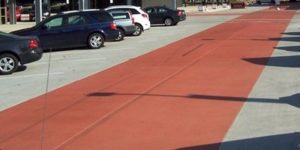
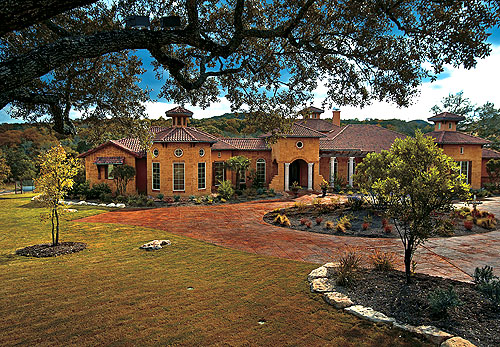
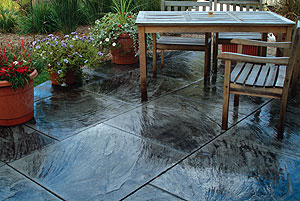
With dry shake color hardeners,beauty is more than skin deep. Not only do these powders offer a range of color options, including colors lighter than natural gray concrete, but they increase surface strength to as much as 8,000 psi or more. The vast majority of decorative concrete applications using color hardeners are imprinted, but the increased durability these materials impart also makes them attractive for large commercial and industrial projects such as warehouse or factory floors.
Concrete preparation
There is no extraordinary preparation required for concrete that will be colored with a color hardener, but as in all architectural applications, it is important to pay attention to details. Concrete for a successful color hardener job must strike a fine balance: There must be enough moisture at the surface to be absorbed by the hardener, but no standing bleed water. Too much air entrainment can prevent moisture from reaching the surface, but concrete with no air entrainment might have excessive bleed water. The color hardener must be applied during a narrow window of time, after the bleed water evaporates but before the surface starts to crust and lose plasticity. So contractors need to pay attention when preparing concrete for color hardeners.
 |
|
|
|
|
The first detail to balance is the mix. Experts recommend a slump between four and five to achieve workability without excess bleed water. Admixtures typically used for air entrainment or for accelerating or retarding the set will not affect the performance of a color hardener. In areas of the country where air entrainment is necessary because the concrete will be subjected to freezing, Bob Harris of the Decorative Concrete Institute (DCI) in Douglasville, Ga., cautions that the entrained air should be reduced from 6 percent to 3.5-4 percent to allow moisture to reach the surface so it can react with the color hardener. He also suggests experimenting with the amount of sand in the mixture — reducing sand can allow the hardener to absorb more water.
“Working with your local ready mix producer is the best advice I can give,” says Scott Thome, director of product services for L.M. Scofield Company. “Performing test pours with different mix designs will cost some money up front but will save money and time in the future.”
Once the mix has been established, the second detail is placement. Concrete should be placed with the same form work and subgrade preparation as conventional concrete, following American Concrete Institute (ACI) guidelines. If the colored concrete will be imprinted, Thome recommends driving the form stakes flush with the top of the forms so they won’t interfere with stamp placement.
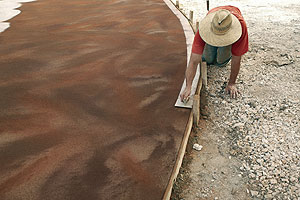
Bart Sacco of Concrete Texturing Tool & Supply, Throop, Pa., offers these directions: Place the concrete, strike it off to the proper height with a screed, bull float the surface, then edge the slab and remove the edger marks with a hand float so they won’t telegraph through the hardener. The flatter you screed the surface, the easier it is to work the color in. Then, just before broadcasting the color hardener, send the bull float over the slab and “wake the concrete up” or break the skin forming on the surface so the moisture in the slab can activate the color hardener.
The bull float itself is another detail requiring attention. Both wooden and magnesium floats are used with color hardeners, but it is important to understand the differences. Howard Jancy, business development manager at Butterfield Color, Aurora, Ill., says that while most contractors use magnesium floats, wood has many advantages. “If you want to bring moisture to the surface, a wood float works best,” he says. “Wood tends to drag because it is opening up the surface, so it can feel like more work, but it is more conducive to wetting out the hardener and getting the chemistry going.”
Thome explains, “Wood floats keep the surface open and allow the excess water in the concrete to leave at a more uniform rate than magnesium or steel. The wood float is also very abrasive to the surface of the concrete. When working a color hardener in with wood, the surface is being agitated and the color hardener becomes one with the concrete.”
DCI’s Bob Harris believes a wooden float works the hardener into the surface better, but says a mag float is less likely to skip. However, he warns against trapping bleed water, which ultimately leads to weaker concrete. Bart Sacco says, “We’ve used magnesium floats with success, but areas without air entrainment in the mix do better with wood. Whichever type of float you use, pull across the surface nice, slow and easy, and if needed, put a temporary weight in the channels on the bullfloat. This will help work the hardener into the concrete surface.”
Applying the color hardener
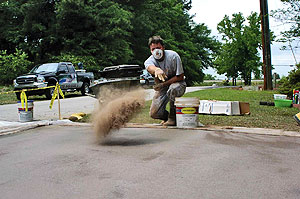
Dry shake color hardeners are most commonly broadcast by hand. Sacco advises contractors to “pre-fluff” the powder to make sure there are no clumps. Then the recommended technique is to hold the hand low and fan the material out gently and evenly, moving the hand horizontally across the body. Throwing the material too far or too high can cause the sand, cement and coloring agents to separate, causing uneven color or, in the worst case, weak spots in the concrete. “To minimize this issue, there are manufacturers that grind their ingredients together instead of blending them,” Thome notes. “This process is more expensive but the chance for these ground materials separating is very minimal.”
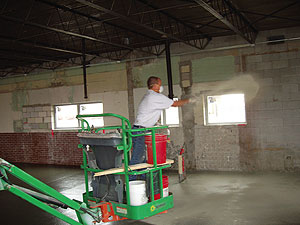
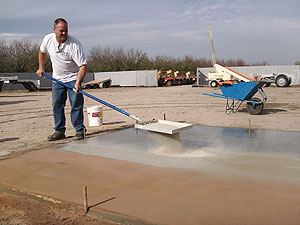
Harris reports seeing people on a scissor lift hand broadcasting over a larger area. For most large pours, such as interior warehouse floors, a mechanical spreader fed by a hopper can be the fastest, most efficient method.
The general recommendation is to apply dry shake hardeners at a rate of one pail (50-60 pounds) per 100-125 square feet to get adequate coverage. A higher coverage rate might be advised when the main purpose of the hardener is extra abrasion resistance. Thome recommends at least six-tenths of a pound per square foot in this case.
Manufacturers recommend the same coverage rate whether the colored concrete will be imprinted or not. “Anything less than the recommended application rate would be considered “flashing” and the durability would only be slightly higher than conventional concrete,” says Thome.
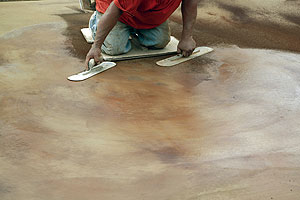
Complete coverage is accomplished in two applications or “throws.” Anywhere from 50 percent to 80 percent of the powder is applied in the first broadcast. The next step is to watch the powder turn moist as it draws up the water. Then, Sacco says, run the float over it and let it become one with the top surface. Edge it, clean up the lap marks and then follow up with the remaining application of hardener without delay. “Don’t call home on the cell phone, it’ll kill you! If the first application skins over, you won’t get the moisture for the second layer.”
 Hot or windy conditions can cause the moisture in the concrete to evaporate too quickly. “A finishing aid mixed with water and pump-sprayed on the surface forms a chemical film that holds moisture in,” Jancy says. “It doesn’t retard the set, but it delays evaporation. It buys time. Then float in the finishing aid to open the surface again for the hardener.” Bob Harris uses the same technique, or, alternatively, covers the surface with a 6 mil sheet of Visqueen after the first broadcast and leaves it on for about ten minutes before bull floating. This draws out the moisture and wets out the hardener.
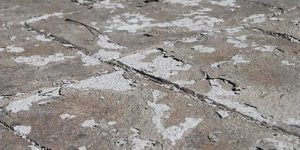
While it is important to apply the color hardener before the concrete surface is too dry and crusted, it is also critical to wait until bleed water has evaporated. “If the concrete is too wet it’s going to suck up hardener,” Sacco explains. “You will have to use more material and the concrete will fight you. It will go from liquid to solid too quickly and leave you with a relatively short window of time for stamping.” Jancy says excess water can lead to substantial problems. “Applying color hardeners when the surface is too wet sets up the concrete for deterioration down the road. Working water back into the surface alters the water/ cement ratio. That weakens the surface, resulting in dusting and cracking. Don’t think you can fix it by adding more color hardener. Make sure there is no standing bleed water before broadcasting the first layer of color hardener.”
The second layer should be broadcast at a 90-degree angle from the first, if possible, to fill in any gaps in the coverage. If a light color hardener is being used, a third application may be required to prevent bleed-through of gray concrete, depending on the color of the original mix. In fact, Thome says sufficient coverage could require as much as 1.2 pounds of hardener per square foot.
The size of the area that can be effectively treated depends on a variety of factors. Crew size and experience, weather, project configuration and mix design all make a difference. Thome says he’s seen some as large as 14,000 square feet. Sacco says projects typically range from 400 to 6,000 square feet. He says, “If the weather’s right, go with it. If it’s not, do a smaller section and you won’t end up ripping it out.”
Achieving natural looking color
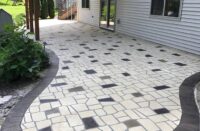
Concrete imprinted in a tile or stone pattern can achieve a more natural look through the use of one or more colors in addition to the base color. Natural looking color also depends on the imprinting pattern — slate tiles that are colored brick red will always look jarring. As with all decorative applications, mock-ups are recommended to be sure everyone involved understands and approves the final look.
Complementary colors can be applied by flashing a dry-shake hardener over integrally colored concrete, by using one hardener as a base and one or more different colors as accents, by broadcasting two colors at the same time or by using a colored stamping release agent over a dry shake hardener. Each gives a different effect. For example, Jancy points out that color hardeners are permanent. “The advantage of color hardeners is the physical/chemical bond with the surface. An antiquing release agent could lose color over time, especially if the surface is poorly maintained.” He does add, though, that imprinting always requires a release agent, whether colored or clear.
Thome warns against tossing color hardener in streaks. “Typically, streaks of colors take the shape of the tail of a shooting star and are not natural looking. I like applying a light broadcast over the entire surface and then blending the colors together in a random trowel motion. The ideal flashing project would have every stone a different color. No colors would run from one stone to the next.”
Sacco has a similar style. “It takes skill to get the right amount of shading. You can use a base color or leave it gray,” he says. “Then apply one or two colors of hardener, with subtle transitions for one color to the next, not big handfuls. I think selecting the right color depends on the environment. It should complement other features in the project, like the house. Don’t try to make an exact match, to brick for example, because it will look monochromatic and unnatural. Make the concrete complement the environment instead — give it its own identity. When in doubt, go with gray. Gray goes with everything. Cobblestones are gray.”
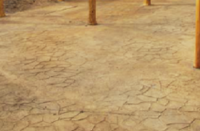
Bob Harris likes to work with a blend of dry shake colors — as many as five or six. He starts with an initial layer of 60 percent coverage in a base color and builds up from there. For example, the base may be beige, and then he’ll flash with terracotta and dark brown. “Some contractors claim color hardener is more difficult to use,” Harris says, “but it gives you more colors and a more durable surface. It’s just lazy to use integral color for stamping. True pros use hardeners for imprinting projects. There are no rocks to fight — there is less aggregate at the surface so you get a cleaner, crisper imprint.”