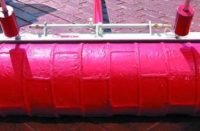
 The Concrete
Concrete is the most important variable in hot weather stamping. When hot weather arrives, most ready mix suppliers start adding retarders to the mix. But how much retarder is a good thing, and what do they bring to the party? Are there better alternatives?
Your objective in hot weather is to get the concrete placed as quickly as possible. Let’s face it, that last “lump” of concrete out of the truck after sitting onsite for an hour is NOT the most user-friendly concrete in the world!
Later, you are faced with the daunting prospect of determining when the concrete is ready to stamp. A false “set” or “crust” often means that stamping operations begin too soon. The top seems ready but the body of the concrete is still like Jell-O! This leads to sloppy impressions, “squeeze” (concrete oozing out at the edge of the tools), and poor release from the slab, in effect pulling the surface up with the mat or skin. Set controlled retarders are available, but what are some other methods for controlling slump and set time?
Let’s take a look at a load of concrete batched out of the plant at a nominal 4″ slump with retarder added. By the time it arrives at the site and/or passes through the pump line, it may be closer to a 3″ slump! What are your options? Unfortunately, most of you are raising your hands to give the truck driver the thumb-in-the-mouth “More Water!” signal! On commercial projects, jobsite-added water, or water of convenience, is tightly monitored to prevent low concrete strength and excessive shrinkage cracking. But I believe water is just as important on decorative concrete projects — for the same reasons and a few others.
Let me tell you about an integrally colored and stamped patio I was called out to look at last week. The first truckload of concrete was delivered as batched from the plant. To maintain the flow and placeability of the concrete, the pump operator added 22 gallons of water to the second truck. The third truck received 15.5 gallons of water.
Now we all know that concrete is colored by the color pigments surrounding all of the ingredients in the concrete — cement, sand, and aggregate. But what we forget is the influence water has in diluting the tinting strength of the color. Suffice it to say that on this patio there were at least three different shades of color — obvious to Mrs. Jones and her concrete contractor — by the end of the day!
Of course on a color hardener job, the underlying color is not an issue, but compressive strength, shrinkage cracks, and durability in freeze-thaw conditions certainly are. And we still haven’t improved placeability — moving 4″ slump mud in the heat of the day is still a time consuming and back-breaking job. Nor have we solved that pesky issue of set time — how long will that concrete wait for your crews to catch up with the color, release and mats? What about score lines and detailing?
A better way to maintain placeability — without the delay caused by retarders or the damage caused by excess water — may be to use a fast-acting superplasticizer. While normally added at the plant, several of these can be added at the job site, as needed, by the ready mix driver or even by the concrete contractor himself. Mixing one of these products in the truck for five minutes can save hours of placing and finishing time compared to using retarders or adding water.
Eucon 37 by Euclid Chemical and Supercizer 1 by Fritz-Pak are two such admixtures. Used at a dose as low as 8-10 ounces per sack of cement, the concrete can be taken from the unplaceable 3″ slump it arrives at to as much as an 8-10″ slump! Think how quickly your crews could place concrete that is almost self leveling! Since the concrete snaps back to normal set in about an hour, consider how much more concrete can be stamped before the Summertime Dragon saps the strength from your job. And compare 3.5 gallons of liquid per truckload to the 15-22 gallons of water we looked at previously. On-site dosing is safe and allows for flexible control throughout the day, from truckload to truckload as the slump, temperature, travel time, standby time, etc., vary.
The Plan
Quality concrete imprinting always requires planning and skill — that’s why good contractors are successful and always in demand. But hot weather stamping requires special planning and preparation in order to meet the rapid changes brought on by temperature, wind, rain showers, etc.
The “plan” should include a sketch showing the sequencing of stamping operations — what has to happen first, second, third — and where the operations are to occur. This may sound silly when you (the owner, foreman, superintendent) are in complete control of a jobsite, but when you have to delegate, or a problem arises in setting a form, repairing the canyons dug by the tires of the ready mix truck, concrete scheduling, a sudden concern of the owner, or a thousand other things that demand your attention during a pour, you should be able to trust your second and third in command to figure out the answers to most questions by consulting “The Plan.”
Your “plan” will address how many workers are needed — and what special skills each must have — to get the concrete placed, stamped, etc. And you will call for a miniature “pre-job” meeting right there on the site BEFORE the concrete arrives and all heck breaks loose. When temperatures soar, the wind kicks up or a rainstorm blows in — failure is not an option! (Or is certainly a very expensive option.)
Consider whether segments of the slab must be poured separately in order to achieve special effects such as rosettes, brick pattern borders, or multiple applications of color hardener, etc. Marking and cutting score lines so they don’t get “lost” is important. The bags or buckets of color should be laid out and clearly labeled — colors can look the same in the heat of the moment. You really don’t want to be scraping color hardener off of an area already prepared to receive release powder because somebody grabbed the wrong bucket!
Do you have enough mats and skins? Are they clean? Can they be kept clean as placing, dusting and stamping operations continue from one end of the job to the other? If you are using liquid release, plan on needing more than the normal amount as effective open time is decreased by rising temperatures. Sprayers should be clean and well marked for release, evaporation retardant, or cures.
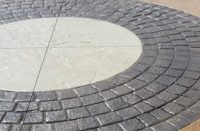
The Tools
Strangely enough, the “Tools” include some of the things we have already talked about — the concrete mix design and the “Plan.” But consider the following “tools” for hot weather decorative concreting that are different than for normal slabs and driveways.
Water. The color hardener broadcast on the surface of the concrete is bone dry, and may have been sitting in the hot sun at surface temperatures of over 100 F. Where will the water required to combine this dry powder into the surface of the slab come from? Ideally, it will come up from the freshly placed concrete. But did you remember to saturate the compacted substrate just before you poured? Or are you hoping that the sprinkling you did the night before is sufficient? If not, the water in the concrete will be sucked right down to the base rock and not be available for your color hardener.
Floats. What tool would you normally use for your floating operation? If you said “wood bull float” you’ve been there and done that before! Using a steel fresno, funny trowel, or edger can close off the surface of the concrete, locking the moisture away from the soon-to-be-placed shake-on hardener. Yes, we want to keep moisture in the slab, but not just yet. The wood float helps keep the surface open and porous so it can absorb the color hardener, making it part of the slab.
Once the powder has absorbed the moisture and darkened significantly, you can float it in (if that is part of the process used in your part of the country) with the wood bull float, or this time, if you prefer, a magnesium bull float. In either case, since it is hot, and surfaces tighten up more quickly, consider using lead weights to help drive the color into the slab. This allows longer, more even strokes that don’t tear the surface and “bury” the hardener, causing uneven color and streaking. Closing up the slab with steel at this time can cause blistering and pop-outs. This is especially true when placing lighter colors at higher rates of application. Piles of color hardener that have not become wet all the way through will be sealed in and not hydrate properly. These areas will be soft and subject to scaling, freeze-thaw damage, and poor abrasion resistance.
Groovers and saws. For joints and score lines, many finishers prefer the “Torpedo Groover” by Slip Industries over a smaller, wider, traditional grooving tool. At 56″ long, they tend to be heavier and they cut better through color hardener. The relatively narrow design of these aluminum tools leaves clean, easy to detail joints. Soff-Cut saws and other tools for cutting contraction joints and decorative score lines can be used after the concrete has hardened if temperatures cause the concrete to set too quickly or you require special time-consuming efforts because of the patterns being stamped.
Evaporation retardant. Not to be confused with a surface retarder for exposed aggregate, the manufacturers describe this liquid as a “monomolecular” film that slows down evaporation due to sun, wind, and low humidity. Products such as Eucobar by Euclid Chemical and Confilm by Master Builders are well known in the industry. These products can be applied several times during the course of a pour. Apply to the screeded concrete if there is going to be a delay in applying the shake-on hardener, but remember that another pass with the bull float prior to application will be necessary to completely break the surface tension created by the evaporative retardant and allow the color hardener to “wet-up.”
Apply after the shake-on hardener has absorbed moisture from the slab and has been floated to keep the surface from drying out while waiting to begin the stamping. Procedure. Finally, apply after stamping if using a liquid release and there will be a delay in curing the slab. One word of caution — these products are still water-based. Over-application, just like spraying water from a hose, can weaken the surface significantly, causing dusting, cracking, and discoloration. This applies to broom finishes as well as to stamp pattern finishes. Use a pump-up sprayer with a fan tip and don’t saturate the slab with these products.
Cure-seal. Consider using a high quality cure-seal product at the end of the day if you are using liquid release. This will seal in moisture and allow for proper hydration, which is important for a strong durable surface with a minimum amount of cracking, checking or curling. Use a product that is advertised as compliant with ASTM C-309, and that is non-blushing, and non-yellowing. If using a water-based product, use a sprayer with a fan tip (not an adjustable tip) that is kept pumped up, and apply a very thin coat (see Jeff Patterson’s article on water-base cures in the Dec./Jan. issue of Concrete Decor magazine). Do not apply these products if you are going to do post-pour accenting (such as acid staining or other finishing techniques).
Common sense. If you normally pour 800-1,000 square feet in a day, consider cutting back to 600 square feet. Or do the back yard one day and the driveway the next. Marathon pours will wear out your crews, cause sloppy work that will never be your best — and may cost you money!