It sounds just a little bit like a pulp science fiction story: While packing up their warehouse to move, workers at a concrete stamp company discover a long-forgotten design for a concrete stamp that is three-dimensional.
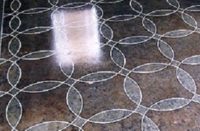
The 3-D design is actually 2-D flat, of course, but with the right stains, it really can fool the eye with the appearance of depth. The stamp is a series of simple box shapes. Each box consists of one 8-inch-by-8-inch square and two trapezoids, and several boxes fit together seamlessly on the stamp. The whole design is topped off with a slight amount of slate texturing. The boxes don’t fool the eye much on the stamp, but after the three sides of each concrete box impression are stained, they can jump out at the eye like a floor full of real cubes. The illusion can even be achieved while using a clear release.
Because the 3-D effect incorporates both stained and stamped concrete, merging both worlds in one design scheme, it is unique in the world of stamped concrete, says Kris Kaitanjian, senior vice president of Matcrete.
Kaitanjian’s father designed the stamp, most likely about a decade ago, he says. “It was just ahead of its time. Staining just wasn’t as big as it is now.”
What’s more, today Matcrete is looking for unique. Kaitanjian says the company wants to get more in tune with the community of concrete artists and expand beyond ubiquitous, cookie-cutter stamp designs such as ashlar slate and granite stone — even though, he acknowledges, designs like those are still the “bread and butter of the concrete industry.”
Matcrete began selling the cube stamp in 2002, and plans to introduce two more textured 3-D patterns in 2006. Kaitanjian says the 3-D cube would be especially striking in a casino or resort. “This adds a little bit more of the creative juices, rather than just finishing the concrete and stamping it,” he says. “It gives a little bit more character and uniqueness to stamped concrete. It definitely is an extra step (when used with stain) but it’s a cut above the rest.”
(800) 777-7063