
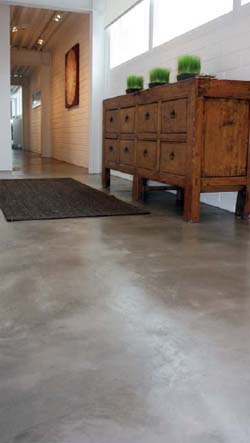
 Concrete Staining Recipe submitted by: Bay Area Concretes Inc., Livermore, Calif.
www.bayareaconcretes.com
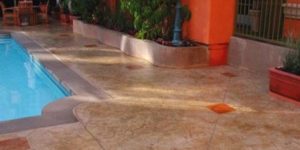
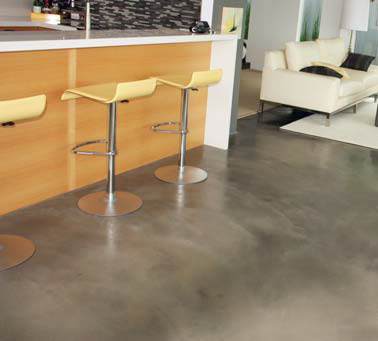
This luxe look is achieved by overlaying several super-thin coats of microtopping and dye, resulting in a finish with subtle depth and a sexy sheen.
Ingredients:
- Innotech Decorative Concrete Products Micro-topping EXT Liquid, plus custom colored tint packs: Flint and Charcoal
- Colormaker Floors Aquacolor: Wales Charcoal, Onyx Black, French Grey, White
- Colormaker Floors Deso Dye Concentrate: Black, Burleywood
- Acrylic thinner
- Surtec Systems Aquapro sealer
- Surtec Systems Endure floor finish
- Special equipment required: Shotblaster loaded with light abrasive, floor grinder with 100-grit pads, hand-held sander
Directions:
- Because this is an overlay application, your first step is going to be to prep your substrate. Shotblast the surface with a light abrasive, and use a shop vac to clean.
- Using your floor grinder and the 100-grit abrasive pads, grind the floor lightly until you have a smooth, even surface.
- Clean the floor thoroughly.
- Mix up your first batch of Innotech microtopping with no pigment. Apply an even coat across the entire surface with a trowel.
- Let that dry completely, and then sand lightly. Clear off any dust.
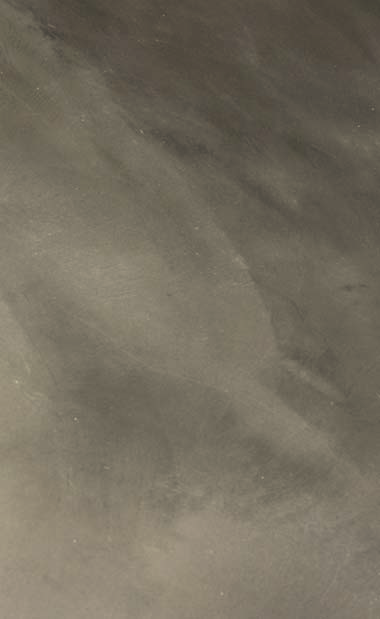
- With that base coat down, the fun can begin. What gives this floor depth is that, on top of this base coat, five more layers of colored microtopping are applied, and between each of them, a coat of dye. Basically, once the base coat is down, you get to mix and match different shades of microtopping with different shades and different dilutions of dye before finishing with a nearly transparent topcoat.
- The process goes as follows: For each layer, you’ll want to mix a new batch of lightly pigmented microtopping in varying shades of gray. Bay Area Concretes used these ratios for the pigments in each layer:
– Layer 1 – 3:1 Flint to Charcoal
– Layer 2 – 1:1 Flint to Charcoal
– Layer 3 – all Flint
– Layer 4 – 4:1 Flint to Charcoal
- Once you’ve mixed up your batch of microtopping for your first layer, apply in a thin coat, let dry, sand lightly and clean.
- Mix up the dye you want to use for the layer. Bay Area Concretes used the colors listed to mix a whole palette of grays and blacks at a variety of dilution ratios. The Deso Dyes were all diluted 50:1 with acetone, but the Aquacolors were diluted with water anywhere from 5:1 to 50:1. You can experiment with lots of different shades, but you’ll want to use heavier dilutions in the lower layers and lighter dyes the closer you get to the surface.
- Apply a coat of dye and let it cure completely.
- Repeat the process — microtopping, sanding, dyeing — for the next three layers.
- Once you’ve finished those four layers of dye and microtopping, you’ll want to mix one last batch of microtopping, colored with just a little bit of Charcoal pigment and diluted heavily with acrylic until translucent.
- Apply this final coat, let dry, but don’t sand! This will leave your trowel marks intact for some additional texture, so trowel nicely.
- Apply a final coat of light-colored dye for a last bit of mottling, and let dry.
- Seal with two coats of Aquapro, followed by three coats of Endure, letting each coat dry before applying the next one.
|
|
|
Question from Readers
Question
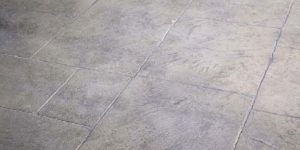
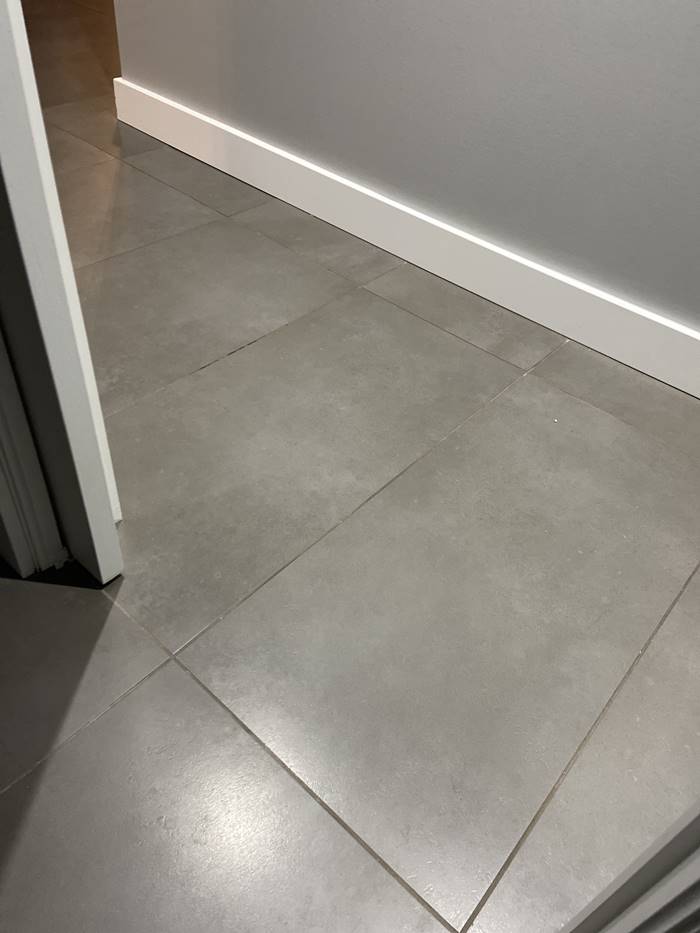
Can I do concrete flooring on top of ceramic flooring, or do I have to take it out first?
Answer from Concrete Decor
There are cementitious overlayments that can be applied on top of your tile but there are some concerns with this approach. One of those is elevation. The photo is great because you need to understand that anything you install will require removing the baseboard unless you can ensure yourself of a clean line along that (white) base. Furthermore, doors that are already close to the floor may start to rub if your elevation changes too dramatically.
Lastly, there is a thing called ghosting. This happens when you have installed the overlay and are then staining and sealing your completed project. For whatever reason, the grout lines in your existing floor can start to show through. It doesn’t happen all the time, but it’s a problem to be wary of as you decide your next steps.
Having said this, there is a particular product new to the market that can address your project requirements. This, however, does require professional applicator experience. It’s known as urethane cement and is capable of delivering very monotone finishes in both gray and white tones. It can also deliver a terrazzo finish. While it’s not cheap, it’s not prone to cracking and will deliver excellent wearability for a lifetime.