Recipe submitted by: Artistic Concrete Coatings, Wapakoneta, Ohio
www.artisticconcretecoatings.com
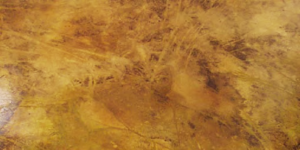
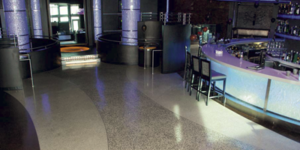
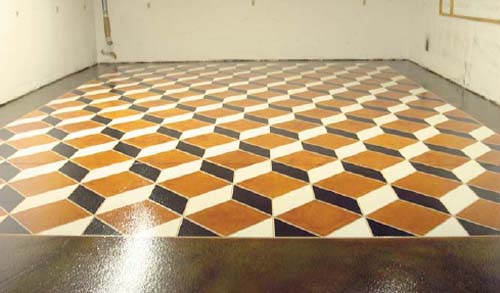
With a subtle two-level texture coat and a wild 3-D geometric pattern, this staining technique delivers a unique, captivating concrete floor finish.
Ingredients:
(Note: These amounts are enough for a 700-square foot surface.)
- 8 gallons The Concrete Protector HD Resin Concentrate
- 8 gallons water
- 8 50-pound bags The Concrete Protector Spray Texture
- 1 bottle The Concrete Protector Colorant: Buff
- 10 rolls The Concrete Protector Stencil Tape, 1/2-inch
- 1 quart each Smith’s Color Floor: Black, Amber, Nutmeg, Bark Brown
- 5 gallons The Concrete Protector T-3000 High Wear Epoxy
- 2 gallons The Concrete Protector Protector-thane 1000
- Special equipment required: Graco RTX 650 or another texture sprayer
Directions:
- Start by preparing your concrete substrate to receive the spray texture by shotblasting or grinding the entire floor to remove all contaminants.
- Dilute the resin concentrate 1:1 with water.
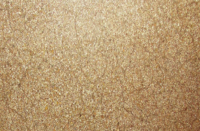
- For each 50-pound bag of spray texture, add 1.75 gallons of the resin concentrate solution as well as one ounce of Buff colorant, and mix thoroughly. Using your texture sprayer, spray an even coat across the entire floor — this should take about four bags of spray texture.
- Let the surface dry for at least 4 hours (if your ambient temperature’s around 70 degrees). Once dry, scrape off any extraneous texture so you have a relatively even, textured surface.
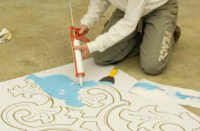
- Working from the center point of the room, use the stencil tape to mark out a grid of squares. Then tape a diagonal line through each of the squares in both directions (so you end up with a grid where each square has an X through the middle). From there, you can eliminate the tape lines you don’t need until you have the tessellation pattern. (This is tricky, but with a little practice, working from the picture, you can figure out which lines need to be there and which ones don’t.)
- Once you have the pattern taped out to your satisfaction, start mixing the spray texture for the topcoat. Use the same ratios as you used for the base coat — 1.75 gallons of resin concentrate solution for each 50-pound bag — but omit the colorant.
- Spray the entire floor with the white spray texture. (This should use up the remaining four bags.) Let the texture dry thoroughly.
- Pull up the tape to expose your grout lines.
- Mix your batches of stains at 3 parts distilled water to 1 part stain. (You’ll end up with a gallon of each color.)
- Using sponge brushes, go through and hand-stain all of the Black accent tiles (see pattern in photo), being careful not to let the stain run into the grout lines.
- Hand-stain all of the square Amber tiles in the same manner, still watching out for grout lines.
- Once the tiles have dried, tape plastic sheeting over them and spray the border of the floor with an even coat of Nutmeg stain.
- Once the Nutmeg has dried, highlight the border with some Amber and Bark Brown.
- Let the entire floor dry overnight.
- Apply a coat of the T-3000 high-wear epoxy to seal and let dry thoroughly.
- Finally, finish the floor with a topcoat of Protector-thane for resistance to abrasions and chemicals.