
Whether it’s a precast oven hood with complex finials, an elaborate entryway with Greco-Roman columns, or a unique high-detail garden sculpture, ornamental precasting can be a great way to work some value-added elements into existing projects.
Although the process does have some overlap with other concrete applications, there is an additional skill set required for doing quality casting work, especially for high-detail pieces. As with everything, casting is a practice-makes-perfect craft, but in this section we’ll outline the basic steps and some good pointers to keep in mind when you next need to produce a high-detail precast piece.
1. Prepare the Model
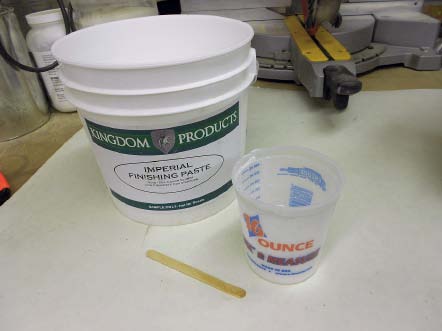
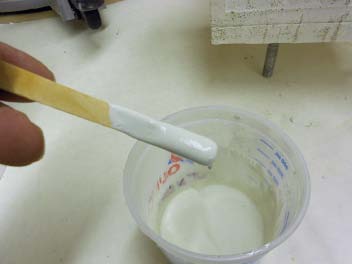
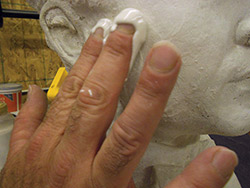
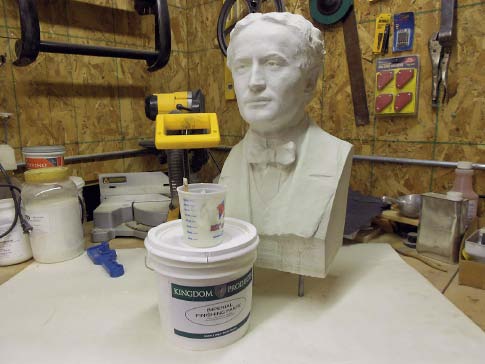
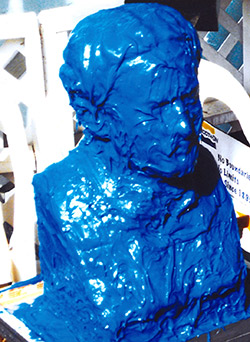
The first step to casting a piece is to prepare the model you’ll be basing the mold on. Models can be existing pieces or they can be something you sculpt from clay, wood or stone yourself.The most important element of preparing your model for the molding process is to remember that the rubber molding materials will pick up every scratch, blemish and imperfection that the model may carry. Sometimes this is an advantage — if your model has very fine detail work, you won’t have to worry about it coming through in the casting process. However, if you’re casting a new piece to address damage sustained by the original, you’ll need to repair the model and fill in any imperfections with clay, wood filler, Bondo Body Filler, or for cementitious materials, a specialized finishing paste such as Imperial Finishing Paste from Kingdom Products (Bart’s company).
 Once you have your model finished, you’ll need to apply a coat of release agent. When casting an element with fine features you need a release material that is very low-build, so it doesn’t interfere with the molding compounds’ ability to pick up the detail from the model. Molding companies sell release agents appropriate for each different material that your model might be made from. For instance, a polymer clay model may only require a light spray of aerosol release, while a natural stone or concrete model may need a coat of wax or sealer in addition to an aerosol release. Much of this decision depends on the porosity of the piece you’re using as a model.
For stone and concrete applications, a simple, cost-effective release option is to melt Vaseline in a slow-cooker and add mineral spirits at a 1:1 ratio. Warm the mixture over low heat. The mineral spirits will reduce the viscosity of the melted Vaseline and allow you to apply this mixture in a thin application. This alternative is easy to make in large volumes and is a great, low-build release option for use on stone or concrete models.
 |
 |
Whatever product you choose, apply the release to your model in a thin, even coat. Make sure you cover the entire model, especially areas with deep reveals or undercuts, where you will have to stretch the cured rubber molding material to release it from the model. Use good common sense when applying the release. Be sure to get a thorough coating on the entire surface of your model. When in doubt, apply additional release to be certain your rubber mold will come loose from the model.
 |
 entire surface of your model. |
2. Apply Inner Molding Compound
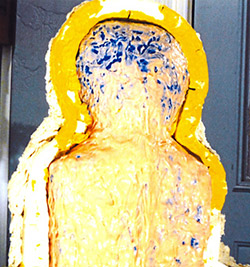
For casting high-detail pieces, you’ll be applying two compounds to your model, one on top of the other.
The first, inner compound will be a soft, flexible rubber with a low durometer (a measure of rubber’s hardness). That means that even once the material has set, it will still be quite flexible and easy to stretch around deep reveals when demolding. The second product will be a higher-durometer material, usually a plastic or fiber-reinforced resin, which will support the inner liner during the casting process.
Your molding materials will come in the form of a two-component system, which will have a limited pot life once the components are mixed together. The pot life of your molding material will range between 10 to 50 minutes, so you’ll need to pay attention to the mix ratios of the product you’re using and have everything completely ready before you mix.
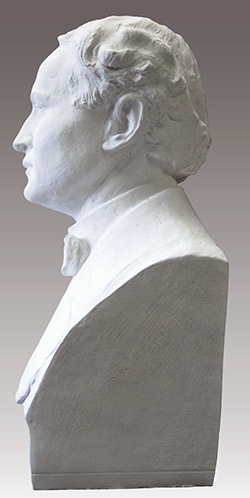
One other thing you’ll need to plan before you start is where the seam for your mold will fall. Typically you’ll want to choose a smooth, even side of your model. For example, in the case of a bust, you’d plan for the seam to run down the back of the head, where there’s a relatively smooth surface to follow.
When choosing tools for applying your molding materials, you’ll want a spatula or a good supply of cheap, throwaway bristle brushes, as the molding products are very difficult to clean out of a brush afterward. Before you get started, wrap some masking tape around your fingers, with the adhesive side out, and tap the brushes against the tape to remove any loose fibers — they’ll get into your rubber and can interfere with the finished surface.
When you have everything on hand and you’ve applied the release to your model, you’re ready to mix the first compound, the one with a low durometer. Make sure you mix the two components very thoroughly, paying close attention to the mix ratios called for in the product instructions. Mix for about two minutes, making certain to scrape the sides and bottom of the mixing container, then transfer the mixture to another container and mix again for another one and a half to two minutes. The second round of mixing will ensure your materials blend thoroughly.
Using the brushes or a spatula, work quickly to put down a thin, uniform layer of material. Let the first layer dry for about 30 to 40 minutes until it’s tacky, at which point you’ll want to have your second batch of the material mixed.
Many molding products will have dye you can add to alternating layers, making it easier to tell where you’ve applied your current coat already. Add dye while you’re mixing your second batch, then apply another thin layer of product. For the second and subsequent coats, apply extra material along where your seam will be and around any sharp undercuts or outcroppings to ensure the resilience of the final mold. Once the second coat has dried until tacky, repeat the process with up to two more layers (four total), until the mold is about 1/2 inch to 3/4 inch thick. Test the thickness by sticking a pushpin through the rubber.
Once you’ve reached the desired thickness, let it cure undisturbed in a room with constant environmental conditions for about 16 to 24 hours at 70 degrees F.
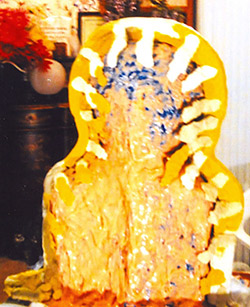
3. Apply Outer Molding Compound
For the second molding compound, which will form a sturdy outer shell to hold the inner mold, you’ll be using a much higher-durometer plastic or resin compound, which will also come in a two-component system, possibly with additional fiber reinforcement.
Before applying that compound, you’ll need to plan out the joints for the outer shell. Depending on the design of the piece, you may have an outer shell that comes together in several pieces or in just two halves. The outer mold is cast one section at a time, and those pieces will be bolted, clamped or strapped together during the casting process.
Take a Sharpie marker and draw the seams on the inner mold where the outer shell will come together. Make sure that none of the seams of your outer mold will overlap with the seams of your inner mold, to ensure the security of the inner mold’s seal.
To prepare for casting the first section of the outer shell, use modeling clay to build a 3-inch-tall wall along the seams for that section. Use a wire-end clay-carving tool to cut a 1/2-inch groove down the middle of the clay wall. This groove will be cast into the edge of the outer shell and will ensure that the pieces fit together securely.
|
|
|
|
Apply a coat of rubber-appropriate aerosol release to the first section, and mix up a batch of the high-durometer compound. You’ll want to use a trowel or spatula for this material and apply one uniform coat to the first section at a thickness of about 3/4 inch. Let this section cure for about 90 minutes.
Once the modeling clay has cured, remove it.
If your mold has more than two sections, you’ll need to repeat the wall-building process for each additional seam on the outer shell. If your mold only has two sections, you can spray release on the rest of your mold, mix and apply a second coat of the high-durometer compound right up against the first, cured section, and let the whole thing cure overnight.
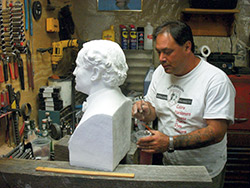
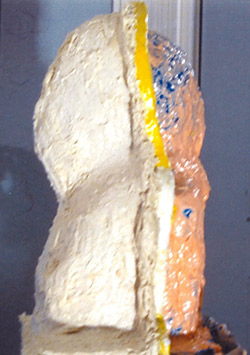
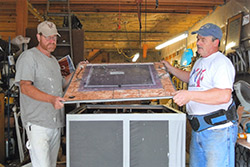
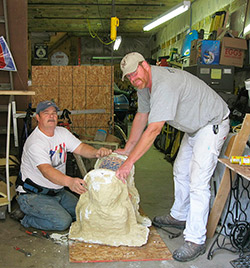
4. Demold the Model
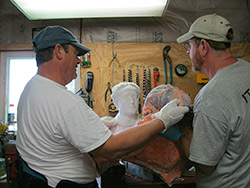
When demolding the outer shell, you will be able to pry the pieces apart with a screwdriver fairly easily. To demold the inner mold, find the place you’ve chosen for your seam, and use a pair of scissors or sharp razor knife to make an angled cut. Cutting the seam at an angle, rather than perpendicular to the model, means the flaps of the rubber will overlap during the casting process and give you a better seal. Once you’ve made the cut, remove the inner mold from the model, pulling it carefully out of any deep reveals and around any high-detail elements until it comes free. Clean the inside of the mold thoroughly with soap and water and allow it to dry.
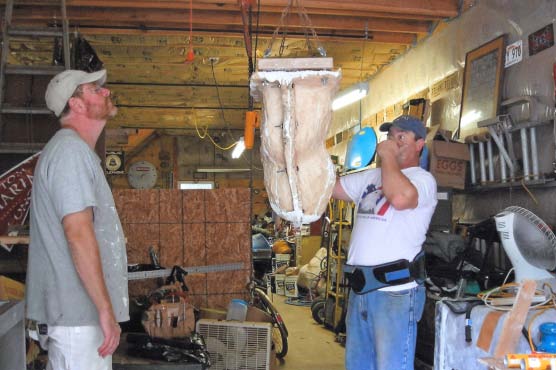
5. Build a Vacuum Box
A vacuum box is optional, but it’s easy to make and operate and will ensure that the final piece comes out free of pinholes. You’ll need two-by-fours, plywood, vinyl or plastic sheeting, lots of duct tape, a shop vac and (optionally) a piece of plexiglass. For convenience, you can build your vacuum box on a dolly, though that’s not a requirement.Build an open frame box with a plywood floor and plenty of room for your finished mold. Wrap the entire box in heavy-duty vinyl or plastic sheeting and seal the seams with ample amounts of duct tape. For the lid of the box, you’ll need a piece of plywood or plexiglass large enough to cover the entire thing. Drill a hole in the lid the exact same size as the tube on your shop vac. You’ll use this apparatus during the casting process to put negative air pressure on the cast.
 |
 |
 |
 |
6. Cast the Final Piece
As you can see, most of the time involved in precast projects goes into the prep work. Now, it’s time to actually make your final piece. When selecting a mix for an ornamental precast project, you want a high-strength, self-compacting concrete mix that provides a lot of fluidity with moderately low amounts of water. Polycarboxylate plasticizers and self-compacting additives will give you a mix with the desired fluidity and a finished piece that will be strong, durable and free of pinholes.
Start the casting process by spraying a thin coat of release agent inside the inner mold. Be careful not to let any release agent pool in the mold anywhere, as that will interfere with the surface texture of the finished casting. If there is excess release, wipe it out of the mold with an absorbent, lint-free cloth.
Place the inner mold inside the piece of the outer shell that covers the inner mold’s seam, and make sure the pieces that join at the seam are lying flat and smooth. Put the other pieces of the outer shell in place and secure them together tightly using bolts, clamps or straps. Put the mold into the vacuum box and mix your concrete.
For large pieces, if you pour in the concrete from the top of the mold, it can splash up the sides, which can then dry faster, causing discoloration or pockmarks in the final piece. To avoid this, use a large funnel and a piece of PVC to pour the concrete into the mold so that you can fill it from the bottom up. As you are filling the mold, vibrate using a hand-held pencil-shaft vibrator.
Once the mold is full to the top, close the vacuum box, attach the shop vac and turn it on. You’ll see the vinyl sheeting go taut as the shop vac creates negative pressure in the box. Let the shop vac run for about five minutes to suck out the air and then turn off the vac.
Let the concrete cure overnight (or longer if you have poor environmental conditions) before demolding.
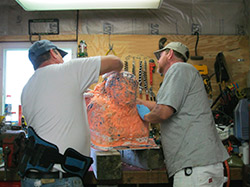
7. Demold the Final Piece
To demold, take the piece out of the vacuum box, remove the pieces of the outer shell and, just like when demolding the model, stretch the silicone carefully off of the finished piece. Once the newly cast piece comes out of the mold, the surface will be tender until it fully cures, so handle it very carefully and allow the piece to remain undisturbed while curing.
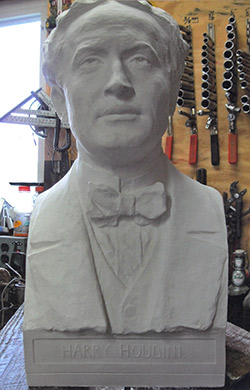 Once the piece has cured fully, apply any stains or sealers you’d like. For a natural look that will be well-protected from the elements, you can use a penetrating sealer. (One example is Aqua Pella, a water-based silane/siloxane sealer from Bart Sacco’s company Kingdom Products.) This will provide a natural look and make the piece resistant to water and dirt intrusion. Apply the sealer liberally to the cured concrete piece. You want to saturate the concrete, using two coats and applying them wet-on-wet without drying between coats. After the second coat, allow the piece to absorb the sealer for a few minutes, and then remove any excess build. This will darken the concrete for a few days until the sealer is cured out, but then the color will go back to its original hue, and the piece will be water- and dirt-resistant.