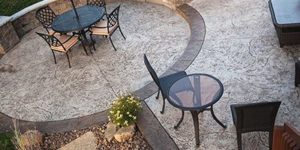

If you have an internal passion to take stamped concrete to the next level, then this article is for you. I will describe what has taken me more than 20 years to learn about how to improve a stamping project. My effort continues to this day.
I have identified six steps that all successful hunks of stamped concrete have in common. Bypassing one of the six steps will leave a stamping professional a rung short of a true level of potential. Perfection starts well before any color broadcasts across a wet concrete’s surface, and even well before a ready-mix truck arrives.
Step 1: Subgrade prep
I want to admit something — I dislike preparing the subgrade with a passion. I would much rather make something colorful and tangible than shovel dirt and sand. But the fact is that every successful stamping project begins with a properly prepared moist substrate. A moist subgrade results in a more evenly dried concrete surface, providing the best odds for stamping consistency.
Your mass of freshly placed concrete has two inevitable forces working against you. Most of you realize the concrete’s surface is under attack from wind, sun and whatever elements your local climate throws out. But what you may not realize is the same conflict takes place under your slab as well. This is why it is so necessary to first put down a subbase layer of material that can hold moisture that’s applied before concrete placement. A 2-inch layer of moistened sand is adequate for most situations.
Step 2: The concrete mix
Transporting concrete from a truck to its final resting place can be expensive and labor-intensive. This is why some resort to pumping 3/8-inch aggregate concrete with a line-style concrete pump. Two problems arise when using this mix and transport method, and both can lead to a subpar stamping project.
First, 3/8-inch aggregate mixes are not designed for slab-on-grade finishes. They are designed to grout block walls. Second, most line pumps require a wet mix of concrete to pump the material any distance at all.
Water weakens concrete and miniature aggregate doesn’t help either.
Use concrete mixes with 3/4-inch aggregate regardless of what it takes to transport them to your area of placement. These mixes will crack less and provide a stronger canvas suitable for coloring and imprinting.
Be sure to properly tamp the surface aggregate soon after concrete is placed and leveled. Don’t accept the misnomer that only small-aggregate mixes work for imprinted concrete. And mention your ability to stamp suitable mix designs during your sales presentation.
Step 3: Placement
The number one cause of concrete cracks is too much water at time of placement. I realize concrete placement is easiest when it’s overly wet but we must consider what is best for our customers and the longevity of our reputations. Keep the concrete’s slump at 5 inches or better, realizing that a good surface retardant will help after concrete placement. (More on surface retardants in a moment.)
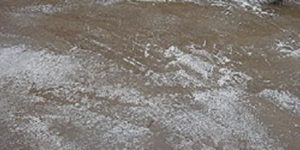
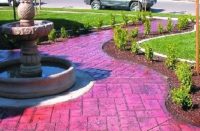
Step 4: Coloring
By now most of you know about the two choices to color concrete. I won’t waste time with integral coloring since this method requires no extra effort at time of placement. The method we will discuss is coloring by way of dry shake hardeners. Color hardeners offer a more accurate form of coloring while providing a stronger concrete surface compared to integrally colored concrete. My advice is to master color hardeners immediately. And, of course, bring up this ability during your sales presentation.
Coloring the concrete’s surface is an art of its own because timing is everything. I have found that most who are new to broadcasting hardeners try to overcolor the surface, not realizing this extra effort and time will cost them dearly at the imprinting stage.
Darker colors cover the wet concrete surface easier than lighter ones. However, light earth-toned color hardener choices approximate the natural color of concrete, so 100 percent color coverage with them is not necessary. This simplifies the coloring process and allows finishers to focus on the next step.
Regardless of your color choice, it’s important to understand the benefits of a spray-applied surface retardant slowing the surface set time. Surface retardant is the key to remoistening the concrete’s surface. This is why our crew applies a layer of surface retardant after each broadcast of color hardener. The color dries the surface (each time it’s applied) and the mist of liquid retardant brings the moisture back. Are you beginning to see how all successful projects hinge on surface moisture and plasticity? The goal is to create as comfortable of a stamping process as possible, in a way that is repeatable job after job.
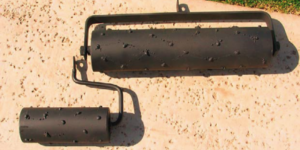
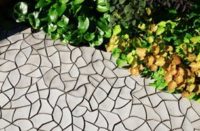
Step 5: Imprinting or stamping
Again, the goal is consistency and timing is the key. Interlocking patterns require more hands and less mud on the ground. Texture-style patterns are more forgiving and allow more square footage to be stamped with less labor.
Regardless of the pattern, the key to successful imprinting is to split the crew into a stamping team and a second team that continues to work the surface that is soon to be stamped. This is where many projects fail. Most effort diligently focuses on stamping as fast as possible, virtually ignoring the remaining portion, and I’ve noticed a sense of panic at stamping time. Continue to apply surface retardant ahead of the stamping process to provide a moistened surface ready for your army of stampers to follow you.
Step 6: Sealing
Stack the sealer deck in your favor when possible. The majority of sealer problems derive from moisture issues. These issues can result from landscape irrigation (sprinklers), roof drains, condensation drains, you name it. But some moisture-related sealer issues come from under the concrete surface too.
Educating your customer is your best line of defense. Explain how the life of their sealer will be determined by the effort to control water intrusion.
I also recommend waiting at least 30 days after concrete placement to seal stamped concrete. I realize it’s a pain to come back, clean and then seal a project long after moving on, but this dry period will reduce sealer-related issues.
Always clean the concrete surface the day before sealing — pressure-washing is suggested. Be sure to turn all irrigation systems off the day before, too. Also, don’t forget to add a nonskid material to all exterior sealed projects when possible.