
 It always seems that the rigors of winter move most forcefully against us when we’re dealing with that third or fourth snowfall. Backs throb and tempers strain to accommodate Mother Nature’s tantrum.
There is, however, one way to rein in the nuisance of dealing with snow and ice: by melting it away! Snow shovels, plows, blowers, salts and other chemicals … not required. By introducing your clients to this technology, you can help them have a stress-free, accident-free winter.
A snowmelting system works with electric heat, or by circulating warm fluids through tubing inside a surface, so that walkways, driveways, and other areas remain dry and clear. Since most snowmelting systems are “hydronic” (using circulated fluids to heat these outdoor masses), that’s what this article will focus on.
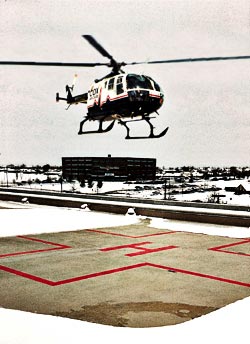
 These systems are ideal for residential uses and for commercial applications — especially critical areas like hospital and senior-housing entry areas, helicopter pads and delivery ramps. A snowmelting system performs a valuable, perhaps life-saving, function.
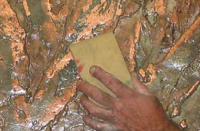
It’s also the perfect complement to an artfully stained, stamped or otherwise decorative concrete surface. Why shouldn’t your craftsmanship be admired year-round?
Here are some of the benefits that you can share with potential customers. Icy surfaces are no longer a threat. Home or facility maintenance costs are reduced because snowplowing is eliminated or reduced, and ice-melting chemicals aren’t required. These chemicals kill landscaping, require cleaning when tracked inside, and seriously degrade concrete and asphalt.
And, consider this: The cost of the system is more than returned with one avoided “I slipped and fell on your sidewalk” lawsuit. Even insurers recognize the value of these systems, rewarding commercial building owners with reduced insurance rates.
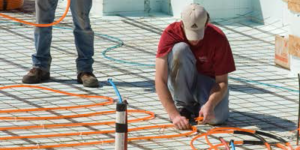
Typically, most of the components of a snow melting system, especially the heating plant, sensors and controls, are installed by a plumbing and mechanical contractor. But concrete contractors should be involved when it’s time to embed the heating elements in the slab.
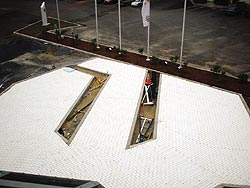
![]() Snowmelting classifications
Snowmelting classifications
Snowmelting systems are generally grouped into three classifications based on the amount of snow actually melted at design conditions:
- Systems designed not to melt snow while it’s falling, but afterwards.
- Half the snow is melted during snowfall, the rest afterwards.
- All snow and ice is melted while falling.
Snowmelting Loads
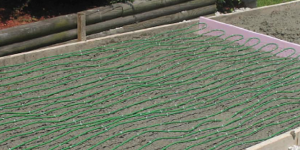
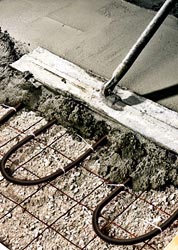
It takes a lot of energy to melt snow: about five to six times the load required to heat a building of similar size. For example, it may take only 30-40 Btu/hr per square foot to heat the inside of a structure with a floor-warming (radiant heat) system. But it can take up to 150 Btu/hr-square foot or more to melt snow and ice and ice from a surface. When a snowmelt is first started, much energy is lost when it’s moved from the heated pipe to the surrounding ground, which is frequently frozen hard. Because the warmed fluid gives off heat as it travels through the slab, installers prefer to lay the tubes in a spiral or serpentine pattern to distribute the heat evenly.
 The Importance of Insulation
Insulation substantially reduces operating cost. When added under the slab and at its perimeter, heat loss into the ground is reduced, and the slab heats more quickly. The preferred material is usually 1- or 2-inch thick rigid polystyrene foam.
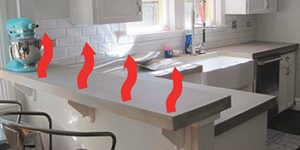
Insulation also helps channel the heat in the direction it’s wanted. Contrary to popular belief, energy doesn’t necessarily rise. It travels — in any direction — from hot to cold, from areas of high concentration to low concentration. This works great for interior spaces. But outdoors, four “thieves” work in tandem to steal the heat.
 Thief #1: Ground. Heat is literally sucked into the surrounding ground. Heat loss to the ground is about 10-15 Btu/hr-square foot.
Thief #2: Atmosphere. The atmosphere works even harder than the ground to swipe the heat you’ll be putting into the slab. That’s why energy must be fed into the slab continuously. Loss to the atmosphere can be up to 90 Btu/hr-square foot. That’s a lotta’ heat.
Thief #3: Water. As the snow or ice turns into water, it runs off into drains, storm sewers and into grass. This water runoff carries precious energy away from our slab, too. Care must be taken to ensure the water runoff from the snowmelt system has a place to go. If not adequately designed for, water will run off the slab and “pool” in low spots around the system and freeze. It may be necessary to heat drain pipes and water runoff areas.
Thief #4: Evaporation. As melting snow and ice turn from liquid to gas, more energy is carried off. This energy must also be replaced by our heat source.
 High-tech tubing
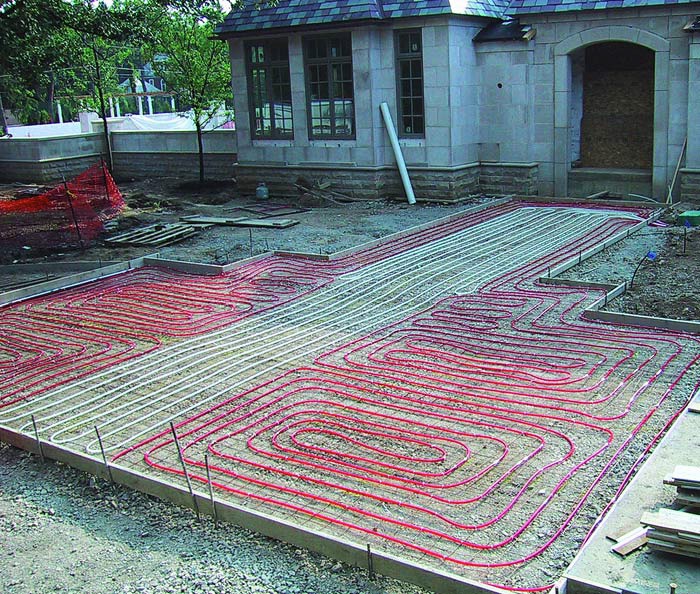
Typical snowmelts employ tubing buried in a concrete slab. The most popular tubing used is either cross-linked polyethylene (PEX), or synthetic rubber (EPDM). Both varieties of tubing have a long history of performance and longevity.
According to Keith Whitworth, a design engineer at Springfield, Mo.-based Watts Radiant, a leading supplier of radiant heat and snowmelt technology, tubing comes in a variety of sizes, typically 1⁄2″ ID (inside diameter) to 3⁄4″ ID. The flexible tubing ties into supply and return piping at distribution points, or “manifolds,” that come in pairs: a supply manifold where the tubing starts and a return manifold where the tubing stops. The layout is usually easiest if these manifold pairs are located together next to the “zone,” or area to be snowmelted.
 Tubing is spaced from 6 to 12 inches on center and circulates a solution that has been heated to 110°F to 140°F. Tube spacing is varied according to the degree of snowmelting required.
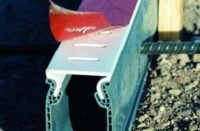
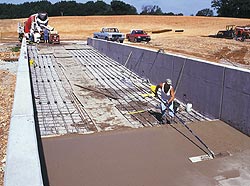
Tubing is usually strapped or tied to rebar or rewire. Even if rewire is not needed for structural reasons, it is needed to keep the tubing from floating to the surface of the concrete during the pour. A minimum of 2 to 3 inches of covering must be maintained over the top of the tubing. Tubing can also be clipped to rewire, hooked to a base material with turf hooks, stapled into rigid insulation, or otherwise connected to a compacted base.
At expansion joints, where slab movement could cause stress, it’s necessary to take special precautions. “We recommend slipping the tubing through collars cut from plastic pipe or pipe insulation and placed several inches below the expansion joint,” explained Whitworth.
 “Another key precaution,” he added, “is that the system must be pressure-tested before and during the concrete pour to ensure that no damage has been done to the heating elements during installation.”
… and, finally, maintenance:
A hydronic system requires maintenance. In addition to maintaining the boiler and pumps, Whitworth explains that the glycol/water antifreeze must also be checked periodically to assure its effectiveness.
 Principles of Operation
On-off operation
Some snowmelts are operated only when there is ice or snow. These “on-off” systems are operated in the presence of precipitation when the ambient temperature is below 35°F. While less costly to operate, these systems take longer to start melting ice and snow because they must first increase the temperature of the slab.
Idled operation
In order to help systems respond faster, some systems are idled, or operated at reduced output until precipitation is sensed with a temperature below 35°-38°F, when the system is operated at full output. These systems permit faster system response, and no snow or ice accumulation is permitted.
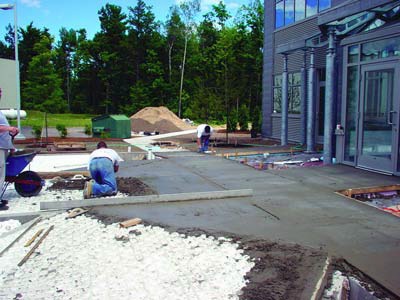
![]() Sophisticated controls
Sophisticated controls
Automatic controls that sense slab temperatures, outdoor temperatures, and precipitation can also be used. They’re more costly, but allow greater system control.
What’s the system cost?
Snowmelts themselves are not that expensive to operate — especially the “on-off” types — since, typically, they operate only a few times a year. The biggest cost with a snowmelt system is the up-front price.
“Considering the cost of insulation, tubing, boiler and pump system, and all installations, a snowmelt system will usually cost between $6 to $12 per square foot, with commercial systems at the higher end,” says Whitworth.
 … and the operating cost?
On-off system cost:
The cheapest system to operate has a simple on-off function. As an example, a Class II system in Buffalo, N.Y., may cost about $0.21 per square foot per year. The same system in Chicago, Ill., may only cost $0.12 per square foot per year. Minneapolis or St. Paul may be in the range of $0.25 per square foot per year.
Idled system cost:
Because they operate any time the temperature is below 38°F, it will clearly cost more to operate these systems. Considering that they may operate for up to 1⁄3 of the year (about 3,000 hours), the total system energy would be 300,000 Btu/year. Hospitals may have waste heat from steam or condensate that may be readily available, greatly reducing or eliminating energy needs.
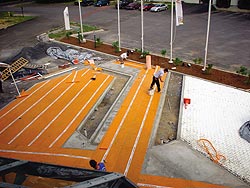
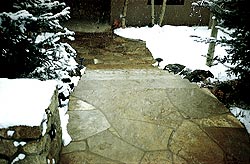
 Snowmelt systems and decorative concrete: a great match
Whether your client needs to melt snow on a New Jersey walkway or warm the entrance to an emergency room in Nome, a properly installed snowmelt system will readily answer the call. And with some beautiful decorative concrete to finish off the job, you will have brought both beauty and utility to the site.