

 An interior designer recently approached a decorative concrete contractor in Naples, Fla., for a solution to an unfortunate stroke of ill luck.>
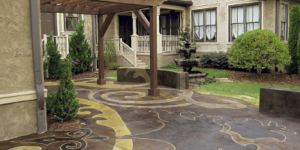
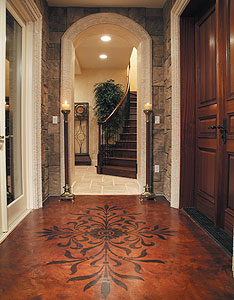
One of Pam Novakovich’s clients had ordered a $9,000 shipment of Italian tiles to lend old-world Tuscan ambience to an 85-square-foot entryway. The tiles had been irreparably damaged in transit, so the owner of the $5 million home naturally turned to Novakovich for help in salvaging the situation. She, in turn, went to artisan-installer Corby Albright.
Albright had recently attended one of Colormaker Floors’ Wild Workshops, at which he had experimented with Modello designs using Pentimento and Sgraffino products. He knew that some of the techniques he had worked with just might do the job. He presented his samples to the designer to show her the wide-ranging effects and intricacy of detail that could be achieved. Sure enough, he was appointed to the task.
The mission was accomplished. The result was an awe-inspiring 85-square-foot Tuscany floor created for $11,000 — a cost-effective solution for the client and a tidy profit to Albright for his value-added efforts.
|
|
|
|
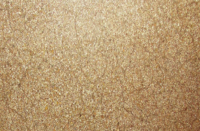
Here’s a quick description of the procedure, including the names of appropriate Colormaker products:
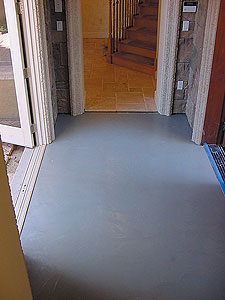
Step 1: Install Pentimento (Grey) at 1⁄8-inch thickness.
Step 2: Acid-stained Patinaetch (Sumatra) diluted with water at 1:1.
Step 3: Dye-wash the surface by spraying Someru Dye Black (diluted with water at 5:1), Someru Dye Red (diluted with water at 4:1) and Someru Dye Blue (diluted with water at 6:1). These dyes are sprayed separately but simultaneously using spritzer bottles and mopped till the dye is completely dry.
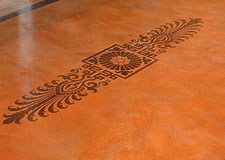
Step 4: Lay the Modello design on the floor and use Decographic Dye Black, diluted with acetone at 5:1, to transfer the design on the floor.
Step 5: Seal the surface with two coats of Texture Seal solvent-based acrylic sealer.
Step 6: Apply two coats of Uro Finish urethane-based floor finish.