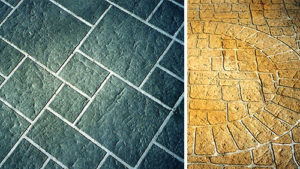
Stenciled overlays are usually used for relatively large areas like driveways, pool decks, patios and pathways. So how do you place the stencil properly for the most natural-looking result? Scott Thome of L.M. Scofield Co. advises starting with the same line of sight the customer will have. If the customer will look up the driveway toward the house, run the stencils perpendicular to this line. “This way the joints between stencil sheets will be less noticeable,” Thome says.
While it may seem logical to start a rectangle pattern in line with the house or building, experts caution against it. “Do not rely on the building as your starting point,” Thome says. “Most buildings are not square. String a line a foot or so away from the building and then start your pattern.” Brad Berg of Architectural 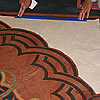 Enhancements says, “If both the house and the patio are crooked, set the pattern at a 45-degree angle.” Butterfield’s Jancy explains another advantage of that approach. “What I like to do when you have a long run is place the sheets on a 45-degree angle so you don’t see overlapping repeats.” He also suggests sighting a center line and then laying out the stencils evenly on the right and left sides so the edges will match. “Avoid creating ‘slivers’ of the pattern,” he says. “That makes homeowners nervous about giving you a check.”
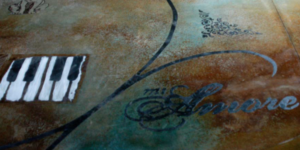
For detailed stencils used with etching or sandblasting over smaller design areas, the stencil can be placed in the center of the target area. Additional background patterns or saw cuts radiate out from there. Placing and adhering the stencil properly is critical for getting clear edges and details. Both Surface Gel Tek and Modello recommend a “tape hinge” method for their designs, which are supplied with backing paper on the adhesive side and transfer tape on the other side to hold the pattern together until the stencil is applied. 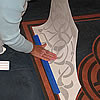 The design is set in the desired spot with the backing paper on the concrete. One edge is taped securely to the floor, the tape acting as a hinge. A squeegee or plastic trowel is used to “burnish” the transfer tape for better adhesion with the stencil.
Now the stencil is flipped back on the tape hinge. The stencil can be burnished again on the backing paper side for easier release. Next the backing paper is gradually peeled off at a 180-degree angle to itself starting from the hinged edge. The adhesive stencil is slowly rolled onto the surface as the backing paper is removed. Once in place, reburnishing 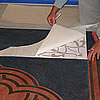 will ensure a tight seal. The transfer tape can then be peeled off and the stencil is ready for color or overlay application.
Modello Designs cuts many larger-scale patterns and intricate designs. When the design area exceeds the width and cutting length of the vinyl the designs can be “tiled” into different sections that are joined together during the installation process. The company provides a clearly marked layout “key” just for this purpose, so there are literally no limits on either the size or the creative application for these stencils.