
Concrete contractors should by now be well aware of the recent spike in popularity of decorative concrete in a variety of applications. Concrete remains one of the most durable, functional, reliable building materials available. There’s no getting around the fact that when you mix Portland cement, sand and water, the initial result is not particularly attractive. Through the use of integral colors, dry-shake color hardeners and similar products, fresh concrete need no longer be gray, monotone and drab looking.
Rise in Decorative Concrete
In situations where a concrete slab has cracked, spalled or aged, cementitious overlayments can provide a solution. When compared to the time-consuming and costly alternative of ripping out the hard slab and pouring new concrete. Numerous manufacturers offer products and systems that fall under the category of trowelable, stampable overlayments. This article will focus solely on self-leveling, polymer-modified overlays.
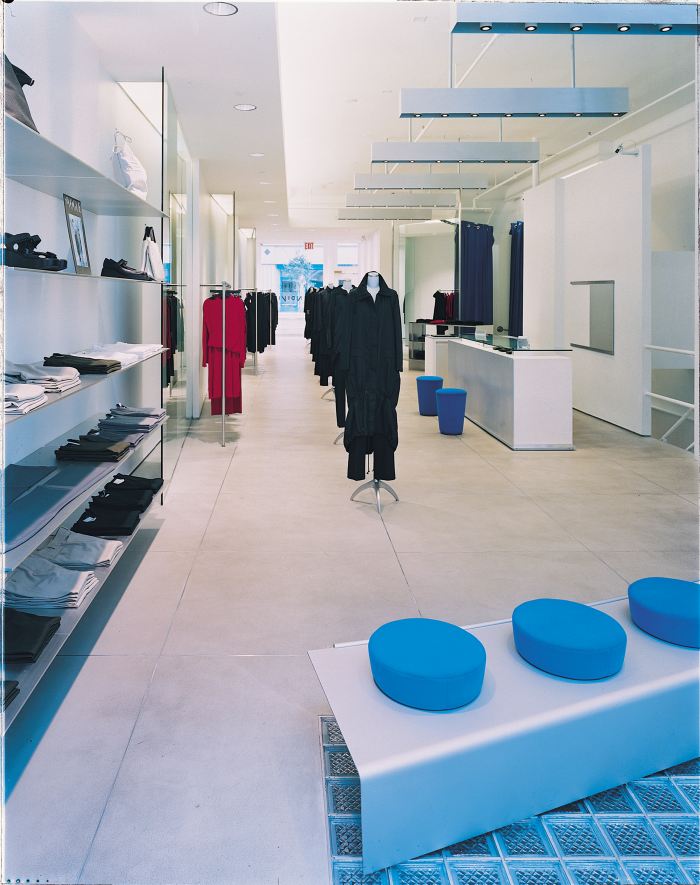
Self-leveling overlays, flowable, polymer-modified cementitious toppings that have the huge advantage of setting within a matter of hours. They are a new options for contractors that appeared on the market within the last five or six years. Designed exclusively for use in interior applications, self-leveling overlays offer tremendous benefits that explain the widespread use in many casinos, hotels, restaurants, shopping malls, resorts, theme parks, office buildings, and even residences across the country.
Advantages
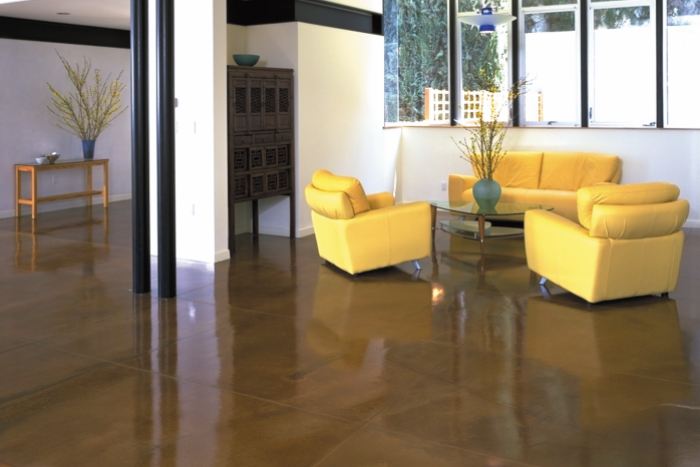
Self-leveling overlays offer a number of significant benefits over alternative floor coverings. Through staining, saw-cutting, dying and grouting, overlays can accommodate an almost limitless range of designs. Global maps, for instance, or dolphins swimming through waves. These examples would be either impossible or cost-prohibitive with other materials. Provided they are properly and regularly maintained, self-leveling overlayments will also last indefinitely. Which offers a clear advantage over carpet, tile, vinyl and other more traditional floor coverings that must be periodically replaced. Additionally, overlays are considerably less expensive than pricier alternatives such as granite, terrazzo or marble.
“In the casinos of Las Vegas, the use of self-leveling overlays has taken off like crazy,” says Gale Hodges, president of NuFloor Systems, a veteran contractor firm in the Western U.S. “It wasn’t that long ago that 100 percent of my work was installing underlayments for the flooring people, but ever since these self-leveling overlays came out, now 95 percent of my time I spend putting in decorative toppings. It’s like a revolution, at least in Vegas. That’s all they use.”
He said carpet used to be the preferred choice there, “but it wears out from all the traffic, and they had to change it at least once a year, which was a headache, and costly. In some areas, tile was popular, but that required maintenance too, and these overlays can be much more decorative. And the main benefit, of course, is it lasts. It’s there forever, as long as you clean it and keep it waxed.”
Time and Durability
Another key advantage is the time factor, says Robert Harris, director of product training for The Scofield Institute, part of L.M. Scofield Co., a leader in architectural concrete for more than 85 years. “Depending on the size of the floor, you can conceivably turnkey a project — surface preparation, crack repair, priming, overlay installation, floorcutting, staining and sealing — in three days. That’s a real fast-track turnaround, especially when compared to the 28 days it takes for a fresh-poured concrete floor to cure.”
Polymer-modified, self-leveling overlays are designed to be 1⁄2 to 3⁄8th of an inch thick. They generally perform better at 3⁄8″ to compensate for variences in floor height. The vast majority of installations are in this range. Although, there might be rare instances when overlays have been installed to thicknesses as high as 4–5″, says Seth Pevarnik. Pevarnik is technical field consultant with Ardex, Inc., a recognized leader in the self-leveling overlay product category. “That thickness would very expensive, even cost-prohibitive, but if we’re talking about a customer who needs the project turned around in a day or two. He can’t afford to wait for the alternative. Which is to pour a fresh 4″ structural slab, and wait the 28 days it takes to cure. With the casinos, for example, they can’t afford to keep their slot machines and tables out of action for that length of time.”
Substrate Preparation is Crucial
Installers and manufacturers of self-leveling overlay systems universally agree that a project is doomed to failure if the concrete substrate is not properly prepared to accept the product. According to Pevarnik, “The key to success when installing our products is to achieve a good bond between the substrate and the topping, and proper preparation of the surface is by far the most important factor in achieving this bond.”
Self-leveling overlays have been installed on top of substrates other than concrete — wood, tile, brick, metal — with only limited success. “Concrete overlays are designed to go on over structural concrete slabs. Period,” says Harris. “With other materials, you can’t be sure you’ll get sufficient adhesion, and you can have serious problems with moisture and/or delamination.” Pevarnic adds, “If you pour a self-leveling or self-drying topping over something flexible, like wood, you’ll never get the topping to flex with the substrate, and cracks will appear. It’s best that the substrate be a concrete slab.”
Says Harris, “I can’t overstate how critical it is to achieve an appropriate surface profile on the concrete. Technical guidelines recommended by ICRI (the International Concrete Repair Institute) indicate that, on a scale of 1 to 9, you want a surface profile of between 4 and 6 when you’re installing a 10-mil topping like a self-leveling overlay. Our experience tells us the best way to achieve that range is through shotblasting.”
Manipulating Surfaces
Steel shotblasting is a process whereby steel shot — essentially, BBs — is centrifugally propelled in a special machine’s enclosed blast chamber at high velocity onto the substrate surface. This aggressive action roughens up, or abraids, the surface with many small indentations. Which offers thousands of minute peaks and valleys to which the overlay can grab on to and adhere.
While there are a number of other ways to prep a substrate. From mild methods like detergent scrubbing or acid etching to super-aggressive processes such as scarifying or rotomilling. Shotblasting is generally recognized as the ideal methodology when self-leveling overlays are to be applied, according to IRCI guidelines. A single pass with a shotblasting machine is ideal for removing dirt, laitance, curing compounds, sealers, polyurethane coatings, tile mastics, and thin epoxy coatings. Some thicker materials may require multiple passe. Certain materials such as resin systems, resilient coatings and adhesives, may require scarifying or similar aggressive techniques. Shotblast systems are designed to contain airborne dust generated during the procedure.
While acid etching is a popular preparation method in some circles, overlay manufacturers discourage it for projects involving their products. “Acid etching isn’t recommended because it’s difficult to get all the residual acids off the surface, and if it’s allowed to dry and be left behind, it acts as a bond breaker,” says Jeff Potvin, director of engineering for Increte Systems. Adds Pevarnik, “The acid can penetrate into the porous concrete and chemically react with the cement, thus affecting the long-term integrity of the concrete.”
Moisture Problems
Too much moisture content in the concrete substrate will almost certainly cause problems for a self-leveling overlay system. Moisture vapor transmission through the capillaries of the concrete reaches the surface and, eventually, will cause delamination with any kind of topping or overlay, says Harris. “Perhaps the concrete hasn’t fully cured, or it was made with a high water-to-cement ratio, or you have a high water table or other groundwater sources in your installation location.
If you suspect you might have a moisture problem, regardless of the source, there are a couple of simple tests you can do to be sure. There’s ASTM 4263, which is a tape-down test. Where you tape down and seal off a small area overnight or a minimum of 16 hours. If you see beads of sweat or condensation, you’ve got excess moisture. There’s ASTM 1907, a calcium chloride test that takes three days, or between 60 and 72 hours. Critically, you’ve got to bring the moisture content down before applying an overlay.”
Repairing Cracks
Another important part of the surface preparation process is the repair of existing cracks. Because the overlay is a concrete material, cracks in the concrete substrate have a tendency to eventually make their way to the surface of the topping. Most overlay manufacturers offer companion products for patching hairline cracks to help inhibit their ability to reach the new surface.
“One way to repair a crack is to grind the edges to help make it smoother. The he crack may still resurface over the course of a few years,” says Potvin. The use of Fiberglas tape or membranes, followed by patch, can be helpful in keeping cracks under control. Many installers simply plan their designs to include sawcuts in the same areas where cracks exist in the substrate. In this way, when cracks make their way to the surface, they are disguised as saw-cut joints. As Harris puts it, “Honor the crack. Let it do its thing, and make it work to your advantage. Make it part of your design.”
Applying Primer
Once the substrate is properly shotblasted, moisture content is determined to be at or below acceptable levels. And when cracks have been satisfactorily repaired, the next step is application of an appropriate primer material. Most overlay manufacturers make a primer product specifically designed for use with their proprietary self-leveling overlay systems. Two coats, or even three or four, are recommended to ensure the primer accomplishes both jobs it is designed to do. Bond with the substrate and seal the pores in the concrete.
“With our self-drying topping,” says Pevarnik, “we recommend two coats of Ardex primer. It acts as a bonding agent. More importantly, it seals the pores of the concrete so the substrate doesn’t absorb water from the overlay mix. In return, it prevents air from coming up from the substrate into the mix and leave pinholes and air bubbles.”
Testing Applications
A simple water test can be conducted to ensure that the primer has properly sealed the substrate. “Once the primer has dried,” says Harris, “pour a capful of water and then examine it closely. If it beads up, then that means the water won’t penetrate. But also, check to see if any tiny air bubbles are permeating up through the primer. If so, apply a third coat.”
You should apply primer with a brush or pushbroom. “Some installers try to roll it on, or spray it on, but you need to brush it afterwards too,” he notes. “You need to make sure you force the primer down into the pores of the concrete. Otherwise, it’s just a film sitting on top, and it’s not really bonding well.”
It’s wise to plan your project so you apply the overlay material within 72 hours of the primer application. “Actually, once the primer is dry to the touch — anywhere from two to eight hours — start overlaying as soon as possible. The longer you wait, the better the chance for dust or other small debris to collect and cause problems.”
Overlayment application
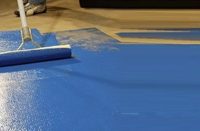
Some contractors mix their overlay systems and water in barrels at the job site while others prefer using a pump and hose, and it often depends on the size of the job. Says Hodges, “Either way, it must be done precisely to the manufacturer’s specifications. The amount of water in the mix must be consistent and exact. We put down about 100 truckloads annually, and we’ve found through experience that the pump gives you better control of thickness and consistency.”
For Scofield’s Overlay product, says Harris, “You need to add exactly 4.5 quarts of water per 55-pound bag of mix. Don’t vary from that ratio. If you add too much water, it dilutes the integrity of the mix. But if you don’t add enough water, it won’t self-level properly.”
As the material is poured into place, particularly with larger areas, it’s vital to keep a wet edge, just as painters do. Then, using either a gauge rake or a smoother, or both, you maneuver it around and help it find its own uniform level at a uniform depth. “You need to work quickly and efficiently. Because this material is heat sensitive and the warmer the conditions the faster it will start setting up,” says Harris. “Using a smoother breaks the surface tension and allows any entrapped air to get out. It’s tempting to overmanipulate the material, but once you get a routine going that works, you’ll find that one or maybe two passes with the smoother is all you need. Then get off it.”
Application Considerations
If more than just a few bubbles appear, this probably indicates application of the primer was insufficient. In these cases, a porcupine roller can help alleviate the problem. Then go back over it with a smoother if you don’t like the dimpled effect left from the porcupine roller, he says.
Temperature, of the air, of the mix and of the water, is yet another important criterion in a successful overlay floor installation. “Keep in mind, this is a concrete product, and it’s best to work when conditions are cool,” Harris notes. “If the ambient temperature is too warm, or you store the mix outside in the sun, that will affect the set time. An air conditioning system or heating system should be shut off, if at all possible, before you begin pouring product. The water you add should be chilled or cool. We recommend putting several bags of ice in the water barrel and coiling the hose in the chilled water if the conditions are warm. That will help prevent the floor from setting up too fast.”
Finishing and Maintaining
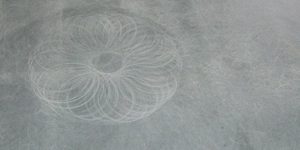
Once the overlay has reached sufficient hardness — three hours to overnight — there are special power tools available to score or sawcut the surface. The possibilities are almost without limit. A wide range of patterns, designs, artwork and even company logos can be cut into overlay surface. “You can achieve designs in concrete that you can’t get with other materials,” says Harris, “either because the material won’t allow it or it would be cost prohibitive. With self-leveling overlayments you can do just about anything your imagination allows”. Different diameter diamond blades on a straight or angle grinder permits the installer to show their artistic flair without causing excessive dust problems. As mentioned earlier, you might consider tailoring your design for certain saw cuts. To ensure they are made at places where there were cracks in the concrete substrate. Thereby hiding them if and when they make their way to the surface.
Some overlay systems come only in gray or white; if you desire different colors, you must add coloring products or pigments to the mix. Several overlay manufacturers also offer custom mixed colors. These allow the designer, architect or contractor to match any color. Whether it be a paint chip or other colors already in use. Other systems premix in dozens of different colors, like Scofield’s. Many installations, however, are more dynamic and colorful through the use of stains (sometimes in multiple colors) that one applies to the hardened overlay. Through various brushing techniques, stains can be evenly applied or layered or mixed to create a faux look.
Finishing Up
The final step is to apply sealer and protective coating to protect the floor from damage and traffic wear-and-tear. If the floor is in a high traffic area, some installers apply several coats of sealer. Not only to protect the floor but to simplify the regular maintenance routine. “If you build up successive coats of wax or polish, an overlay floor is relatively easy to maintain,” observes Harris. “It also depends how much traffic a floor gets, but if you adhere to a regular maintenance schedule and continue reapplying wax, the floor should look great and last almost indefinitely.”
Hodges agrees. “These floors can last forever, but only if they get the maintenance they require. In the casinos, they buff and polish every day, or every other day. In most locations, they should be cleaned and waxed a minimum of once every five days.”
For concrete contractors looking to enter this popular new market niche, many overlay systems manufacturers and their distribution networks offer two-day or three-day training seminars that cover everything an installer needs to know in a hands-on environment.