
Concrete Decor’s Technique section is designed to offer readers helpful information on methods for properly preparing concrete surfaces and installing decorative concrete products. This month, we’ll focus on techniques for stamping an overlay.
Thanks go to Clark Branum of Brickform for sharing his expertise.
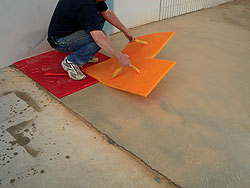
 1. Texturing the wall line prior to stamping
Near the placement of your first stamping tool, use a highly flexible texture skin — one that matches the texture of your stamping pattern — to apply texture along walls or around posts that prevent the stamp from lying flat. The flexible texture skin will be used periodically to address other hard-to-reach areas as work progresses across the project surface.
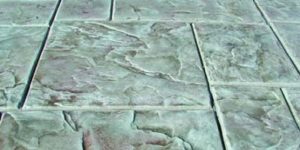
 2. Initial placement of the stamping mat
Provided the wall of the building and any adjoining slab are perpendicular to one another, and you are using a square-pattern stamping tool such as the 36-inch Ashlar Slate shown here, begin with the edges of the stamp aligned to a corner of the area you are stamping. If the wall and any adjoining slab are not perpendicular, a square patterned stamping tool, as shown, should start with the placement of the stamp on a 45-degree angle.
Where walls or adjoining slabs are not in alignment, an applicator should also consider more random stamping patterns as a way to avoid layout problems.
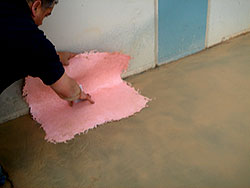
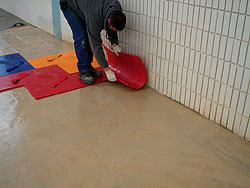 3. Using a floppy mat near the wall
Stamping tools can be purchased in varying densities in order to provide increased flexibility at walls or posts. In this application, a floppy mat helps carry the pattern into the already textured wall line, and is used to reach into tight corners, allowing for increased surface coverage and a better finished edge.
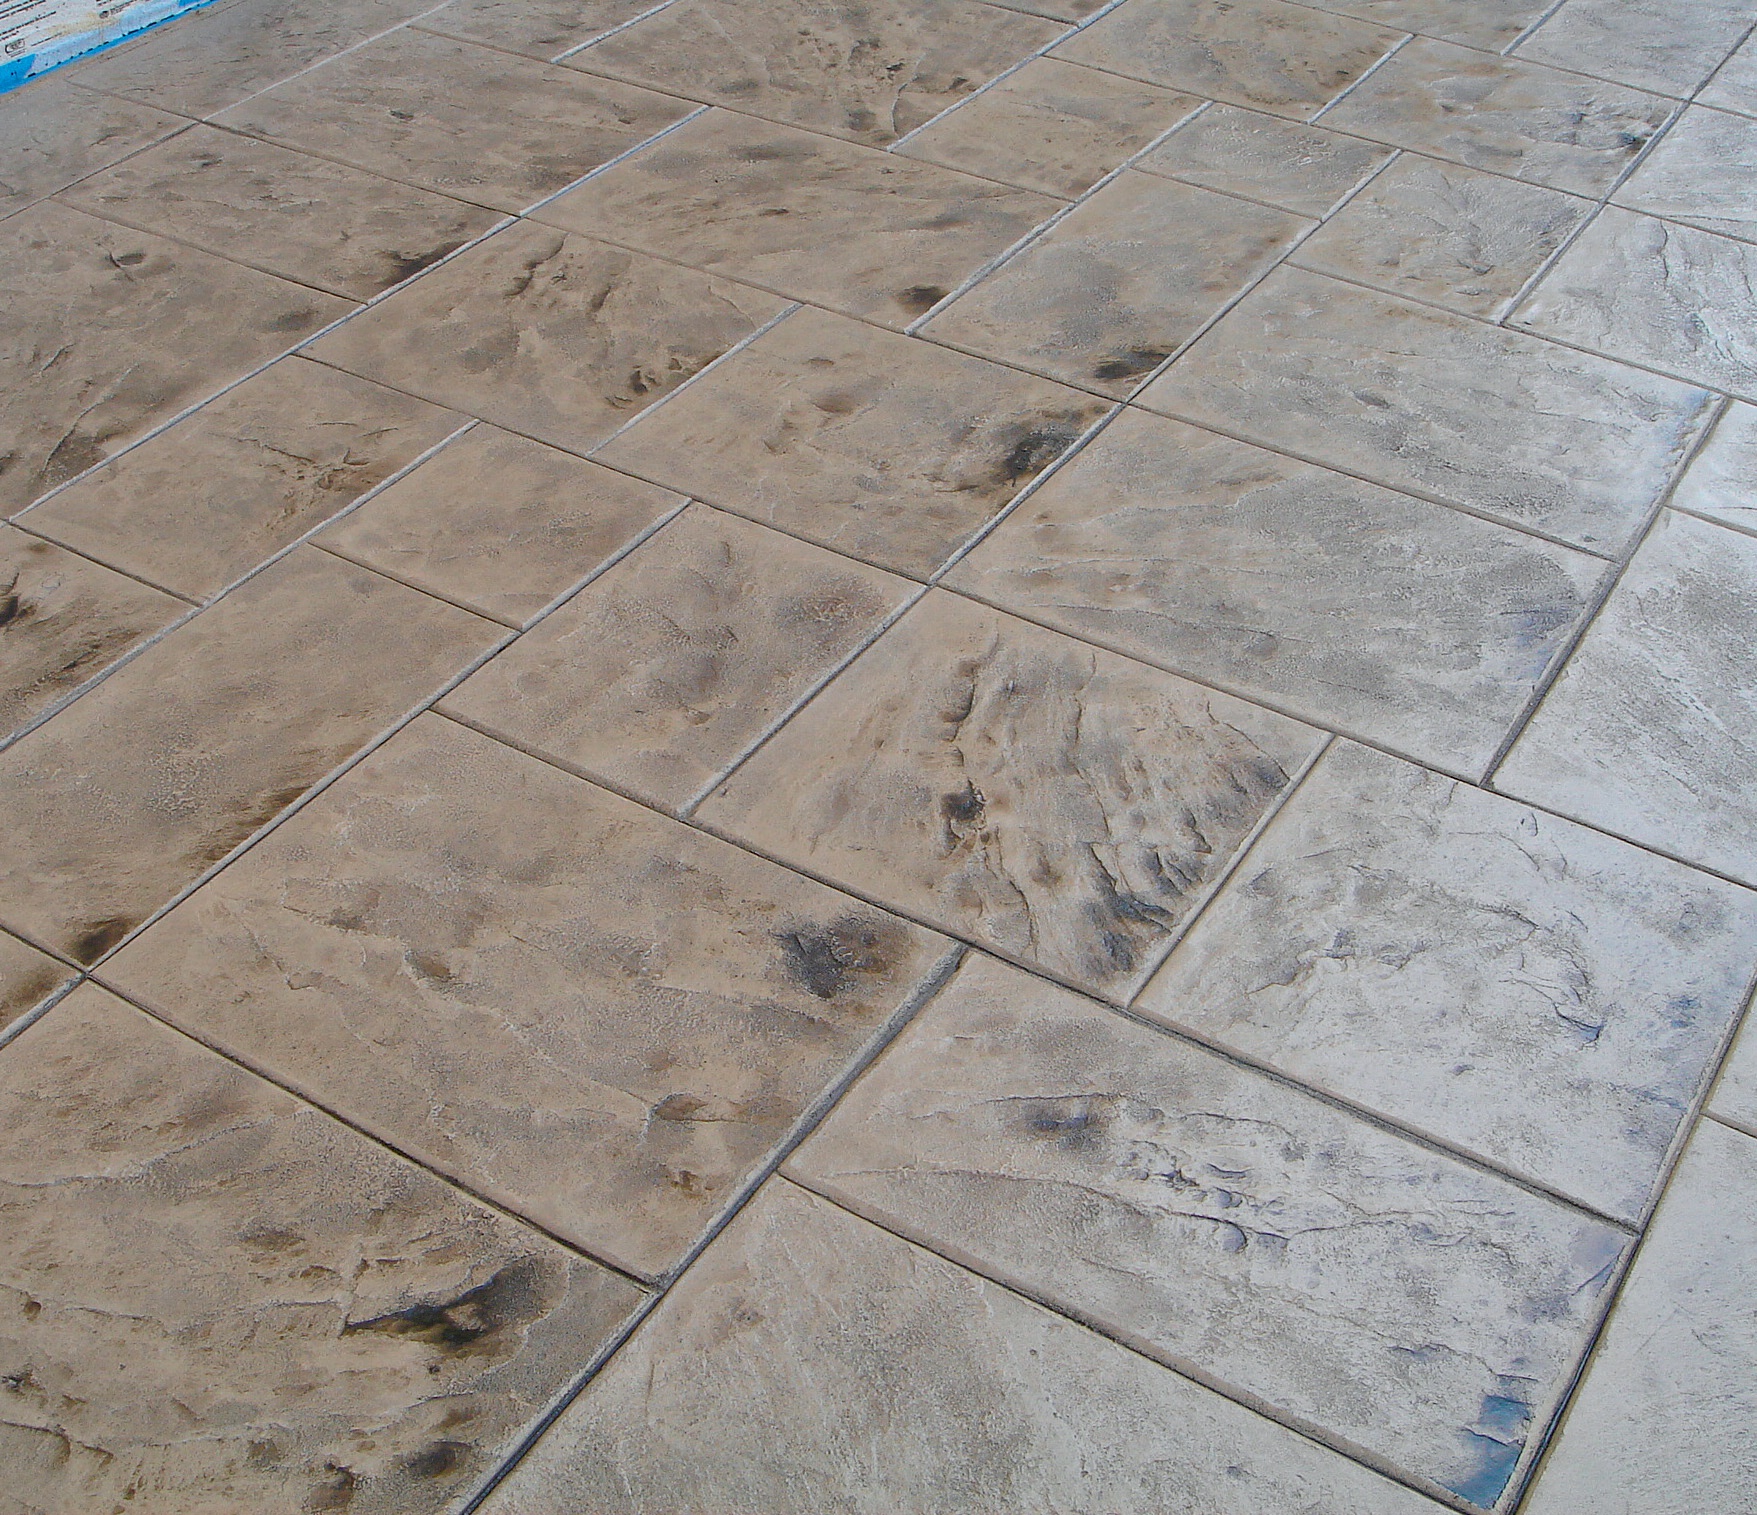
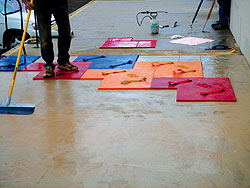 4. Stamping a row
Having an adequate supply of color-coordinated or labeled stamping tools on hand is critical to prevent repeat patterns or lines from appearing on the finished work. Lines or repeat patterns can be avoided by varying the use of the stamp colors, as shown here. Notice that from right to left the forward row shows a red, yellow, red, and a blue. The next row can now start with a blue, red, yellow, red or any variation that is inconsistent with the previous row.
It is critical to keep the rows aligned as you move forward. You should always have enough stamps on hand to span the area in one direction and start your next row.
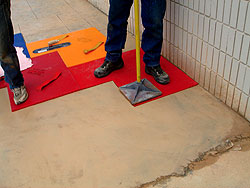 5. Use of the Tamper
Compared to stamping a new concrete surface, tamping a pattern onto an overlay requires less force. In fact, tampers for stamping an overlay are larger at the base so as to displace some of the force of the pounding over a larger area. Making sure that the tamper lands flat on the surface of the stamping tool is critical. With an overlayment, tamping up to the edge of the stamp is okay, provided the applicator is careful not to hit the stamp excessively.