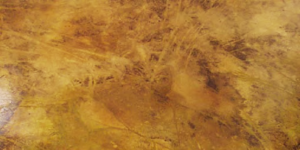
This recipe demonstrates a great way to achieve an incredibly striking, elegant effect with the simplest of ingredients.
Linear Thinking
Artistic Surfaces – Pompano Beach, Fla. – www.artisticsurfaces.com
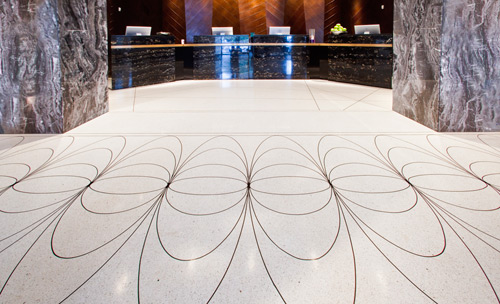
For an upscale hotel like the W in Miami Beach, elegance is anything but optional. This effect, using incredibly simple ingredients, provides a deliciously luxe look for the lobby.
Ingredients
- Dry-pack mudbed: Key Resin Moisture Vapor Treatment #635
- Cement-IT Western White portland cement
- Klein and Co. Plex-A-Bond acrylic additive
- Coarse sand
- Key Resin Epoxy Terrazzo #108, white
- Manhattan American Terrazzo Strip plastic divider strips (3/8 inch by 1/8 inch), black
- Continental Terrazzo Supply marble chips, China White in size 0 and 1
- Burnett Athletics Plus 5 Field Marker white marble dust
- Johnson Wax Professional Plaza Plus sealer
- Special equipment used: Water-jet cutter, Blastrac 1-15DS Global shotblaster with S-460 steel shot, paint roller with at least a 1/2-inch nap, Terrco Model 3100-3P floor grinder, 24-grit diamond segments, 80-grit and 120-grit carbide stones
Directions
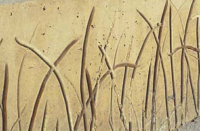
- As this recipe is simple black and white, it works best when creating line art. Using a water-jet cutter, cut out a set of full-size templates for your design.
- Shotblast the floor with Blastrac 1-15DS and S-460 steel shot to open the surface of the concrete.
- Clean floor thoroughly with a vacuum.
- Mix the Moisture Vapor Treatment and put down one coat of the product with a paint roller.
- Mix the dry-pack mudbed using the portland cement, coarse sand and Plex-A-Bond, at a ratio of 4 parts portland cement to 1 part each of sand and Plex-A-Bond. Screed the mixture to the proper elevation.
- Trace design on the mudbed using your template, and then affix your divider strips along the lines of the pattern.
- Mix Key Resin Epoxy, which comes as a two-part system, at a 5:1 epoxy-to-hardener ratio, and mix for 5 minutes.
- Add 25 pounds of Plus 5 as filler to help stiffen the epoxy mix. Let mix for 2 minutes.
- Add a batch of chips – half of them size 0 and half size 1 – and let mix for 3 more minutes. Pour mix on the floor and spread with a hand trowel.
- Let cure for 10 hours before beginning grinding and polishing.
- Start with a rough grind (dry or wet) using the 24-grit diamond segments. Make sure to make an even number of passes so the floor will be even and flat.
- Next, a medium grind with 80-grit carbide stones.
- Finally, a fine grind with 120-grit carbide stones.
- Mop the floor with clean water after the fine grind. Rinse and repeat a couple of times.
- Allow the surface to dry for 4 hours before applying a coat of sealer with a paint roller.