Sealing concrete can be frustrating! Roller marks and their cousins, “lap lines,” are just two of those frustrating problems that can plague professional decorative installers.
When you really think about it, sealing concrete falls more into the coatings industry than the concrete industry. It’s as much art as it is science to get liquid sealer out of a can and lay it down in a thin and seamless film over a concrete surface. We expect this “seamless” process to happen the same way day in and day out, even though each surface is different, each environment is different and each applicator is different. Also, if you are like most decorative concrete installers, your expertise is color and concrete, not sealers or coatings. Taking those factors into consideration, it’s actually pretty amazing how few problems do occur for the amount of decorative sealer applied each year.
With all that in mind, let’s look at roller marks and lap lines, two of the most common problems with sealer application, and try to get a better understanding of why the marks occur, how to repair them, and how to avoid them on future jobs.
Keep in mind that rollers are a different type of applicator from “push-and-pull” applicators, which leave lap lines. Rollers roll and are a class of applicator unto themselves, while “push-and-pull” applicators such as T-bars, lamb’s wool and mops glide, with no rolling action, and are considered a separate type of applicator. Rollers are recommended for lower-viscosity coatings, typically below 30 percent solids, while push-and-pull applicators are recommended for the higher-viscosity coatings with solids above 30 percent.
Roller marks can show up with any sealer or coating and on any surface or substrate. What most people do not understand is that roller marks are created by physical forces exerted on the liquid sealer during application.
As a roller runs across a surface, two forces are exerted on the liquid sealer as it comes off the roller cover. These forces are centrifugal force and the force of gravity. Without getting into complex physics, let’s just say that the liquid sealer held in the nap of the roller has inertia as the roller spins across the surface. The inertia drives the material off the roller cover onto the substrate. As the speed of the roller increases, the centrifugal force and inertia increase, depositing even more sealer onto the substrate. Physical adhesion forces also play a part, but only on the surface of the roller. You need the roller spinning to get all the sealer up to the surface so it can come off the roller cover.
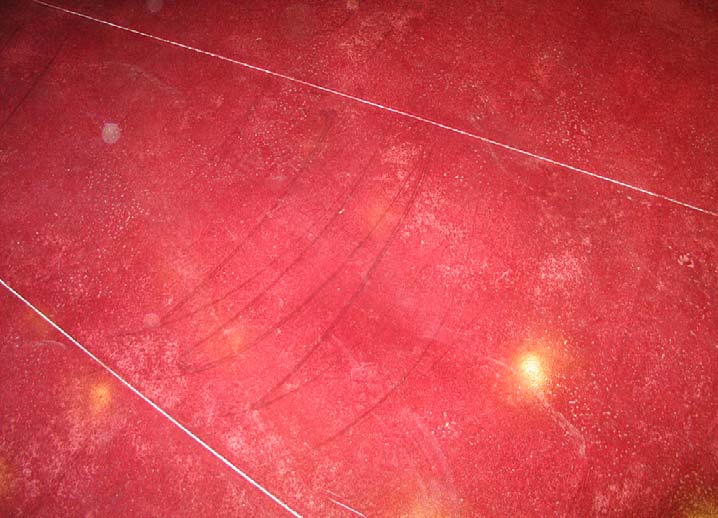
Gravity comes into play as it forces or pushes the roller down into the newly applied sealer. If even more downward force is applied from the person pushing down on the roller, more liquid sealer will get pushed out to the sides of the roller, leading to larger amounts of sealer trailing off the edges. In the case of push-and-pull applicators (such as mops or T-bars) the inertia or centrifugal aspect goes away, but downward pressure creating lines of sealer trailing off the sides leads to lap lines. These lines become visible lap lines after the sealer has cured.
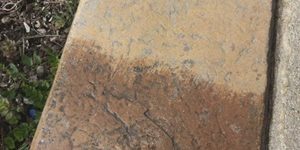
If water-based sealers are used, these lines can have a white milky haze to them, as the lap or roller line buildup did not allow the sealer to fully cure, trapping moisture. Also, the viscosity of the sealer (how thick it is and well it flows), pot life and workability play a big part in the formation of roller marks and lap lines.
How to avoid them
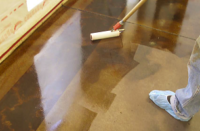
Now that we understand the why, let’s look at how to avoid roller marks or lap lines on future sealer projects. The most critical part is not overworking the sealer or coating. Spray application is best, as it completely eliminates the “overworking” aspect and pretty much guarantees a lap-line-free job. If a roller or push-and-pull is used, a light touch and light thin coats are the best approach. Don’t overload the roller, and if using a push-and-pull applicator, pour the sealer directly onto the substrate and push and pull until a thin film has been achieved.
The other golden rule is to “maintain a wet edge.” I am sure most sealer applicators have heard this term, but I don’t know how many really understand what it means. The idea is simple. Each subsequent pass of a roller or applicator should cover 2 or 3 inches of the previous pass. This assures that any sealer buildup on the previous edge is knocked down, eliminating the lap line.
I prefer low-viscosity sealers and coatings that flow and have a longer pot life. This allows more time for any lap lines that might occur to lie down and flatten out on their own. The new generation of fast-cure high-performance coatings (polyurea-based polyaspartics) is especially susceptible to lap and roller lines because they can set up in 20 to 30 minutes. Control your environment, and use the right application tool for the type of sealer being applied.
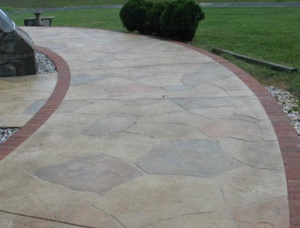
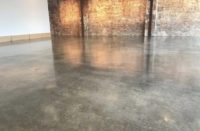
Lap lines are much more common on smooth interior surfaces when higher-solids sealers are used. Smooth surfaces and high viscosity (usually achieved with higher solids) do not allow the coating to move once applied, and lines of a high concentration of sealer become visible once cured. In contrast, textured and stamped surfaces have rougher profiles that allow the sealer to flow or move when first applied, eliminating most lap lines.
What if you see marks?
If lap lines do occur, there are some steps that can be taken to correct the issue. In most cases I recommend starting with a light sanding of the sealer surface. The idea is to lightly abrade the high ridges of the lap lines so the entire surface is flat and smooth. Fine sandpaper or a screen (220 grit or less) is usually enough. A low-rpm walk-behind floor scrubber equipped with a sanding head or sanding screens makes these jobs much easier. If only a few small areas are an issue, a hand-held palm sander works well. Once the lines are sanded smooth, the area is washed, rinsed and left to dry. After the floor has dried, a new thin coat of the same sealer is applied, or multiple thin coats of wax or floor finish can be applied. In cases where the lap lines are very minor, multiple thin coats of wax or finish are enough to bury the lines and create a new, smooth surface. In extreme cases, the sealer may need to be mechanically or chemically removed and a new coat of sealer applied.
Using the right applicator and good application control are keys to eliminating roller marks or lap lines for future sealer jobs. It’s usually when one or both of these critical steps go sideways, even a little, when the problems start occurring. A light touch, slow and easy on the roller or applicator, and not overworking the sealer or coating should lead to lap-line- and roller-mark-free sealed floors.