

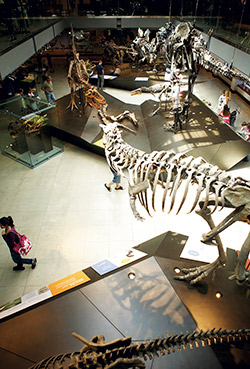
In Southern California, grinding and polishing concrete that was placed 20 or 30 years ago is fairly common. However, burnishing concrete that’s more than a century old is a rare task for any contractor.
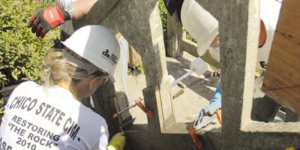
Mark Beamish Waterproofing recently undertook this type of uncommon job as part of a $69 million historic preservation and renovation of the National History Museum of Los Angeles County.
“This was probably the oldest concrete we’ve worked on,” says Don Aase, project manager for the Anaheim, Calif.-based contractor.
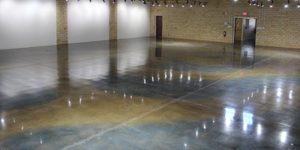
Between May 2009 and April 2011, Mark Beamish Waterproofing polished roughly 70,000 square feet of relatively ancient concrete, a job contracted at more than $265,000.
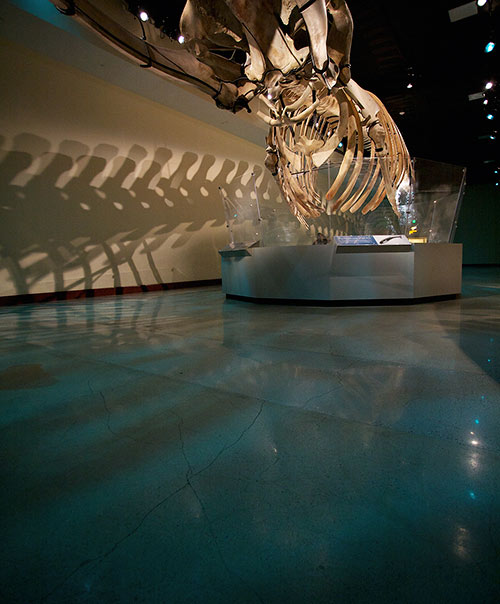
 While the flooring featured visible cracks and differently colored concrete patches — the result of different concrete grains and batches used throughout the years — Beamish primarily focused on cleaning up the concrete surface by grinding, polishing, and applying RetroPlate 99 hardener/densifier and RetroGuard sealer.
“The museum’s preference was to RetroPlate over those old patches and show what the building is, which is 100 years old,” says Ken George, superintendent for Matt Construction, the Santa Fe Springs, Calif., general contractor for the entire renovation project. “RetroPlate only mimics what’s underneath. It in no way hides things — it just gives the flooring a smooth finish.”
Initially Beamish’s grinding and polishing operations were to be the final step in the renovation. However, because the company’s circular grinders couldn’t reach edges and inside corners, they decided to do all but the final grind and polish before the installation of new wall partitions.
Prior to grinding the concrete Beamish removed carpet and cork tile, which had been glued to the concrete surface, to reveal the building’s century-old flooring.
“Not only was the 100-year-old concrete very hard, but it was a very rough and uneven floor,” says Dan Hennes, another Beamish project manager. Because of the concrete’s age and hardness the first cut was very important, he says.
Initially, Beamish used 60/80-grit metal-bonded diamonds attached to a Klindex Expander 750 for the first concrete cut. However the 60/80 metals didn’t cut efficiently and the contractor changed to 16/20 metal diamonds.

“The more aggressive diamonds did the trick,” Hennes says, noting that 60/80-grit metals were utilized after the first cut, followed by 150-grit metals, which prepared the floor for polishing.
After filling large cracks in the floor with epoxy, Beamish used the Expander 750 to polish the floor. The 15-horsepower machine polished the concrete using 50-grit, 100-grit and 200-grit resin-bonded diamond pads. RetroPlate 99, a hardener/densifier manufactured by Advanced Floor Products, was then applied to the polished surface at 200 square feet per gallon. RetroPlate 99 allowed the concrete to be finished to a marblelike sheen. It cost between $4.50 and $5.50 a square foot for this project. “You’re paying that for a finished product that’s pretty durable,” Wesling says.
After polishing the densified flooring with 400- and 800-grit resin-bonded diamond pads, Beamish applied Retroguard sealer — a water-based copolymer — at 750 square feet per gallon and used twister pads to burnish the floor, giving the concrete a final, easy-to-maintain shine.
Following all this grinding and polishing work, Matt Construction and its subcontractors stored equipment on top of the smooth flooring and conducted soft and hard demolition work. Beamish was called in to polish the concrete to a fine finish once again after the renovation work was complete. “We didn’t protect the finish,” says George of Matt Construction. “We instead brought Beamish in at the end to polish the floor with their 800 grit and put a new finish on it.”
|
|
|
|

According to Aase, several smaller areas had to be entirely reground and repolished due to the lack of protection.
Aside from being moved up in the construction activity timeline, the grinding and polishing job was conducted without any major challenges.
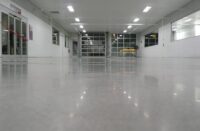
While Beamish’s portion of the renovation work is complete, the RetroPlate 99 densifier and RetroGuard sealer will be used on other parts of the project. Current plans call for RetroPlate to be used on an outside patio and on the floor of the new Otis Booth Pavilion, a glass-enclosed structure that will serve as the new entrance to the museum.
The nearly seven-year renovation and historic preservation of the museum is currently in its fifth year. According to Wesling, Matt Construction is currently on phase P of the project, with a year and a half of construction remaining.
Project at a Glance
Client: National History Museum of Los Angeles County, Los Angeles
Decorative Concrete Contractor: Mark Beamish Waterproofing Inc., Anaheim, Calif. | www.markbeamish.com
General Contractor: Matt Construction, Santa Fe Springs, Calif. | www.mattconstruction.com
Architect: CO Architects, Los Angeles, California | www.coarchitects.com
Scope of Project: Concrete restoration and polishing of century-old floor
Duration of project: May 2009 to April 2011
Materials Used: RetroPlate 99 densifier and RetroGuard water-based sealer, manufactured by Advanced Floor Products Inc.
Tools Used: Klindex Expander 750 grinding and polishing machine, various metal or resin-bonded diamond pads, twister pads