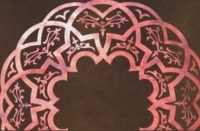
I’m going to come out and say it. I like curves. Curves are eye-catching and most appealing by nature. Ask any man and he will confess the more curve the better. Ask any women and she will agree curves are good as long as they flow — no bulging. Ask a decorative stamping crew and they will agree curves can cause loss of sleep at the design and installation phase.
Challenge #1: Layout
Keep a digital camera in your truck and snap pictures of nice-looking hardscapes regardless if decorative or not. It is a fact that the best stamp job in a poor layout will pale in comparison to an average stamp job in a good design.
Most projects leave the hardscape layout to the decorative contractor. Landscape drawings with radius points and measurements are few and far between.
Those lucky enough to have a plan to work with must still incorporate the stamp pattern into the design. I call this the decorative design within the design. Stamp patterns, deep joints for crack control, cold joints from one day’s pour to the next — all must be considered.
Keep in mind, interlocking tools will not follow curves and contours. The very first stamp tool imprinted into the wet concrete will decide the direction of pattern regardless of the layout of form work.
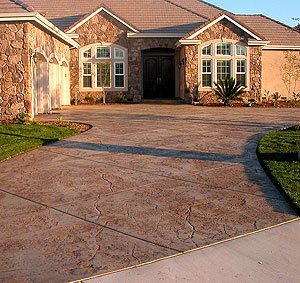
First, lay out all perimeter lines with a landscape chalking wheel. This visual aid will put you and your client on the same page. This is a great time to see if patio furniture fits, if two cars can fit in the driveway, etc. This layout phase is always a balance between decorative and functional. If the car has to run off the edge of the driveway to enter the garage, it doesn’t matter how good the design looks. Trust me on this. This is also a great time to remeasure square footages and compare therm with the estimated budget. It is much easier to shrink chalk lines or negotiate extra footage at this point.
Challenge #2: Installation
The installation phase is completely dictated by pattern choice. Interlocking patterns will always require more planning than seamless texture patterns. Interlocking stamps with a square or rectangular pattern, like the popular Ashlar slate, may need accent bands to help with angle changes in the project.
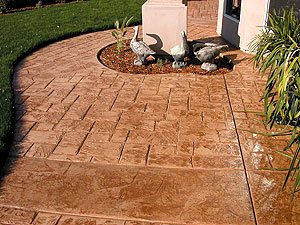 The bands will allow your crew to split into separate areas if needed. Try to have enough stamp tools to allow your crew to split. This allows the two crews to stamp toward each other without the concern of patterns matching as they connect. When they do connect, the connection should be on either side of an accent. This accent will also provide an opportunity to realign your pattern.
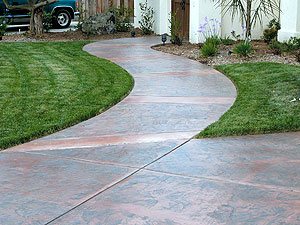
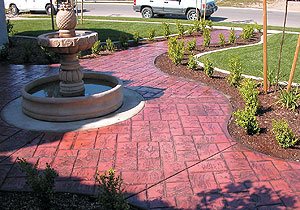
Here’s an important thing to keep in mind: The sidewalk pattern must stay square with the building where it connects to the entryway. This can cause you trouble if the entry area is in the shade and the curved connecting sidewalk is not.
It seems logical to start stamping near the house, so that everything comes out square, but the area near the house, which is usually in the shade, is drying slower and not ready to stamp. The condition of the concrete always decides where the stamping begins, and in this case, the beginning will be at the bottom of your curved walkway. Remember, your pattern must start at a 90-degree angle to your building to finish square with it. Eliminate this frustration by adding periodic accent strips.
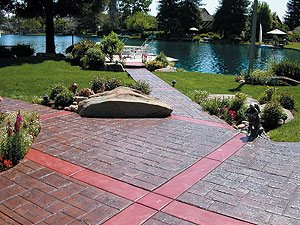
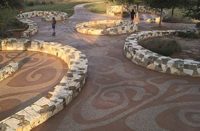
Now let’s talk a little about texture stamping, which is everything that interlocking is not. If I were just starting my decorative business today, it would consist entirely of texture patterns. There is more profit with half the frustration of interlocking patterns. Scoring or saw cuts can turn any texture job into a work of art. Stamp tool manufactures have created several variations of texture mats. I prefer Proline Tools because of the handles built into their texture tools.
The more curves, the better these texture patterns show. Starting points and accenting are nonissues. Decorative crews across America should have a national holiday for the inventor of texture stamps. I don’t know, maybe a Texture Parade every year at the World of Concrete. I probably would be long out of the decorative business if not for the invention of texture stamp tools. Use them: They are money in the bank.
Challenge #3: Cutting off pitfalls at the pass
I hate to do it, but I must bring up the dirtiest word in the decorative language: SEALERS. Believe me, I would rather talk about integers, filibusters, even soap operas before sealers on decorative concrete. But this is an issue, especially with curves in your concrete. In a nutshell, sealers hate water. The mineral deposits, as well as the moisture breaking down the sealer, will make a good job look bad.
It is almost impossible to irrigate lawns that come up to curved hardscapes without overspraying concrete. I have wrestled, begged, and pleaded with landscapers on this issue. The only way to water the grass is to allow the sprinklers to spray onto the sealed concrete. This will be a problem for you if you allow it. Here is the solution: Ask for 12-inch to 18-inch planting areas along the decorative work. These areas can be irrigated with low-flow watering. This will eliminate constant watering of your decorative art. The best time to discuss this is in the layout stage — if not sooner. Most homeowners will understand and agree; most landscapers could care less.
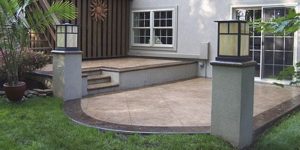
Either set your forms with curves or set them straight, but not in between. Nothing looks worse than flat spots in sweeping curves. This will not look natural. Remember, the whole idea of using decorative concrete is make the total landscape blend from left to right in an organic way.
Use deep joints for crack control. I realize it can be difficult to incorporate jointing with some pattern designs. But this is concrete and it will crack. Most homeowners will not see the hummer in your “no extra charge for the crack” comment after paying you 10 dollars a square foot. Let your client know you are doing everything possible to help minimize random cracking.
Keep your sub-base and thickness of concrete consistent. Concrete must dry even for even imprinting. You may have more control over this than you think. Example: Concrete over a 1-inch sand base will dry faster than over a 3-inch sand base. Why? Because three inches of sand will hold more moisture than one. Concrete placed four inches thick in some areas and five inches thick in another will dry differently.
The best decorative recipe for success? Good concrete practices used over and over again. Happy stamping!!